Introduction: Why Bathroom Waterproofing Matters
When it comes to home improvement, few projects have as profound an impact on both comfort and property value as bathroom renovations. But amid the excitement of new tiles and fixtures, one critical step often gets overlooked: waterproofing. Inadequate waterproofing is a leading cause of costly water damage, mold growth, and eventual structural deterioration in homes. According to insurance experts, water damage claims are among the most frequent for homeowners—many stemming from improperly sealed bathrooms. Whether you’re tackling a full remodel or simply updating finishes, taking the time to properly waterproof your bathroom is a vital investment.
This comprehensive guide is designed for DIY enthusiasts and first-time renovators, offering a detailed, step-by-step approach to bathroom waterproofing. You’ll learn not only how to execute the process but also how to ensure your work complies with local building codes and best practices. We’ll cover everything from material selection and preparation to common pitfalls, compliance essentials, and maintenance tips—arming you with the confidence to protect your home for years to come.
Understanding Bathroom Waterproofing: The Basics
What Is Bathroom Waterproofing?
Bathroom waterproofing involves creating a continuous moisture barrier on surfaces exposed to water—such as floors, walls, and shower recesses—to prevent leaks, rot, and mold. This barrier is typically achieved through the use of membranes, sealants, and specialized tapes, which work together to keep moisture from penetrating into the underlying structure of your home.
Key Areas That Require Waterproofing
- Shower floors and walls (especially the area up to at least 1800mm high)
- Bathroom floors (entire floor or, at minimum, within 1500mm of showers and 500mm around baths)
- Junctions between walls and floors
- Penetrations (pipes, drains, fixtures)
- Behind bathtubs and around basins where water splashes are likely
Common Types of Waterproofing Systems
- Liquid Membranes: Applied with a brush or roller; flexible and ideal for irregular surfaces.
- Sheet Membranes: Pre-formed sheets (often rubber or PVC) applied over surfaces; excellent for large, flat areas.
- Cementitious Waterproofing: Powdered mixes combined with water; good for areas not exposed to movement.
Compliance and Permits: What DIYers Must Know
Legal Requirements for Bathroom Waterproofing
Bathroom waterproofing is regulated by building codes that vary by state and municipality. Most regions require waterproofing to meet specific standards (e.g., ANSI, ASTM, or AS 3740 in Australia). In some areas, only licensed contractors can perform waterproofing tasks above a certain scale, while others permit homeowner installations if code requirements are met.
Key Compliance Steps
- Contact your local building authority to confirm whether a permit or inspection is needed for your project.
- Obtain and review the relevant waterproofing standard for your jurisdiction.
- Use only products that are certified for use in wet areas and meet code standards.
- Keep records of product data sheets, receipts, and photographs of the process for future reference or resale.
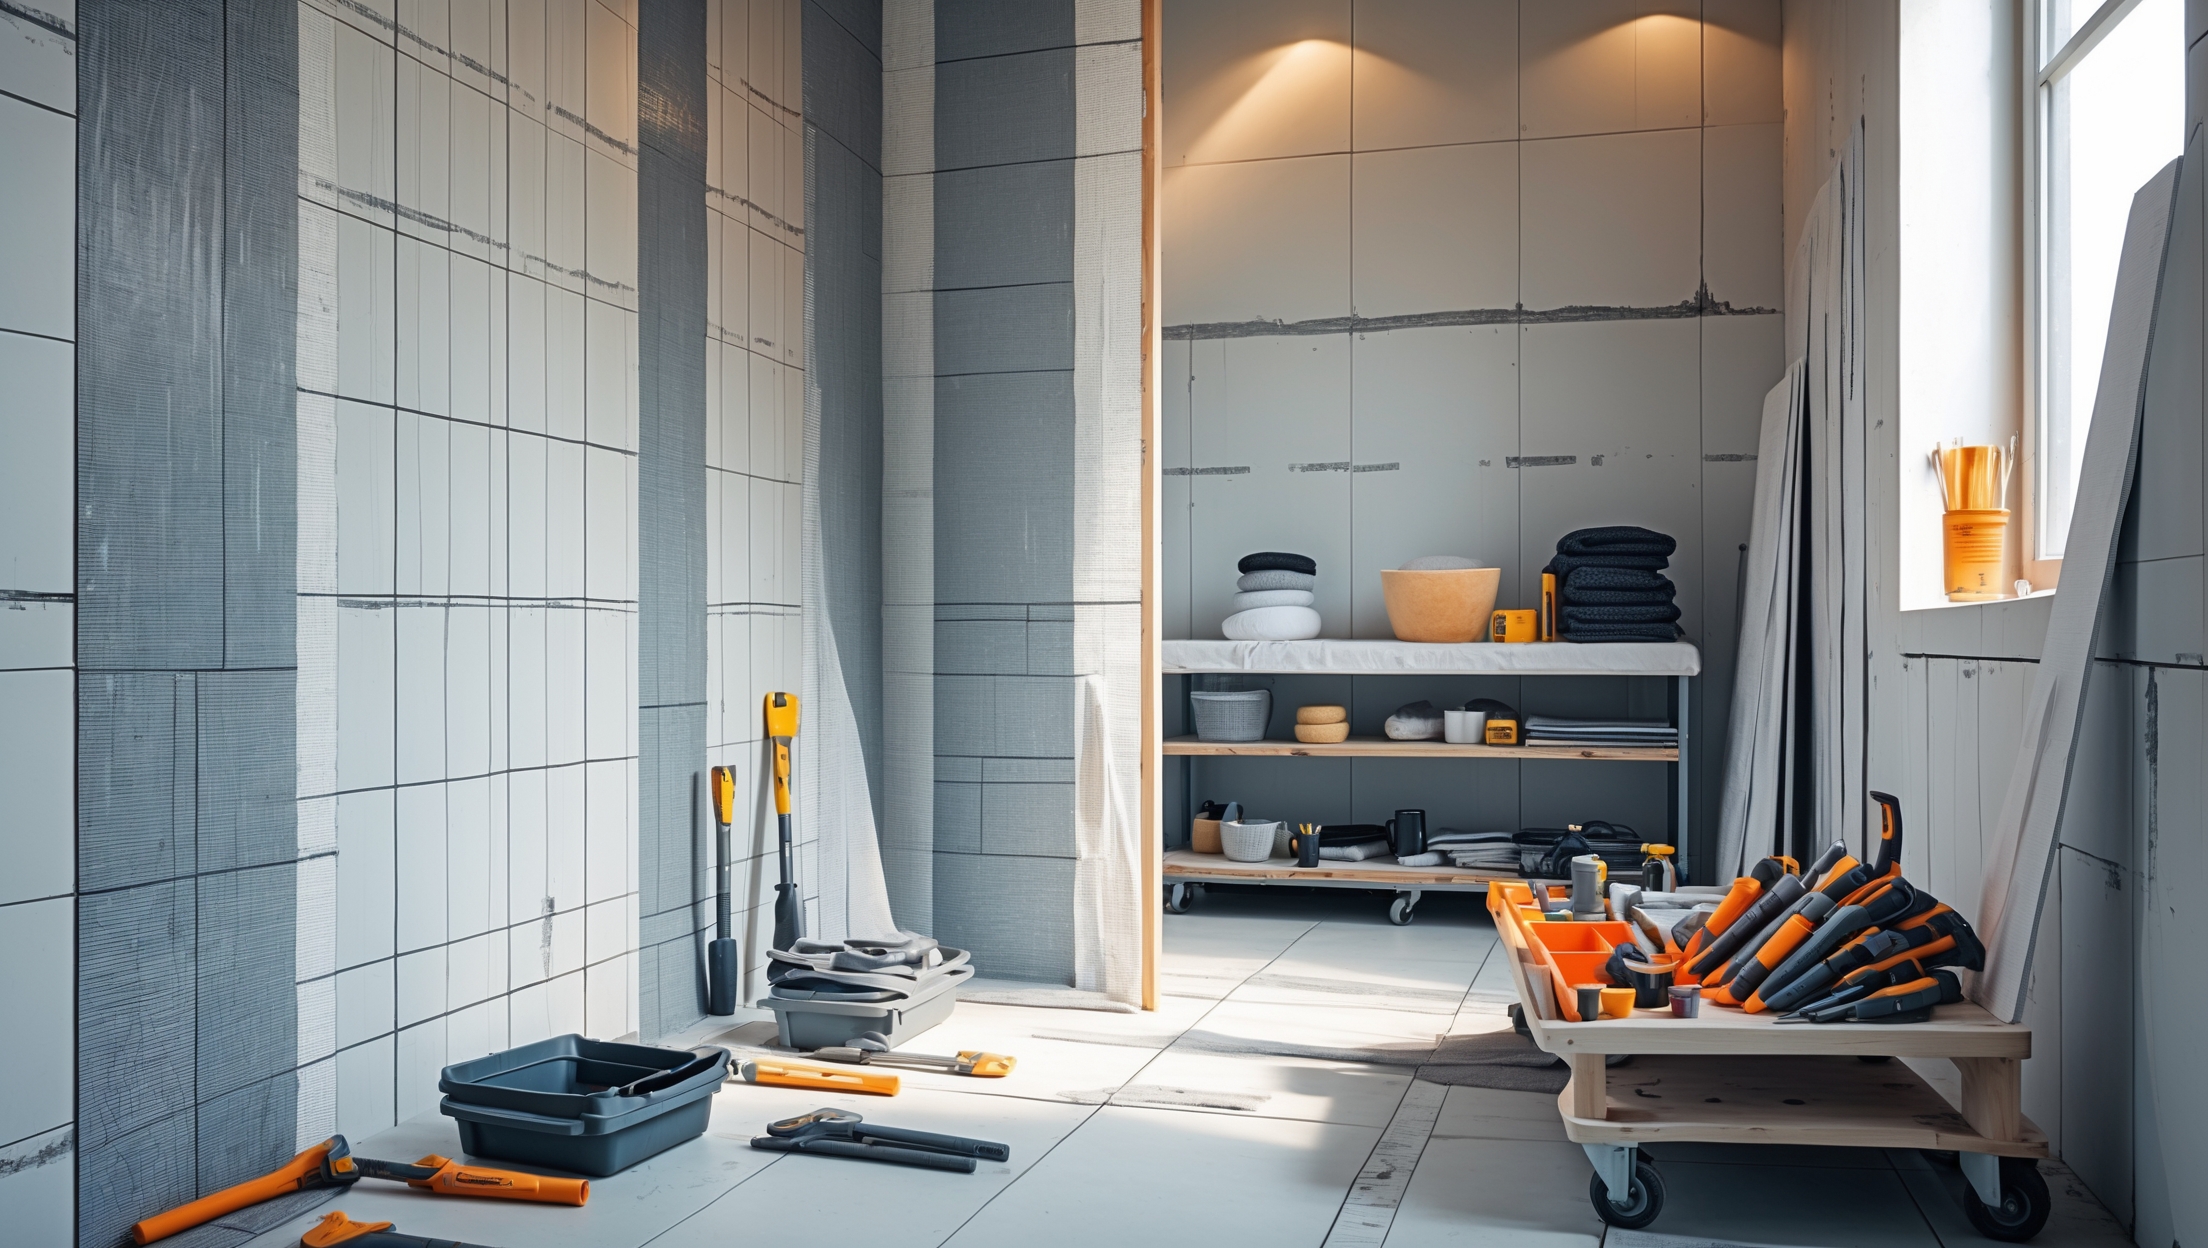
Tools & Materials: What You’ll Need
- Waterproofing membrane (liquid or sheet, as per your plan)
- Primer (if required by membrane manufacturer)
- Waterproofing tape for corners and joints
- Silicone sealant (bathroom-grade, mold resistant)
- Paint brushes and rollers (dedicated for waterproofing chemicals)
- Trowel or putty knife
- Measuring tape and chalk line
- Masking tape and drop sheets for protection
- Protective gloves and goggles
- Utility knife and scissors (for sheet membranes)
Step-by-Step DIY Bathroom Waterproofing
1. Preparation: Clean and Assess
- Remove all fixtures, fittings, and old flooring or wall coverings from the area.
- Thoroughly clean all surfaces; remove dust, oil, and debris using a vacuum and mild detergent.
- Check for cracks, holes, or uneven surfaces. Repair with appropriate patching compound and allow to dry fully.
- Ensure the substrate (concrete, cement board, etc.) is dry, stable, and free from movement.
2. Priming the Surface
- Apply a compatible primer to all surfaces to be waterproofed, following the manufacturer’s instructions.
- Allow the primer to dry completely before proceeding to the next step.
3. Sealing Joints and Penetrations
- Apply silicone sealant to all wall-to-floor joints, corners, and around pipes or drains.
- Press waterproofing tape into the wet sealant along corners and junctions for added protection.
4. Applying the Waterproofing Membrane
- For liquid membranes:
- Stir the membrane thoroughly.
- Using a brush or roller, apply the first coat evenly across all required areas, ensuring full coverage at joints and corners.
- Allow the first coat to dry (usually 4–6 hours, check manufacturer’s instructions).
- Apply a second coat at 90 degrees to the first for maximum protection.
- For sheet membranes:
- Measure and cut sheets to size, allowing a minimum 50mm overlap at all joints.
- Apply adhesive (if required) and press the membrane firmly onto the surface, smoothing out air bubbles.
- Seal overlaps with the manufacturer’s recommended tape or liquid membrane.
5. Detailing Around Fixtures
- Apply additional membrane and tape around drains, mixer valves, and other penetrations.
- Ensure a continuous, gap-free barrier at all points of water ingress.
6. Curing and Inspection
- Allow the membrane to cure fully as per product instructions (typically 24–48 hours).
- Conduct a visual inspection for pinholes, missed spots, or thin patches.
- If your local code requires, schedule an inspection before tiling or covering the membrane.
7. Final Steps Before Tiling
- Check that all surfaces are dry, free from dust, and sufficiently cured.
- Carefully mark out tile layouts to avoid damaging the membrane during installation.
Common DIY Waterproofing Mistakes to Avoid
- Skipping surface preparation: Membranes won’t adhere properly to dirty or uneven substrates.
- Inadequate coverage: Missing corners, joints, or penetrations leaves vulnerable gaps.
- Applying membrane too thinly: Follow manufacturer’s recommended thickness for lasting results.
- Not allowing proper curing time: Rushing to tile before the membrane cures can compromise the barrier.
- Using incompatible products: Only use primers, membranes, and tapes designed to work together.
- Ignoring code requirements: Non-compliant waterproofing can void insurance and lead to expensive repairs.
Cost Breakdown: DIY vs. Professional Waterproofing
Material Costs (2024 Averages)
- Liquid membrane: $60–$100 per 5-gallon bucket (covers ~100 sq.ft. per coat)
- Sheet membrane: $1.50–$3.50 per sq.ft.
- Primer: $20–$40 per gallon
- Waterproofing tape: $15–$30 per 50 ft. roll
- Silicone sealant: $7–$15 per tube
- Tools (rollers, brushes, gloves): $30–$80 total
For a standard 60 sq.ft. bathroom, expect total DIY material costs of $200–$450. By contrast, professional waterproofing typically ranges from $1,000–$2,500 depending on location and bathroom complexity.
Time Investment
DIY waterproofing a bathroom usually takes 2–3 days, accounting for drying and curing times, plus any prep or repair work required.
Insurance Considerations
Some home insurance policies require proof of compliant waterproofing for water damage claims. Retain documentation and, if possible, have your work inspected by a certified professional or building official.
Best Practices for Long-Lasting Waterproofing
- Always use products certified for wet areas and follow manufacturer instructions precisely.
- Seal all joints, corners, and penetrations thoroughly—these are the most common failure points.
- Allow each coat or layer to dry fully before applying the next.
- Photograph your work at each stage for future reference or warranty claims.
- Keep the bathroom well-ventilated during and after the application to speed up curing and reduce fumes.
Maintenance Tips After Waterproofing
- Inspect grout and silicone joints regularly for signs of cracking or mold; repair immediately if needed.
- Avoid harsh chemicals or abrasive cleaning pads that can damage the waterproofing barrier.
- Address leaks or water pooling promptly to prevent seepage beneath tiles.
- Every few years, have a professional inspect your wet areas if possible—early intervention can prevent major damage.
Conclusion: Protecting Your Home With Smart Waterproofing
Proper bathroom waterproofing is an often overlooked but absolutely essential part of any successful renovation. Taking the time to understand the process, select the right materials, and implement each step with care can save you thousands of dollars in repairs and protect your home’s structural integrity for decades. As a DIYer, the sense of accomplishment from a well-executed waterproofing job is matched only by the assurance that your bathroom is shielded against the most common—and costly—forms of water damage. Remember that compliance with local codes is not just about passing inspections; it’s about ensuring safety, longevity, and peace of mind for everyone in your household.
By following the detailed approach outlined in this guide—from surface preparation and material selection to careful application and ongoing maintenance—you’ll be well-equipped to tackle bathroom waterproofing with confidence. Don’t hesitate to consult local building officials or professionals if you have questions about regulations or product compatibility. Waterproofing is one area of home improvement where cutting corners can have dire consequences, so approach the task methodically and document your work. Your diligence now will pay dividends for years to come, ensuring your bathroom remains a safe, dry, and beautiful space for your family and guests. Happy renovating!
Is it necessary to waterproof the areas behind a freestanding bathtub, even if it’s not up against a wall, or is it mostly for built-in tubs?
Even with a freestanding bathtub, it’s still recommended to waterproof the floor area underneath and around the tub. This protects against splashes, leaks, or accidental overflows, which can still occur regardless of whether the tub is built-in or freestanding.
I’m planning a bathroom remodel in an older home and I’m concerned about meeting local building codes for waterproofing. Are there common code requirements I should be aware of when sealing around pipes and drains?
When waterproofing around pipes and drains, codes usually require a continuous waterproof membrane that’s tightly sealed at all penetrations. Pay close attention to sealing collars or gaskets where pipes pass through, and use compatible sealants for joints. Most codes also ask for a minimum height of waterproofing up walls near wet areas. Always double-check your local code specifics before starting.
When waterproofing around bathtub and basin areas, are there specific products recommended for penetrations like pipe fittings, or do general-purpose sealants work just as well?
For penetrations like pipe fittings, it’s best to use specialized waterproofing products such as waterproofing collars, grommets, or sealant tapes designed for wet areas. General-purpose sealants may not provide long-term protection, especially in high-moisture zones. Always check that the product is approved for bathroom waterproofing and complies with local regulations.
When selecting a waterproofing membrane for DIY bathroom projects, are there particular types or brands that are easier for beginners to apply and still meet US building code requirements?
Liquid-applied waterproofing membranes are generally easier for beginners to use, as they brush or roll on like paint. Popular brands such as RedGard and Mapei AquaDefense are widely available in the US and meet building code requirements when applied according to manufacturer instructions.
Are there any budget-friendly waterproofing materials you recommend that still meet the compliance essentials described in your guide?
Yes, look for acrylic-based waterproofing membranes or water-based polyurethane products, as they’re usually more affordable but still effective. Just be sure the product carries the necessary certification for wet areas (like AS 3740 in Australia) to ensure compliance with the standards mentioned in the guide.
Could you clarify whether waterproofing behind a bathtub is always necessary, or only if the tub is placed against an exterior wall? The article mentions it for basins and bathtubs, but I’m not sure about different installation scenarios.
Waterproofing behind a bathtub is generally required regardless of whether it’s against an exterior or interior wall. This helps prevent water damage from splashes or leaks in any scenario. Always check local building codes, but for best protection, waterproof behind all basins and bathtubs.
When you mention using membranes and specialized tapes for waterproofing, is there a particular type or brand you recommend for a first-time DIYer, or are most of them pretty similar in terms of how easy they are to apply?
For first-time DIYers, look for sheet or liquid waterproofing membranes labeled as user-friendly or DIY. Brands like RedGard and Mapei are known for their ease of use and clear instructions. Most reputable brands have similar application processes, but always follow the product’s instructions for best results.
Could you clarify what type of membrane is best for areas around pipes and other penetrations? Is there a specific product you recommend for DIYers?
For areas around pipes and penetrations, a flexible, paint-on liquid waterproofing membrane works best since it can easily seal irregular shapes. Many DIYers find products like RedGard or Crommelin Wetite user-friendly and effective. Just be sure to follow the manufacturer’s instructions for prepping and applying around these tricky spots.
What should I do if I discover mold or water damage during the prep stage before applying new waterproofing materials?
If you find mold or water damage during prep, stop and address these issues first. Remove any mold with a suitable cleaner and let the area dry completely. For water damage, replace any compromised materials before proceeding with waterproofing to ensure the new layers adhere properly and last longer.
You mentioned that compliance with local building codes is crucial during bathroom waterproofing. How can I check if the materials and methods I’m using actually meet those code requirements before I start the project?
To make sure your materials and methods meet local building codes, contact your local building authority or council for the specific requirements. Ask for a list of approved waterproofing products and installation guidelines, or check if they have published code documents online. You can also consult a licensed builder or inspector for advice before you start.
When selecting waterproofing membranes for bathrooms in the US, are there certain products or types that are more likely to help meet code requirements, or is it mainly about how you install them?
Both the type of waterproofing membrane and proper installation matter for meeting US code requirements. Look for membranes labeled as meeting ANSI or ASTM standards, which many local codes reference. Sheet and liquid-applied membranes can both comply, as long as they’re approved products and installed strictly according to manufacturer instructions.
Is there a big difference in effectiveness or durability between using liquid waterproofing membranes and sheet membranes for shower walls? I’m trying to decide which method fits my DIY skills best.
Liquid waterproofing membranes are easier for DIYers to apply, especially on uneven surfaces or corners, but require careful coverage. Sheet membranes are highly durable and consistent but can be trickier to install, needing precise cutting and sealing. Both are effective if installed correctly, so choose based on your comfort with application technique.
How do I make sure the waterproofing I do myself meets local building codes, especially when it comes to areas around pipes and drains?
To ensure your DIY waterproofing meets local codes, check your area’s building regulations before starting. Pay special attention around pipes and drains by sealing gaps with compliant sealant and overlapping waterproofing membrane as required. Document each step, and consider having your work inspected if your area requires certification.
You mentioned using membranes, sealants, and specialized tapes—do I need all three for a small bathroom, or could I get away with just one or two to keep the costs down?
For a small bathroom, the essentials are usually a waterproof membrane and sealant, especially around wet areas like showers. Specialized tapes are most important for reinforcing corners or joints. If your bathroom has minimal joints or corners, you might skip the tape, but membrane and sealant are strongly recommended to ensure full protection.
Could you clarify how to check if my DIY waterproofing job meets the local building codes? Are there specific inspections or paperwork I should be aware of before starting?
To ensure your DIY waterproofing meets local building codes, contact your local council or building authority for exact requirements. Many areas require permits and scheduled inspections during and after the work. Keep records like product details, receipts, and photos as you go, since some councils may ask for this documentation during compliance checks.
For the compliance part, how do I find out what the local building codes require for bathroom waterproofing before I get started?
To find out your local bathroom waterproofing code requirements, contact your city or county building department. They can provide specific regulations or direct you to official resources. You can also check their website for downloadable guidelines or permit information before starting your project.
When selecting waterproofing materials, is there a big difference between liquid membranes and sheet membranes in terms of durability or ease of installation for beginners?
Liquid membranes are generally easier for beginners because you can brush or roll them on, making coverage over corners and tricky areas simpler. Sheet membranes are often more durable and consistent but can be harder to install, especially at seams. So for DIY projects, liquid membranes usually offer an easier starting point.
When you talk about waterproofing around pipe penetrations and drains, is there a particular sealant or tape that holds up better over time, especially in high-use commercial bathrooms versus residential ones?
For high-use commercial bathrooms, a polyurethane-based sealant is usually more durable than silicone, as it resists movement and moisture better over time. For tape, butyl rubber waterproofing tape is highly recommended around pipe penetrations and drains because of its strong adhesion and flexibility. These options tend to outperform standard residential-grade products in demanding environments.
When you talk about membranes, sealants, and tapes, how do I know which type is best for a heavily used family bathroom? Are there any differences I should look for in terms of durability or ease of application?
For a heavily used family bathroom, sheet membranes are usually the most durable, while liquid membranes offer easier application. Look for products labeled as waterproof and mold-resistant. For sealants and tapes, choose those designed specifically for wet areas. Always check manufacturer recommendations and ensure compatibility with your chosen membrane.
If I’m just updating the finishes instead of doing a full remodel, is it necessary to waterproof the entire floor, or just the areas close to the shower and tub as you mentioned?
If you’re only updating finishes and not altering plumbing or fixtures, you usually just need to waterproof areas near the shower, tub, and any wet zones. However, always check your local regulations, as some codes may require more extensive waterproofing.
You mention following local building codes for bathroom waterproofing. Are there specific code requirements in the US I should be aware of before starting a DIY project, or do these rules vary significantly depending on the state or city?
Building code requirements for bathroom waterproofing can vary quite a bit between states and even cities in the US. While the International Residential Code (IRC) sets general standards, many areas have added their own rules. It’s best to check with your local building department to find out exactly which waterproofing materials and methods are approved in your area.
If my local building codes differ slightly from the general recommendations in your guide, what’s the best way to ensure my waterproofing work still meets compliance requirements?
To ensure your waterproofing meets local code, always prioritize your local building regulations over general guidelines. Consult your local building authority or a licensed inspector before starting. They can clarify specific requirements and approve your plans, helping you avoid costly rework.
How long does it typically take for the waterproofing membranes and sealants described to fully cure before I can start tiling over them without risking any issues?
The curing time for waterproofing membranes and sealants usually ranges from 24 to 48 hours, depending on the specific product and conditions like temperature and humidity. Always check the manufacturer’s instructions on the packaging to be sure, and only start tiling once the product is completely dry.
Could you clarify if the waterproofing membrane should go up behind the vanity backsplash as well, or is that area generally considered safe from splashing and moisture?
Waterproofing behind the vanity backsplash is recommended, especially in areas prone to splashing or high humidity. Even though this spot might not get direct water, extending the membrane behind the backsplash adds extra protection against potential leaks and moisture seepage over time.
When applying waterproofing membranes and sealants around pipe penetrations and drains, do you recommend any specific brands or types that are easiest for a first-timer to use and still meet code?
For beginners, a liquid waterproofing membrane like RedGard or Mapei AquaDefense is user-friendly and widely accepted by code. For pipe penetrations and drains, look for compatible pre-formed sealing collars or use a high-quality polyurethane sealant. These products are easy to apply, effective, and commonly pass inspection when installed correctly.
If I’m just updating the finishes and not fully remodeling, is it really necessary to redo all the waterproofing around tubs and basins, or can I just touch up certain spots?
If you’re only updating finishes and not disturbing the existing waterproofing, you usually don’t need to redo everything. Just make sure the sealant and waterproofing in key areas—like around tubs and basins—are intact. Touch up any spots that look damaged or worn to keep things watertight.
Can you explain the difference between using waterproofing membranes and sealants for shower walls? Is it necessary to use both, or would one option be enough?
Waterproofing membranes are physical barriers, like sheets or paints, that block water from penetrating walls, while sealants are used to fill joints and gaps to prevent leaks. For best long-term protection, it’s recommended to use a membrane on the walls and sealant at joints or corners, as they serve different purposes.
Can you clarify whether the waterproofing recommendations in the article apply to both above-grade and basement bathrooms, or are there extra steps to consider for below-grade spaces?
The waterproofing steps in the article cover general bathroom situations, but for basement (below-grade) bathrooms, you should take extra precautions. These include addressing potential hydrostatic pressure, sealing foundation walls, and possibly using more robust waterproofing membranes compared to above-grade bathrooms.
Could you clarify if the waterproofing steps differ when using prefabricated shower pans instead of building a tiled shower floor from scratch? The article mentions membranes for shower floors but doesn’t specify for different base types.
When using prefabricated shower pans, the waterproofing steps are simpler. Usually, you only need to seal around the edges and joints where the pan meets the walls. With a tiled shower floor, a full membrane is needed under the tiles and up the walls. Prefab pans have built-in waterproofing, so focus on sealing connections well.
If I want to waterproof just the areas around my tub and not the entire bathroom floor, will that still be compliant with most US regulations and insurance requirements?
Waterproofing only around your tub may not meet code everywhere. Many US building codes and insurance policies require waterproofing in all wet areas, especially floors and walls near tubs and showers. It’s best to check your local building regulations and consult your insurer to ensure full compliance before starting.
You recommend using membranes, sealants, and tapes for creating a moisture barrier. Is there a particular order or combination of these materials that works best for areas around pipes and drains to prevent leaks?
Around pipes and drains, start with applying a membrane first to cover the main surfaces. Next, use a compatible waterproof tape to reinforce joints and corners, especially around the pipe edges. Finally, seal any gaps with a quality waterproof sealant. This combination helps ensure a watertight barrier in these vulnerable areas.
For a first-time DIYer, how do I know if I’ve created a continuous moisture barrier, especially around the pipe penetrations and corners? Are there any easy ways to double-check for gaps before tiling?
To check your moisture barrier, inspect all seams, corners, and pipe areas closely for any gaps, pinholes, or thin spots. Use a flashlight at an angle to spot imperfections. For extra reassurance, gently run your hand over the surface to feel for inconsistencies, and apply a second coat if unsure, especially at tricky areas.
I’m curious about the different membrane and sealant options you mention. Are there budget-friendly choices that still offer long-term protection against leaks and mold?
Yes, there are budget-friendly options like liquid acrylic membranes and polyurethane sealants that provide good waterproofing and mold resistance. While they may not last as long as premium systems, with careful application and regular maintenance, they can offer effective long-term protection.
You mentioned compliance with local building codes—how can I find out exactly what my area requires for bathroom waterproofing, and are permits typically needed for a DIY job like this?
To find out your local requirements, contact your city or county building department—they can tell you what’s needed for bathroom waterproofing and if permits are required. Often, permits are needed for waterproofing, even with DIY projects, to ensure safety and compliance.
You mention waterproofing behind bathtubs and around basins—does that mean I need to remove existing fixtures to get full coverage, or can I apply membranes around them if they’re already installed?
For best results, it’s ideal to apply waterproofing membranes behind and beneath fixtures like bathtubs and basins. If your fixtures are already installed, you can still waterproof the surrounding areas, but you might not achieve complete coverage or compliance with some regulations. Removing and reinstalling fixtures provides more thorough protection.
I’m planning to update my bathroom finishes but not do a full remodel. Is it still necessary to waterproof the entire bathroom floor, or just the areas within 1500mm of the shower and 500mm of the tub like you mentioned?
If you’re only updating finishes and not altering plumbing or layouts, you generally need to waterproof just the areas specified—within 1500mm of the shower and 500mm around the tub. However, fully waterproofing the entire floor can provide added protection, especially in older bathrooms or high-moisture zones.
You mention making sure the waterproofing complies with local building codes. Are there certain code requirements in the US that DIYers commonly overlook, and how can I double-check that my project will pass inspection?
DIYers often overlook requirements like using the right type and number of waterproof membrane layers, proper overlaps at seams, and correct curing times. To ensure your project passes inspection, review your local building codes, consult with your local building department, and follow manufacturer guidelines for waterproofing products.
After completing the waterproofing steps, how long should I wait before installing tiles or fixtures to ensure the membrane is fully cured and compliant with inspection requirements?
You should wait at least 24 hours after applying the waterproofing membrane before installing tiles or fixtures. However, some products may require up to 48 hours to fully cure. Always check the manufacturer’s instructions and ensure the membrane passes inspection before proceeding.
When you mention aiming for 1800mm high on shower walls for waterproofing, is that a strict code requirement everywhere in the US, or does it vary by state or municipality?
The 1800mm (about 6 feet) height for shower wall waterproofing is a common guideline, but code requirements can vary by state or even municipality. It’s best to check with your local building authority to confirm the specific standard for your area.
You mention compliance with local building codes in the guide. How do I check what specific waterproofing requirements apply in my area before I start the renovation?
To find the waterproofing requirements for your area, contact your local building department or council. They can provide details on codes and any permits needed. You can usually call, check their official website, or visit in person to get up-to-date information before starting your project.
If I’m only updating the finishes and not doing a full remodel, do I still need to waterproof the entire bathroom floor, or just the area closest to the shower and tub as you mentioned?
If you’re only updating finishes and not changing the underlying structure or plumbing, you usually only need to waterproof the areas most exposed to water, like around the shower, tub, and any wet zones. Always check your local codes, as some regions may have stricter requirements.
After finishing the waterproofing step, how long should I wait before installing tiles or other finishes to make sure I don’t compromise the moisture barrier?
You should wait at least 24 hours after applying the final waterproofing coat before installing tiles or other finishes. This allows the membrane to fully cure and ensures maximum protection. Always check the specific product instructions, as some may require up to 48 hours to dry completely.
What should I do if I discover a small area of mold or water damage during the waterproofing process—do I need to remove all the old materials before applying new waterproofing layers?
If you find mold or water damage, you should remove all affected materials and let the area dry completely before adding new waterproofing layers. This helps ensure the new waterproofing is effective and prevents future problems.
You mention the importance of making sure the waterproofing meets local building codes. Are there any specific code requirements or inspection steps I should look out for when doing this myself in the US?
When waterproofing your bathroom in the US, codes can vary by state and city, but key points often include using approved waterproofing materials, ensuring proper membrane coverage, and overlapping seams. Inspections may check for correct installation and full coverage. Always check with your local building department for specific requirements before starting, as permits and inspections are commonly required.
You mention using membranes and sealants together for bathroom waterproofing. Is there a particular type or brand that’s best for DIYers, especially when it comes to preventing mold and leaks long-term?
For DIY bathroom waterproofing, look for liquid waterproofing membranes that are easy to apply, such as acrylic-based ones. Pair these with a mold-resistant silicone sealant for joints and corners. Brands like RedGard or Mapei are popular with DIYers for their ease of use and reliability in preventing mold and leaks.
You mentioned making sure the waterproofing complies with local building codes. How do I find out what regulations apply in my area before I start work?
To find out which waterproofing regulations apply in your area, contact your local building or permit office. They can provide specific codes, requirements, and any permits you might need. Some regions also have this information available on their official government websites.
You mention compliance with local building codes—what are some typical inspection requirements in the US for DIY bathroom waterproofing? Are there specific documentation or steps homeowners often overlook?
In the US, typical inspection requirements include verifying that waterproofing membranes are correctly applied and seams are sealed, especially in wet areas like showers. Homeowners often overlook providing product specs and manufacturer’s installation instructions to inspectors, as well as documenting each step with photos before covering the work.
If I’m only making cosmetic updates in my bathroom and not moving any plumbing, is it necessary to waterproof the entire floor, or can I focus on just the areas around the shower and tub like you mentioned?
If you’re only making cosmetic changes and not altering plumbing, it’s generally acceptable to waterproof just the shower and tub areas. However, local building codes may vary, so it’s always wise to check if your area requires full floor waterproofing before starting work.
I noticed you mention the importance of covering areas up to 1800mm high in the shower. Is there a specific type of membrane you recommend for walls versus floors, or can the same product be used for both?
You can often use the same waterproofing membrane for both walls and floors, but always check the product’s label to ensure it’s rated for both vertical and horizontal surfaces. Some professionals prefer a liquid-applied membrane for versatility, while sheet membranes are sometimes chosen for floors due to extra durability.
If I already have some water damage around my shower, should I address that first before starting the new waterproofing process, or can the new barrier be applied over slightly damaged areas?
It’s important to address any existing water damage before applying a new waterproofing barrier. Damaged areas can compromise the effectiveness of the waterproofing, so make sure to repair and dry them thoroughly before starting your DIY project.
Can you give estimates on how much time a typical DIYer should set aside for each waterproofing step, especially the drying or curing periods between layers?
For most DIY bathroom waterproofing, plan about 1–2 hours for surface prep and priming. Applying each waterproofing layer usually takes 30–60 minutes. Most products require 2–4 hours drying time between coats, and a final cure time of 24 hours before tiling or further work. Always check your product’s specific instructions for optimal results.
When you mention waterproofing up to 1800mm in shower areas, is that a requirement in all US states or do local codes vary? I want to be sure I’m not missing any compliance steps before I start.
The 1800mm (about 72 inches) height for waterproofing in shower areas is a common guideline, but local building codes can vary by state or even city. Before starting, it’s best to check your local code requirements or consult with your local building authority to make sure you meet all necessary standards.
For a first-time DIYer, how long should I expect the whole waterproofing process to take before I can start tiling? I want to plan my bathroom update realistically.
For a first-time DIYer, expect the waterproofing process to take about 2 to 3 days. This includes surface preparation, applying two coats of waterproofing membrane (with drying time between coats), and allowing the final coat to cure fully before tiling. Always follow the product’s instructions for recommended drying times.
For DIYers in the US, do most local building codes specify a particular type of waterproofing membrane for bathroom floors, or is a liquid-applied waterproofing product usually acceptable as long as it covers all the vulnerable areas you mentioned?
Most US local building codes don’t specify one exact type of waterproofing membrane; they generally require that an approved method is used. Liquid-applied waterproofing is usually acceptable for bathroom floors if it fully covers all vulnerable areas and meets manufacturer and code standards. It’s wise to double-check with your local building department before starting.
You mentioned making sure to comply with local building codes. How can a DIYer easily find out the specific waterproofing requirements for their city or state?
To find your area’s specific waterproofing requirements, start by checking your city or county building department’s website or calling them directly. They can provide local codes and guidance. You can also ask at local hardware stores or consult with a licensed contractor familiar with regulations in your region.
When choosing waterproofing membranes or sealants, are there specific types that work better around tricky spots like shower recesses and pipe penetrations?
For tricky areas like shower recesses and around pipe penetrations, look for a flexible, liquid-applied waterproofing membrane or a sheet membrane with reinforcing corners and collars. These adapt well to irregular shapes and provide a seamless barrier, preventing leaks where surfaces move or have joints.
How can I make sure that the materials and methods I choose for waterproofing will be compliant with local building codes in the US? Does the process differ much between states or municipalities?
To ensure compliance, always check with your local building department before starting. Building codes and approved waterproofing materials can vary between states and even between cities. Ask for their specific requirements and approved products list to make sure your project will pass inspection.
If I just want to update the tiles in my bathroom without a full remodel, is it necessary to redo the waterproofing layer underneath, or can I keep the existing one as long as it looks intact?
If you’re only replacing tiles and the waterproofing membrane underneath is undamaged and fully adhered, you can usually keep the existing waterproofing. Just be careful when removing old tiles to avoid puncturing or lifting the membrane. If you spot any damage or suspect leaks, it’s best to repair or redo the waterproofing before installing new tiles.
You mentioned ensuring compliance with local building codes during bathroom waterproofing. What are some common requirements in the US that DIYers often overlook, especially when it comes to prepping wall and floor junctions?
DIYers often miss the need to install waterproofing membranes that extend at least a few inches up the wall from the floor junction. Corners and wall-floor joints should be reinforced with mesh tape or special sealing bands. Also, many codes require overlap at seams to prevent leaks and specifying the correct type of waterproofing material for wet areas.
I’m trying to decide between liquid membranes and sheet membranes for the shower area. Are there pros or cons to each method, especially for a first-time DIYer?
Liquid membranes are easy to apply with a roller or brush and work well for irregular shapes, making them beginner-friendly. Sheet membranes offer consistent thickness and excellent waterproofing but require careful measuring, cutting, and seam sealing. For first-time DIYers, liquid membranes are often simpler, while sheet membranes can be more reliable if installed precisely.
Could you explain more about how to tell if the waterproofing membrane I’ve applied has fully cured before I move on to tiling? I want to make sure I don’t rush that step.
To confirm the membrane is fully cured, check the product label for the recommended curing time, which can vary from 24 to 72 hours. The membrane should feel dry, firm, and not tacky to the touch. Avoid tiling if there are soft or damp spots, as this means it needs more time to cure.
You mention making sure the waterproofing is up to local building codes, but how can a DIYer find out exactly what the codes require in their specific city or state?
To find the exact waterproofing requirements for your area, contact your local building department or city council. They can provide the relevant codes or guidelines. Some areas also have this information available on their official websites. It’s a good idea to ask if any permits or inspections are needed for your project.
You mention building code compliance—could you elaborate on what documentation or inspections a homeowner might need to provide if they handle the waterproofing process themselves?
If you do your own bathroom waterproofing, you’ll likely need to show proof of the products used (like receipts and product data sheets), and document each step with photos. Before closing up walls or tiling, arrange for a waterproofing inspection by your local council or certifier, as many areas require this for code compliance.
How can I make sure my DIY waterproofing job meets local building code requirements before scheduling an inspection, especially regarding the height and coverage areas you mentioned?
To ensure your waterproofing meets code, check your local building authority’s requirements for membrane height on walls (often 150–180mm above the floor or 25mm above shower hobs) and full coverage of all wet areas, including behind fixtures. Take clear photos and measurements before inspection as proof.
If my house is older and the bathroom subfloor has some minor damage from previous leaks, is it still safe to apply a new waterproofing system directly, or should I address repairs first?
It’s important to repair any subfloor damage before applying a new waterproofing system. Waterproofing works best on a solid, stable surface, so addressing issues like rot or uneven areas first will help ensure long-lasting protection and compliance.
You mention compliance with local building codes for bathroom waterproofing. How can I find out exactly what codes apply in my city before I get started?
To find the codes for your city, contact your local building department or municipal government office. They can provide the specific regulations and any necessary permits for bathroom waterproofing projects in your area.
You mention making sure the work complies with local building codes. How can a DIYer determine which waterproofing materials and techniques are actually acceptable in their area?
To ensure your waterproofing meets local codes, contact your city or county building department. They can tell you which materials and methods are approved. You can also ask for a list of recognized products or guidelines, and some areas provide this information online. It’s a good idea to check before you start to avoid costly rework.