Introduction: Why Asphalt Driveway Maintenance Matters
Your home’s asphalt driveway is more than just a pathway for vehicles; it’s a major contributor to curb appeal, property value, and everyday convenience. Unfortunately, driveways are also among the most exposed and frequently neglected features of a home. Sun, rain, snow, and the weight of vehicles all conspire to degrade asphalt over time, leading to cracks, potholes, fading, and even structural failure. Proper maintenance isn’t just about aesthetics—it’s about safeguarding a significant investment. By proactively caring for your driveway, you can extend its lifespan by years, prevent costly repairs, and ensure your home maintains its welcoming first impression. This comprehensive guide will walk you through the most effective, practical maintenance strategies, seasonal must-dos, and expert tips for keeping your asphalt driveway in optimal condition, year after year.
Understanding Asphalt: What Makes It Durable (And Vulnerable)
Asphalt is a mixture of aggregate (stone, sand, and gravel) and bitumen, a sticky petroleum product that binds everything together. Its flexibility, affordability, and quick installation make it a popular choice for residential driveways. However, several factors can accelerate its deterioration:
- Weather exposure: UV rays, freeze/thaw cycles, and heavy rain can weaken the binder and cause cracks.
- Vehicle load: Repeated parking of heavy vehicles can create depressions and stress points.
- Chemical spills: Oil, gasoline, and de-icing chemicals can break down the asphalt surface.
- Poor drainage: Standing water seeps into cracks, undermining the base and causing potholes.
Understanding these vulnerabilities is the first step towards effective maintenance and prevention.
Routine Inspection: Spotting Problems Early
How Often Should You Inspect?
Inspect your driveway at least twice a year: once in early spring (after winter’s freeze/thaw cycle) and once in late fall (before winter sets in). Additionally, walk your driveway after major storms or if you notice new stains or debris.
What Should You Look For?
- Cracks: Small hairline cracks can quickly widen if left unattended.
- Potholes: Depressions or holes indicate structural issues and allow water infiltration.
- Fading and discoloration: Signs of UV damage and binder breakdown.
- Standing water: Pooled water after rain highlights drainage issues.
- Edge crumbling: Weak or broken edges are prone to further damage from vehicles and weather.
- Vegetation growth: Weeds or grass sprouting through cracks signal underlying gaps.
- Oil or chemical stains: Spills can erode the surface and should be cleaned promptly.
Cleaning Your Driveway: The Foundation of Maintenance
Basic Cleaning Tools and Supplies
- Stiff-bristle push broom
- Garden hose with spray nozzle or pressure washer (1,500–2,000 psi)
- Asphalt-safe degreaser or dish soap
- Plastic scraper or putty knife
Step-by-Step Cleaning Process
- Sweep away loose debris (leaves, dirt, gravel) with a broom.
- Rinse the driveway with a garden hose or pressure washer. Use a fan tip to avoid damaging the asphalt.
- Treat oil stains by scrubbing with an asphalt-safe degreaser or dish soap and a stiff brush. Rinse thoroughly.
- Remove stuck-on substances (like chewing gum or sap) with a putty knife, being careful not to gouge the surface.
Pro Tip: Avoid using harsh chemicals like bleach or solvents, as they can degrade asphalt and harm nearby plants.
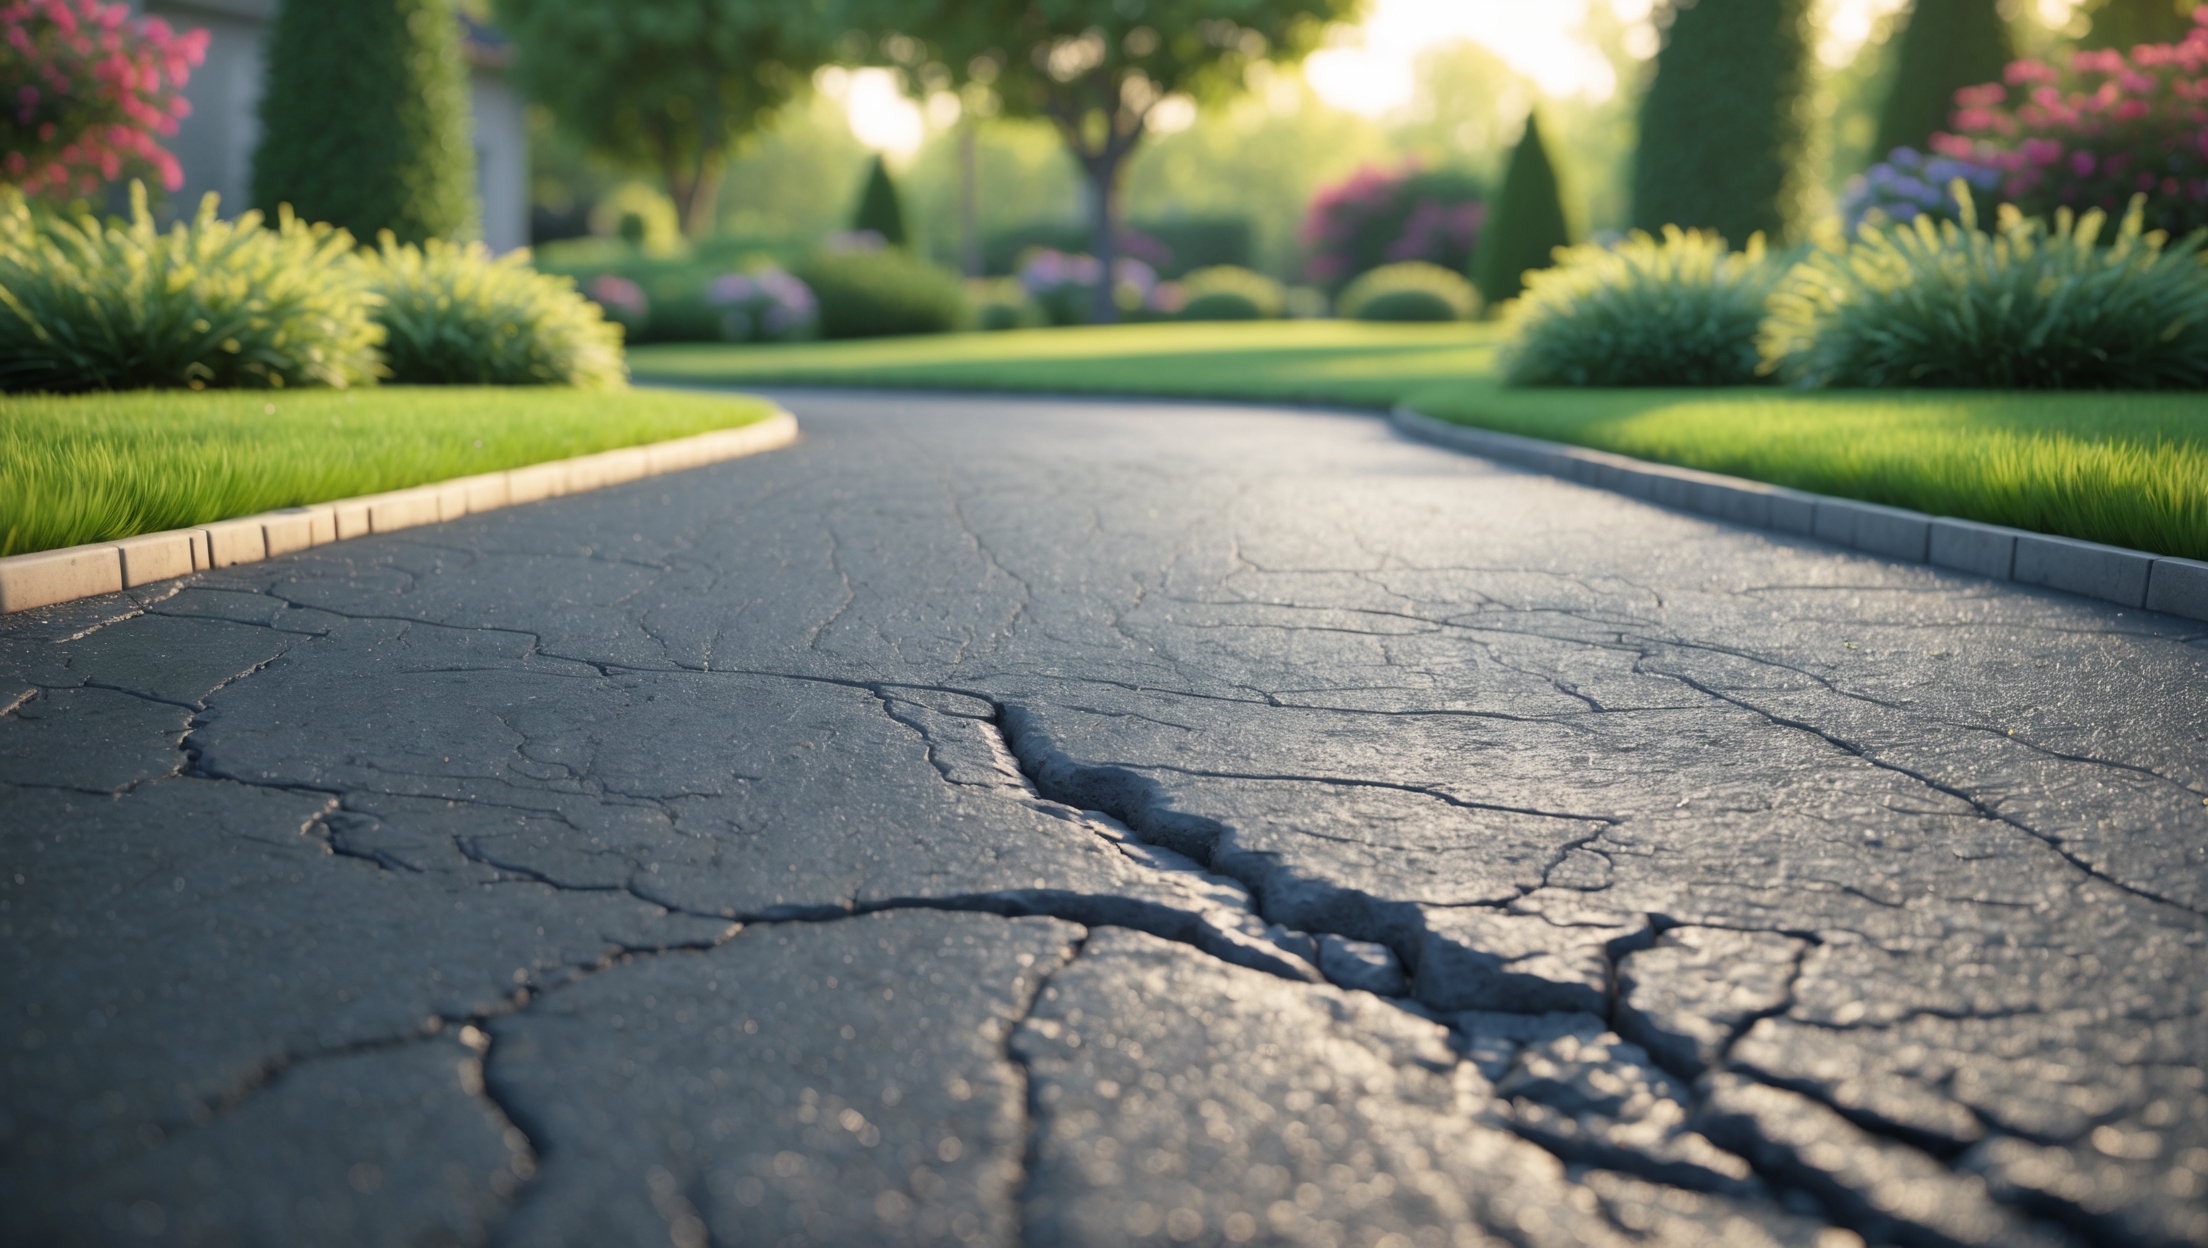
Crack Sealing: Stopping Problems Before They Grow
Why Crack Sealing Is Crucial
Cracks are the entry points for water, which can erode the base and cause extensive damage. Addressing cracks promptly prevents minor issues from becoming major, expensive repairs.
Materials and Tools You’ll Need
- Asphalt crack filler (liquid or rubberized)
- Caulking gun (for tube fillers)
- Wire brush and screwdriver (for cleaning cracks)
- Putty knife or trowel
- Protective gloves
Step-by-Step Crack Repair
- Clean out debris and dirt from cracks using a wire brush and screwdriver.
- Wash the area with water and let it dry completely.
- Fill cracks with asphalt crack filler, using a caulking gun or pouring directly, depending on the product.
- Smooth the filler with a putty knife for a flush finish.
- Allow the filler to cure as directed (typically 24–48 hours) before driving over the area.
Note: For cracks wider than half an inch or deep structural cracks, consult a professional for evaluation and repair.
Sealcoating: Protecting and Revitalizing the Surface
What Is Sealcoating?
Sealcoating is the process of applying a protective liquid coating to the asphalt surface. This acts as a barrier against UV rays, water, oil, and chemicals, and restores the driveway’s rich black appearance.
How Often Should You Sealcoat?
Most driveways benefit from sealcoating every 2–3 years. New driveways should cure for at least 6–12 months before the first sealcoat application.
DIY vs. Professional Sealcoating
- DIY: More affordable, but labor-intensive and best for smaller driveways.
- Professional: Ensures even, long-lasting coverage—ideal for larger or heavily used driveways.
DIY Sealcoating Steps
- Clean and repair cracks or potholes before starting.
- Choose a dry, mild weather window (50–90°F, no rain for 48 hours).
- Apply sealcoat using a squeegee or spray system, working in small sections.
- Allow to dry per manufacturer’s instructions (usually 24–48 hours) before use.
Safety Tip: Wear gloves, old clothes, and keep pets and children off the driveway during application and curing.
Addressing Potholes and Depressions: When to DIY, When to Call a Pro
Small Potholes: DIY Repair
- Clear loose debris from the pothole.
- Fill with cold-patch asphalt material, slightly overfilling.
- Compact with a tamper or heavy object.
- Let cure as directed before driving over.
Large or Recurring Potholes: Professional Assessment Needed
Extensive potholes or repeated depressions often signal base failure, which DIY repairs can’t address. Contact a reputable paving contractor for evaluation and repair options such as patching, resurfacing, or full-depth replacement.
Managing Drainage: Preventing Water Damage
Why Drainage Matters
Standing water is asphalt’s enemy. Persistent puddles indicate improper grading or clogged drainage, leading to cracks and base erosion.
Practical Drainage Solutions
- Keep gutters and downspouts clear: Ensure runoff is directed away from the driveway.
- Fill low spots: Use cold-patch material or consult a contractor for regrading problem areas.
- Install a channel drain or French drain: For persistent standing water, these systems redirect water away from the driveway’s surface and base.
Seasonal Maintenance Checklist
Spring
- Inspect for winter damage: cracks, heaving, or surface splitting.
- Clean off sand, salt, and debris.
- Seal cracks and plan for sealcoating if due.
Summer
- Schedule sealcoating in dry, warm weather.
- Trim back overhanging branches to minimize debris and shade (which can encourage moss).
- Address drainage issues before heavy summer rains.
Fall
- Remove fallen leaves promptly to prevent staining and moss growth.
- Inspect for new cracks and seal before winter freeze.
- Clear gutters and downspouts to ensure proper runoff.
Winter
- Use a plastic shovel or snow blower for snow removal (metal shovels can gouge asphalt).
- Avoid using salt or harsh de-icers; opt for sand or calcium magnesium acetate.
- Address ice promptly to prevent slip hazards and water infiltration.
Preventing Common Asphalt Driveway Mistakes
- Overloading: Avoid parking heavy trucks or equipment for long periods, especially near driveway edges.
- Neglecting small cracks: Even tiny cracks can widen quickly, especially after winter.
- Skipping regular sealcoating: Unsealed driveways degrade far faster under UV and weather exposure.
- Improper snow removal: Metal shovels and plows can cause gouges; use plastic tools and gentle techniques.
- Ignoring drainage: Allowing water to pool accelerates all forms of damage.
Tools & Products: What’s Worth Investing In?
Essential Tools for Homeowners
- Stiff-bristle broom and leaf blower (for regular cleaning)
- Pressure washer (1,500–2,000 psi, with fan tip)
- Crack filler applicator or caulking gun
- Hand tamper (for small pothole repairs)
- Sealcoating squeegee or brush
Recommended Driveway Maintenance Products
- Rubberized asphalt crack filler (for flexibility and longevity)
- Asphalt cold patch (for potholes and depressions)
- Quality sealcoat (coal tar or asphalt-based, as per your region’s regulations)
- Asphalt-safe degreaser or detergent
When to Replace: Signs Your Driveway Needs More Than Maintenance
- Widespread alligator cracking: Interconnected cracks resembling a reptile’s skin signal base failure.
- Multiple deep potholes: Extensive, recurring potholes indicate foundational issues.
- Surface crumbling or major drainage problems: Erosion or collapse of edges and frequent standing water.
- Frequent repairs no longer hold: If patches or fillers fail quickly, replacement may be more cost-effective.
Consult a licensed paving contractor for an assessment and estimate when you see these issues.
Conclusion: Invest in Longevity and Curb Appeal
A well-maintained asphalt driveway is a testament to diligent homeownership. By understanding the unique vulnerabilities of asphalt and following a regular maintenance routine, you can dramatically extend the life of your driveway, save money on repairs, and keep your home looking its best. Regular inspections, prompt crack sealing, proper cleaning, timely sealcoating, and attention to drainage are the cornerstones of effective care. With the right tools and a seasonal approach, even busy homeowners can protect their investment against the elements and daily wear.
Remember, catching issues early is always less expensive and less disruptive than dealing with major damage down the road. By setting aside a few hours each season for driveway care, you not only preserve its function and appearance but also enhance your property’s value and safety for years to come. If your driveway is showing signs of severe wear or persistent problems, don’t hesitate to consult a professional for expert guidance and solutions. With proactive maintenance, your asphalt driveway can remain smooth, safe, and attractive for decades.
If I already have small cracks forming after winter, is it too late to prevent further damage this season, or are there specific steps I should take right away?
It’s definitely not too late. Clean out the cracks, remove debris, and fill them with an asphalt crack filler as soon as possible. Afterward, consider sealing the driveway to protect it from moisture and prevent further damage this season.