Introduction: Why Basement Waterproofing Matters
Basement waterproofing is one of the most overlooked yet critical home improvement projects for homeowners. A dry, protected basement not only increases your property’s value but also safeguards your investment against water damage, mold, and costly repairs. Many homeowners jump into waterproofing with good intentions, only to run into unexpected costs, ineffective solutions, or even exacerbate the problem. This comprehensive guide is designed to help you navigate basement waterproofing with confidence. We’ll cover the essential tools needed, provide a transparent cost breakdown, and highlight the most common mistakes to avoid. Whether you’re planning a DIY project or considering professional help, understanding the right process will help you save money, time, and future headaches. Let’s dive into the practicalities of keeping your basement dry and your home healthy for years to come.
Understanding Basement Water Problems
Common Sources of Water Intrusion
- Surface Water: Poor drainage, improper grading, or blocked gutters can direct rainwater toward your foundation.
- Groundwater: A high water table or hydrostatic pressure can push water through cracks and gaps in your basement walls or floor.
- Plumbing Leaks: Burst pipes or faulty appliances can cause localized flooding or persistent dampness.
Warning Signs You Need Waterproofing
- Persistent musty odors
- Visible water stains or efflorescence (white powdery residue)
- Mold growth on walls or floors
- Peeling paint or bubbling wall coverings
- Standing water or damp spots after rain
Addressing these issues early can prevent structural damage and create a healthier living environment.
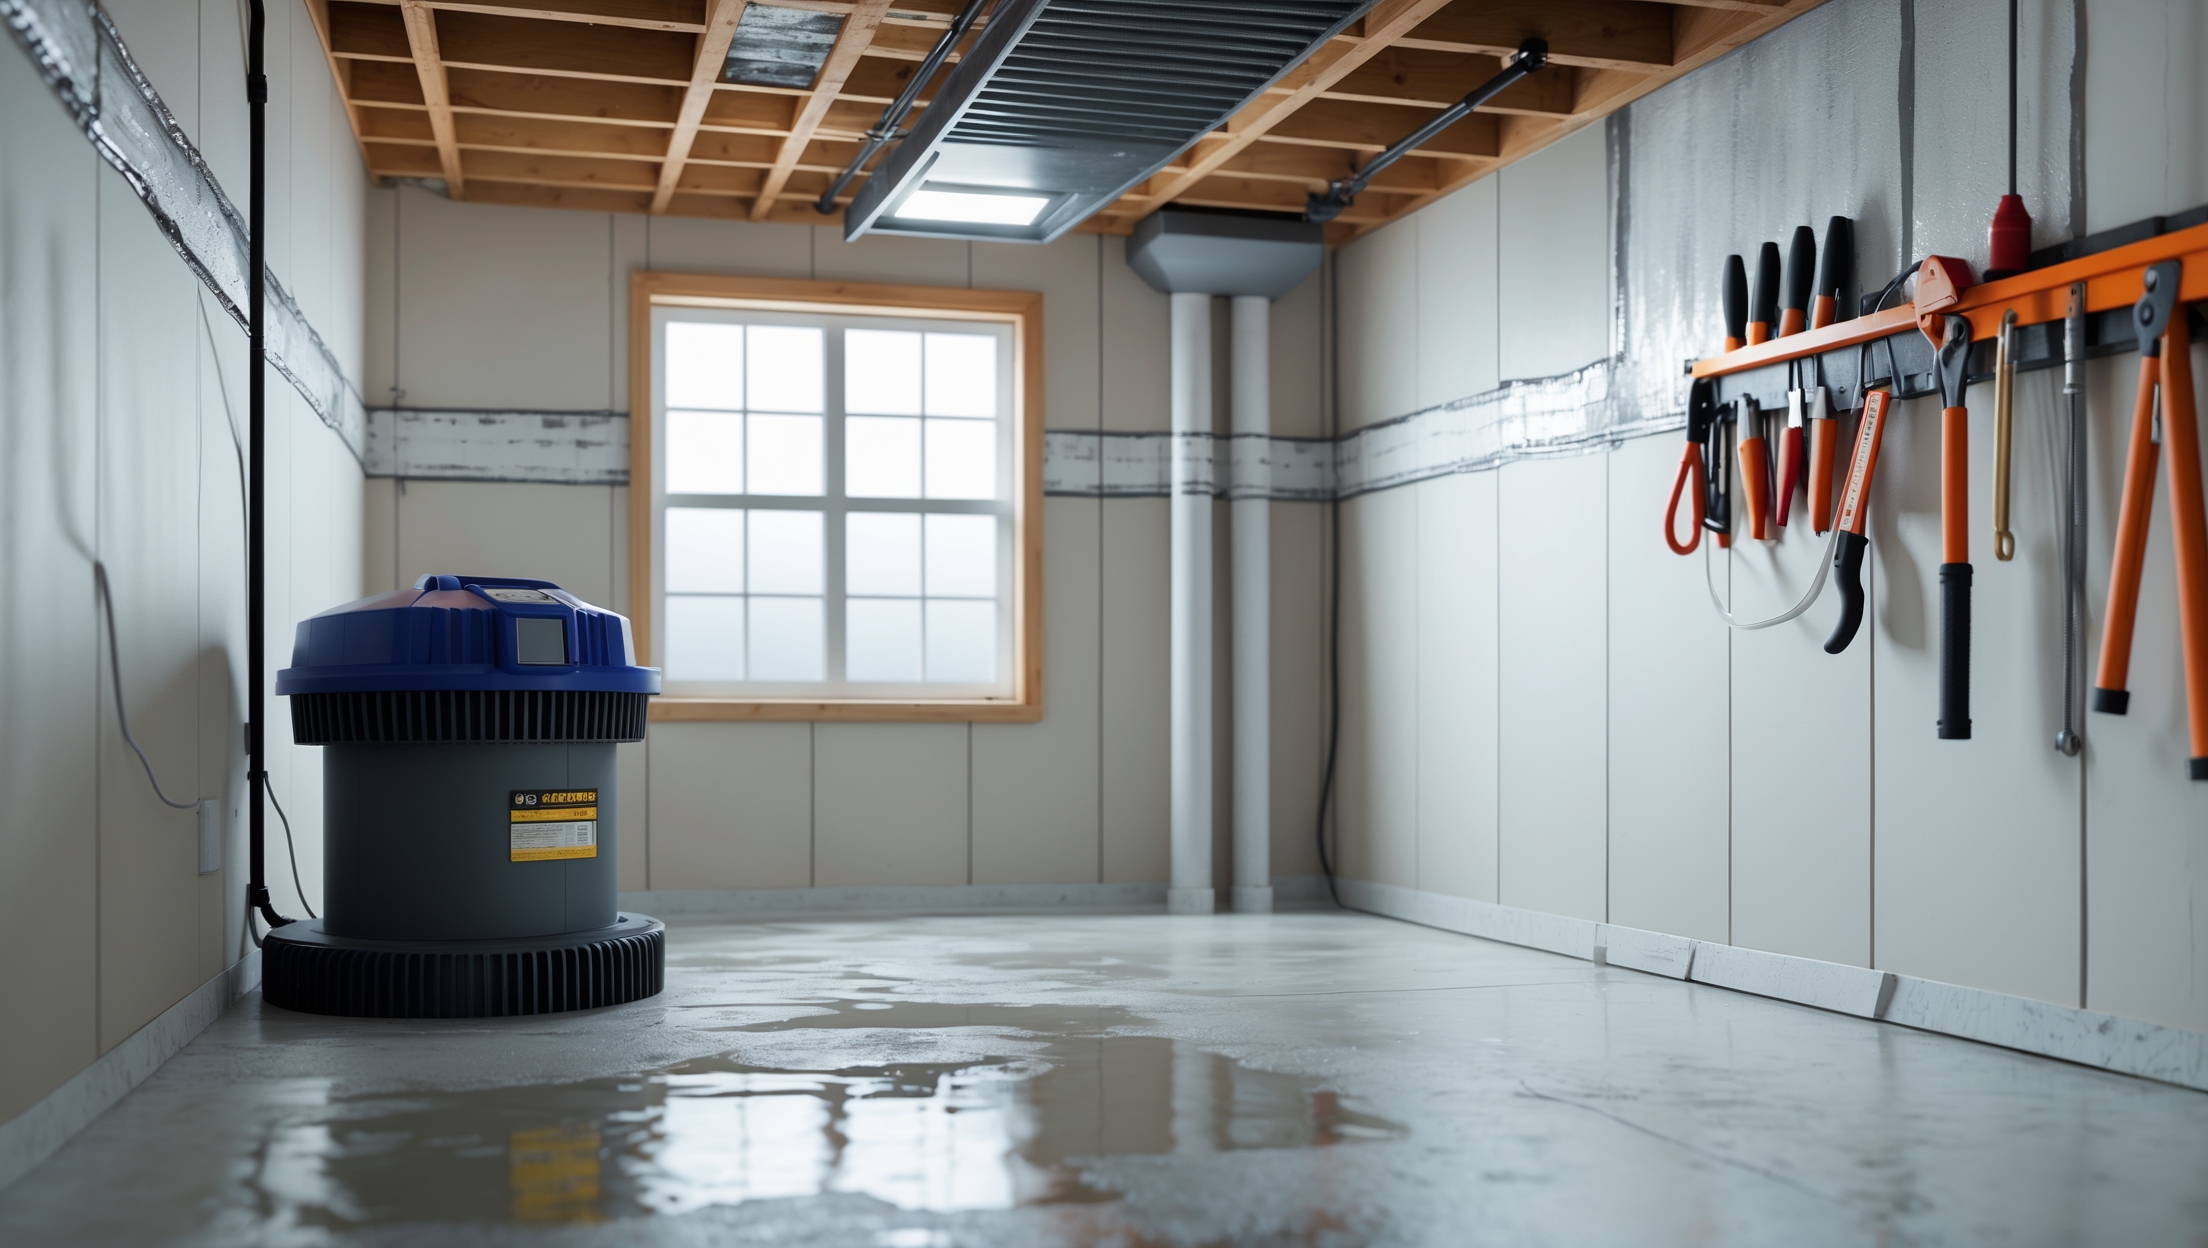
Essential Tools and Materials for Basement Waterproofing
Assessment and Preparation Tools
- Moisture Meter: Detect hidden dampness in walls and floors.
- Flashlight and Inspection Mirror: Identify cracks, leaks, or signs of mold in hard-to-reach areas.
- Utility Knife and Scraper: Remove old paint, efflorescence, or debris for proper adhesion of waterproofing materials.
- Wire Brush: Clean cracks and surfaces before patching or sealing.
Crack Repair and Sealing Tools
- Concrete Patch or Hydraulic Cement: Seal gaps in floors or walls to block water entry.
- Caulking Gun and Waterproof Caulk: Fill small joints around windows, pipes, or seams.
- Putty Knife or Trowel: Apply patching compounds smoothly and evenly.
Waterproofing Application Tools
- Paint Roller and Brushes: Apply waterproof coatings or sealants over large surfaces and edges.
- Sprayer (Optional): For even application of liquid membranes on walls and floors.
- Protective Gear: Gloves, goggles, and respirator mask to ensure safety when handling chemicals.
Moisture Control Systems
- Sump Pump: Essential for homes with recurring water intrusion; pumps water away from the foundation.
- French Drain Components: Perforated pipes, gravel, and landscape fabric for redirecting groundwater.
- Vapor Barrier: Heavy-duty polyethylene sheets to block soil moisture from entering the basement.
Having the right tools ensures a more effective and durable waterproofing outcome.
Cost Breakdown: What to Expect
DIY Waterproofing Costs
- Inspection & Prep Tools: $50–$120
- Sealants, Patch, and Membrane: $100–$400 (depending on area size and quality)
- Sump Pump: $120–$350
- Vapor Barrier Materials: $50–$200
- French Drain (Interior): $500–$1,500 (materials only; labor-intensive)
- Protective Gear: $30–$70
Estimated total for a small to midsize basement (DIY): $400–$2,500
Professional Waterproofing Costs
- Exterior excavation and waterproofing: $5,000–$15,000+
- Interior waterproofing (membranes, sump pump): $2,000–$7,000
- French drain installation (interior): $4,000–$12,000
Costs vary based on the extent of water damage, foundation type, accessibility, and your local contractor rates.
Pro tip: Always get multiple quotes and ensure contractors are licensed and insured for waterproofing.
Step-by-Step Basement Waterproofing Process
1. Inspect and Diagnose the Problem
- Use a moisture meter to assess humidity and dampness.
- Identify cracks, leaks, and sources of water (surface vs. groundwater).
- Check exterior grading and gutter systems to ensure proper drainage away from the foundation.
2. Prepare the Basement
- Remove all items from the basement to create a clear workspace.
- Clean affected areas with a wire brush and scraper.
- Allow the area to dry thoroughly before applying sealants or membranes.
3. Repair Cracks and Joints
- Use hydraulic cement or concrete patch to fill cracks in floors and walls.
- Seal joints and gaps with waterproof caulk using a caulking gun.
- Let repairs cure as per manufacturer’s instructions.
4. Apply Waterproofing Products
- Roll or brush on waterproof masonry sealant over walls and floors.
- Apply a second coat if recommended by the manufacturer for extra protection.
- Install a vapor barrier along walls and floors where persistent dampness is an issue.
5. Install Moisture Control Systems
- If water intrusion is severe, install a sump pump in the lowest part of the basement.
- For chronic groundwater issues, consider adding an interior French drain system to channel water to the sump pump.
6. Address Exterior Drainage
- Ensure gutters and downspouts are clean and extend at least 6 feet from the foundation.
- Regrade landscape so soil slopes away from the house.
- Add window well covers for below-grade windows.
These steps create a layered defense against water, protecting your basement for the long term.
Beginner Mistakes to Avoid
- Ignoring the Source: Treating symptoms (like sealing a crack) without addressing exterior drainage or high water table issues can result in recurring problems.
- Skipping Surface Prep: Failing to clean and dry surfaces before applying sealants reduces product effectiveness and longevity.
- Using the Wrong Products: Not all sealants or membranes are suitable for every basement. Choose products rated for below-grade use and compatible with your foundation type.
- Underestimating the Project Scope: Some basements require professional intervention, especially if you encounter persistent flooding or structural damage.
- Neglecting Safety: Failing to use protective gear or working in poorly ventilated areas can expose you to harmful fumes or mold spores.
- Poor Sump Pump Installation: Incorrect placement or lack of a backup power source can render your sump pump ineffective during storms or power outages.
- Not Maintaining Systems: Forgetting to test your sump pump, clean gutters, or inspect for new cracks can undo your hard work.
Avoiding these common pitfalls will save you time, money, and frustration.
Maintenance Best Practices for a Dry Basement
- Monthly: Check for new cracks, damp spots, or musty odors. Test your sump pump by pouring water into the pit until it activates.
- Seasonally: Inspect gutters, downspouts, and exterior grading after heavy storms or snow melt. Clean window wells and check for debris accumulation.
- Annually: Review the condition of sealants and vapor barriers; reapply or repair as needed. Schedule a professional inspection if you notice persistent issues.
- After Major Events: After floods or plumbing leaks, inspect basement systems and address any signs of water intrusion immediately.
Proactive maintenance ensures your waterproofing efforts last and your basement remains a valuable extension of your home.
When to Call in the Pros
While many basement waterproofing tasks can be handled DIY, some situations require professional expertise:
- Extensive or recurring flooding despite previous repairs
- Visible structural damage (bowing walls, large cracks, settling foundation)
- Persistent mold growth or strong odors
- Uncertainty about the source of water intrusion
Professionals have access to specialized equipment (like foundation excavation tools and advanced moisture control systems) and can provide warranties for their work. Always choose licensed, insured contractors with strong local references.
Conclusion: Invest in Peace of Mind
Basement waterproofing is a crucial investment that pays dividends in home value, safety, and comfort. Armed with the right tools, a clear understanding of costs, and the knowledge to avoid common mistakes, you can tackle this project with confidence. Remember, the key to successful basement waterproofing lies in a systematic approach—diagnosing the source of water, preparing surfaces properly, choosing the right products, and maintaining your systems year-round. Don’t let water intrusion undermine your home’s integrity or compromise your family’s health. Whether you DIY or hire a professional, a well-executed waterproofing strategy delivers peace of mind and protects your most valuable asset. Stay proactive, stay informed, and enjoy a dry, comfortable basement for years to come.
If I find efflorescence on my basement walls but no standing water, should I still go through the full waterproofing process or are there less intensive steps I can take first?
Efflorescence often means moisture is seeping through your basement walls, even if you don’t see standing water. It’s a good idea to start with less intensive steps, such as improving drainage, checking gutters, and applying a waterproof sealant. If moisture persists, then consider a more comprehensive waterproofing approach.
For someone planning to do DIY basement waterproofing, how do you figure out if surface water or groundwater is the main problem before buying any tools?
To identify if surface water or groundwater is causing your basement moisture, check after heavy rain. If water enters quickly or seeps through walls above the floor, it’s likely surface water. If water appears slowly, especially through the floor or lower wall, groundwater is the likely cause. Also, inspect gutters, grading, and nearby downspouts for clues.
Could you give a rough estimate of how much it might cost for the essential tools you listed as a first-time DIYer, or are there affordable starter kits that include most of them?
For a first-time DIYer, essential basement waterproofing tools can cost between $100 and $300 if bought individually. Some home improvement stores offer starter kits for around $75 to $150, which usually include a trowel, brush, gloves, goggles, and sealant. You may need to buy a few extra items depending on your specific project.
How can I tell if my musty basement smell is from water intrusion or just humidity? The warning signs overlap a bit, so I’m not sure if I really need full waterproofing yet.
A musty smell can come from both water intrusion and high humidity, but look for extra clues: water stains, peeling paint, visible mold, or damp spots on walls often point to water intrusion. If you only notice damp air with no visible damage, high humidity might be the cause. Consider using a dehumidifier and monitoring for any new signs of moisture.
You mention using a moisture meter to detect hidden dampness in basement walls and floors. Are there budget-friendly models you recommend for someone who’s never used one before?
For beginners, moisture meters like the General Tools MMD4E or the Klein Tools ET140 are both affordable and user-friendly. They’re usually available at hardware stores and offer clear readings, making them a good fit if you’re new to checking for hidden dampness.
When checking for signs like efflorescence or musty odors, is there a way to tell if my waterproofing problem is mostly from surface water or groundwater without hiring a pro?
You can get some clues by watching when and where moisture appears. If it happens during or right after rain, surface water is likely the cause. If dampness shows up even in dry weather, groundwater may be seeping in. Checking for cracks above or below ground level, and noticing if moisture is near walls or the floor, can also offer hints.
When you mention using a moisture meter to detect hidden dampness, is there a particular type or brand you recommend for DIYers, or is any basic model sufficient for most homes?
For most homeowners, a basic pin-type or pinless moisture meter from a reputable brand like General Tools or Klein Tools should be sufficient. Look for one that’s easy to use and shows clear readings. Unless you have very specific needs, you don’t need a high-end professional model for typical basement checks.
If my basement only has a musty smell and a bit of efflorescence but no obvious cracks or standing water, should I start with surface water solutions or look for hidden leaks first?
Start by addressing surface water solutions like grading the soil away from your foundation and making sure gutters and downspouts are working properly. These steps often resolve musty smells and minor efflorescence. If the problem persists after that, then check for hidden leaks or moisture sources inside.
If my basement has a persistent musty odor but I don’t see visible water stains or standing water, would a moisture meter be enough to find hidden dampness before calling a professional?
A moisture meter is a helpful first step to detect hidden damp spots in your basement, even if you don’t see obvious signs of water. It can pinpoint trouble areas and help you decide if professional help is needed. Be sure to check walls, floors, and corners for the most accurate results.
For those considering DIY versus hiring a professional, what kind of cost difference should be expected for a typical basement waterproofing project, and are there situations where DIY is not recommended?
DIY basement waterproofing typically costs between $500 and $2,000, mostly for materials and tools, while hiring a professional usually ranges from $2,000 to $10,000 depending on the scope. DIY is not recommended if you have foundation cracks, extensive water damage, or if structural repairs are needed, as these situations require specialized expertise.
Does your guide recommend any brands or types of moisture meters for homeowners, or are basic models from hardware stores sufficient for a reliable assessment?
The guide suggests that basic moisture meters from hardware stores are usually sufficient for most homeowners. You don’t need a professional-grade model for typical home use; a simple, reliable meter will help you assess dampness effectively.
Is a moisture meter necessary for every homeowner, or can you spot signs of hidden dampness with simpler tools? I’m trying to decide which tools are really worth buying for a DIY project.
A moisture meter isn’t strictly necessary for every homeowner, especially if you’re on a budget. You can often detect hidden dampness by looking for peeling paint, musty smells, or damp patches. However, a moisture meter does give precise readings and can be helpful if you want to be absolutely sure about trouble spots.
You mentioned a transparent cost breakdown for waterproofing. Can you give a rough idea of what the average homeowner might spend on tools versus professional help for a typical basement?
For a typical basement, DIY waterproofing tools and materials might cost between $200 and $1,000, depending on scope and quality. Hiring professionals generally ranges from $2,000 up to $10,000 or more, based on the size of your basement and the complexity of the job.
When budgeting for basement waterproofing, how much should I expect to pay for professional help compared to a DIY approach with the tools you listed?
Professional basement waterproofing typically costs between $2,000 and $10,000, depending on the problem’s severity and your basement size. A DIY project, using the tools described, might range from $300 to $1,000 for supplies. However, DIY savings come with the trade-off of more time and effort, and possibly less comprehensive results.
The article mentions grading as a way to deal with surface water. Is regrading something I can reasonably tackle myself, and about how much might that add to a typical basement waterproofing budget?
Regrading can be a manageable DIY project if your yard isn’t too large and you’re comfortable with basic landscaping tools like shovels or a wheelbarrow. Costs vary, but for small areas, expect to spend $200 to $1,000 on materials and possible equipment rental. If you hire professionals, it could be more, depending on yard size and complexity.
If my basement only has a few small spots of efflorescence and some minor dampness after heavy rain, do I need all the tools listed, or are there some basic steps I could start with?
For minor efflorescence and slight dampness, you likely don’t need all the advanced tools. Start by checking gutters, grading, and sealing any obvious cracks with basic caulking tools. A dehumidifier and waterproof paint can also help manage moisture without major investments.
You mentioned that moisture meters are useful for detecting hidden dampness. Is there a specific type or brand you recommend for DIY homeowners, or are they all fairly similar in accuracy and ease of use?
Pinless moisture meters are generally easiest for DIY homeowners since they don’t damage surfaces and are straightforward to use. Brands like General Tools and Wagner offer reliable models. While most reputable brands provide similar accuracy for basic home use, checking for clear displays and simple calibration can help make your experience smoother.
If I only see a little white residue on my basement walls but no standing water or obvious mold, should I still go through the full waterproofing process, or can I just deal with that area?
A little white residue, known as efflorescence, usually means moisture is seeping through the walls, even if you don’t see water or mold. You can start by cleaning and sealing that specific area, but keep monitoring for new signs. If the residue returns or spreads, a more thorough waterproofing approach may be needed.
Could you provide a rough estimate of how much the essential tools like a moisture meter and inspection mirror usually cost? I’m trying to figure out if DIY is actually cheaper than calling a professional for my basement.
A basic moisture meter can range from $20 to $50, while an inspection mirror is typically around $10 to $20. These are one-time purchases, so if you have other DIY tasks, the investment could be worthwhile compared to a professional inspection, which may cost $100 or more per visit.
You mention efflorescence as a warning sign—if I see that but no visible water, should I still consider a full waterproofing project, or are there smaller fixes worth trying first?
Efflorescence indicates moisture is present, even if you don’t see standing water. Before committing to a full waterproofing project, try smaller fixes like improving drainage, sealing cracks, and using a dehumidifier. Monitor the situation—if efflorescence returns or worsens, a more comprehensive solution might be needed.
When it comes to using a moisture meter to check for hidden dampness, do you have any tips on what readings should make me concerned enough to take action? I want to be sure I’m interpreting results correctly before jumping into repairs.
For most moisture meters, wood readings above 20% or drywall readings above 1% usually indicate a moisture problem that needs attention. Consistent high readings or wet spots should prompt you to investigate further, especially if there are visible signs of dampness, musty odors, or discoloration.
You mentioned using a moisture meter for detecting hidden dampness—are there specific brands or features you recommend for accuracy without breaking the bank?
Look for moisture meters from brands like General Tools or Klein Tools—they offer reliable accuracy at a reasonable price. Choose a model with both pin and pinless modes, an easy-to-read digital display, and adjustable settings for different materials. These features help you get more precise readings without spending too much.
For someone on a tight budget, which waterproofing materials or tools are the bare minimum to get started safely without risking making things worse?
If you’re on a tight budget, start with a good quality waterproofing paint or sealant for walls and floors, a sturdy wire brush for cleaning surfaces, and a caulking gun with silicone caulk to seal any cracks. Make sure the area is clean and dry before applying anything to avoid trapping moisture.
You mention that a moisture meter is important for detecting hidden dampness. Are there specific brands or types you recommend for someone totally new to these tools?
For beginners, pinless moisture meters are easy to use and don’t damage surfaces. Brands like General Tools, Wagner, and Klein Tools offer reliable, user-friendly models. Look for one with clear digital displays and basic operation features to make the process straightforward.
For those of us who rent but notice musty odors and minor water stains in the basement, is it worthwhile to invest in any of these assessment tools ourselves or should we just document and report to the landlord?
As a renter, it’s best to document any musty odors and water stains with photos and detailed notes, then promptly report them to your landlord. You typically aren’t responsible for repairs or in-depth assessments—your landlord should handle any necessary inspection and fixes.
Can you explain more about how to tell if a problem is coming from groundwater versus surface water? The signs sometimes look similar in my basement, and I want to make sure I use the right solution.
To tell the difference, check when and where water appears. Groundwater seepage often shows as damp walls or floor during wet seasons, especially after steady rain, and may rise from cracks or joints. Surface water usually comes in quickly during or right after heavy rain, often near windows, doors, or foundation edges. Tracking the timing and entry points can help determine the source.
When trying to find the source of basement water issues, do you recommend starting with checking gutters and grading outside first, or should homeowners focus on inspecting inside for cracks and leaks?
It’s best to begin by checking gutters, downspouts, and the grading around your home to ensure water is directed away from the foundation. Exterior issues are often the main cause. After that, inspect the basement interior for cracks or leaks to identify any additional problems.
If I spot efflorescence but no standing water after rain, does that mean my basement only has a minor issue, or should I still be worried about future structural damage?
Efflorescence indicates moisture is seeping through your basement walls, even if you don’t see standing water. While it’s not an emergency, it’s still important to address the cause to prevent future structural damage or mold issues. Consider improving drainage, sealing cracks, and monitoring the area closely.
You mention persistent musty odors and visible water stains as warning signs. How urgent is it to address these, and could waiting a few months make waterproofing efforts significantly harder or costlier?
Musty odors and visible water stains suggest ongoing moisture issues that can worsen over time. Delaying repairs may lead to mold growth, structural damage, and higher repair costs. Addressing these signs promptly makes waterproofing easier and can prevent more serious and expensive problems down the line.
If I use a moisture meter and find hidden dampness, what are the first waterproofing steps you recommend for DIYers before bringing in a professional?
If your moisture meter detects hidden dampness, start by identifying the source—check gutters, downspouts, and grading around your home for drainage issues. Seal any visible cracks with hydraulic cement or waterproof sealant. Use a dehumidifier to lower indoor moisture levels. These steps can help control the problem until a professional can assess your basement.
After sealing basement cracks and addressing drainage, how often should I recheck for new signs of water intrusion? Is this something I should be monitoring every season or just after heavy rains?
It’s best to check your basement for water intrusion at least every season, as well as after any heavy rain or rapid snowmelt. Regular monitoring helps you catch any new issues early before they become bigger problems.
For homeowners who notice a musty odor but can’t identify any obvious leaks or damp spots, what steps do you recommend taking first before calling a professional?
If you smell a musty odor but don’t see leaks or damp spots, start by checking hidden areas like behind furniture, inside closets, or under carpets for moisture or mold. Make sure your basement is well-ventilated and use a dehumidifier to reduce humidity. If the smell persists, then consider contacting a professional for a more thorough inspection.
For a homeowner on a tight budget, which waterproofing tools from your list are absolutely essential to start with, and which ones can wait until later?
For a tight budget, start with essentials like a high-quality caulk gun, waterproof sealant, and a wire brush for surface prep. These let you seal obvious cracks and gaps right away. Tools like sump pumps or dehumidifiers are helpful but can be added later as your needs and budget allow.
You mention a moisture meter for detecting hidden dampness. Is there a budget-friendly model you’d recommend for someone who’s never used one before, or can I trust just feeling the walls by hand?
Feeling the walls by hand can help spot obvious dampness, but a moisture meter gives much more accurate results, especially for hidden issues. For beginners on a budget, models like the General Tools MMD4E or Dr. Meter MD812 are affordable, easy to use, and widely available at hardware stores.
How much of a difference does professional help make compared to DIY waterproofing when it comes to long-term costs and preventing mold? I’m just trying to avoid making expensive mistakes as a beginner.
Professional waterproofing tends to provide more reliable, long-term protection against water intrusion and mold, especially for complicated issues. While DIY can save money upfront, mistakes or incomplete sealing often lead to recurring problems and higher costs later. If you’re new to this, investing in professional help may actually save money and stress over time.
I noticed you mentioned using a moisture meter to detect hidden dampness. Is there a specific type or brand you recommend for someone on a tight budget, or will any basic model do the job?
A basic moisture meter will work fine for most homeowners. Look for a simple pin-type model, which tends to be accurate and affordable. Brands like General Tools or Proster offer reliable options under $30 that should meet your needs without breaking the bank.
If I spot visible efflorescence and some mold on my basement walls but no standing water, should I prioritize exterior grading and gutter fixes first or look into interior sealants?
Addressing exterior grading and gutter issues should come first, since they help direct water away from your foundation and prevent future moisture problems. Interior sealants can help with small leaks, but exterior fixes are likely to provide longer-term results and stop ongoing moisture that causes efflorescence and mold.
What are some of the most common mistakes people make when using a moisture meter, and how can you be sure you’re getting accurate readings before starting a waterproofing project?
People often make mistakes like not calibrating the moisture meter, testing dirty or painted surfaces, or not following the manufacturer’s instructions. To ensure accuracy, always test a clean, bare section of material, calibrate the device if needed, and take multiple readings in different spots to confirm consistent results.
You mention the importance of fixing poor drainage and grading outside the house. Is that something a beginner can realistically handle, or should I hire a pro for the outdoor part before starting on the basement itself?
Adjusting outdoor drainage and grading can be manageable for a beginner if it’s just adding soil to slope away from the foundation. However, bigger issues like re-routing downspouts or fixing major grading problems often need professional help. If you’re unsure about the scope, having a pro assess the yard first can save you headaches later.
You mentioned plumbing leaks as a source of basement water problems—how do I tell if my dampness is from outside water versus a leak inside the house?
Check for water marks near pipes, puddles under plumbing, or dripping sounds—these hint at internal leaks. If dampness appears after rain or is along exterior walls, it’s likely from outside water. You can also shut off your water supply for a few hours; if dampness persists or increases, outside sources are more probable.
If you notice persistent musty odors but don’t see visible water stains or mold, what are the first steps you should take before starting any big waterproofing project?
If you notice musty odors without visible water or mold, start by checking for hidden moisture sources. Inspect corners, behind furniture, and under carpets for dampness. Use a moisture meter if possible. Improve ventilation, run a dehumidifier, and monitor humidity levels. Address minor leaks or condensation before considering major waterproofing projects.
Could you clarify which basement waterproofing mistakes are the most common for first-time DIYers, and what steps you suggest to avoid them?
Common mistakes first-time DIYers make include not addressing the real source of leaks, skipping surface prep before sealing, and using the wrong waterproofing products. To avoid these, always identify where water is getting in, clean and dry surfaces thoroughly, and choose products meant for basement use. Follow manufacturer instructions closely for best results.
How can I tell if the moisture in my basement is from groundwater or a plumbing leak? Would a moisture meter be able to help me differentiate between the two sources?
A moisture meter can show you where moisture is present, but it won’t pinpoint the source. To distinguish between groundwater and a plumbing leak, check if the moisture appears mainly after rain (groundwater) or is constant (possible plumbing issue). Inspect pipes and look for leaks or drips, and consider calling a professional for an accurate diagnosis.
I’m curious how the cost breakdown would differ for someone attempting a DIY approach versus hiring a professional, especially when it comes to materials like sealants and drainage systems.
If you go the DIY route, your main costs will be materials like sealants, waterproof coatings, and possibly a drainage system—expect a few hundred to a couple thousand dollars depending on scope. Hiring a professional will typically add significant labor costs, often doubling or tripling the total price, but it may include higher-quality materials and warranties.
Could you explain a bit more about how to tell if water is coming in from surface water versus groundwater? I’m trying to pinpoint the source before I start any work.
Surface water usually enters after rain or snowmelt and tends to come through windows, walls, or at the top of the foundation. Groundwater typically shows up after prolonged wet periods and seeps up through floor cracks or where the wall meets the floor. Check the timing and entry points after rain to help determine the source.
You mention both DIY projects and hiring professionals—can you give a rough idea how much more it might cost to have a pro waterproof a typical basement versus doing it myself?
Hiring a professional to waterproof a typical basement usually costs between $2,000 and $10,000, depending on the method and basement size. Doing it yourself could cost as little as a few hundred to $2,000, mainly for materials and tool rental. The extra cost with a pro covers expertise, labor, and often includes warranties.
If my basement only has a faint musty odor but none of the other warning signs, is it still worth starting the whole waterproofing process or should I just keep monitoring for now?
A faint musty odor can be an early sign of moisture, even if you don’t see other issues yet. It’s a good idea to monitor the situation closely and try improving ventilation and using a dehumidifier. If the smell persists or worsens, then consider starting waterproofing steps.
You mention a moisture meter for finding hidden dampness—are there certain brands or types you recommend for a beginner, or is any basic model good enough?
For beginners, a basic moisture meter is usually sufficient. Look for pinless models, which are easy to use and less invasive. Brands like General Tools and Klein Tools offer reliable, user-friendly options that are widely available and affordable.
The guide lists a moisture meter as an essential tool for detecting dampness in walls and floors. Can you recommend what type of moisture meter is best for homeowners new to this kind of project?
For homeowners new to basement waterproofing, a pinless (non-invasive) moisture meter is usually the best choice. It’s easy to use, doesn’t damage surfaces, and gives quick readings of moisture levels in walls and floors. Look for a model with clear digital displays and basic features for straightforward operation.
You mention a transparent cost breakdown, but do costs vary a lot between DIY and professional waterproofing? Which approach tends to be more cost-effective in the long run?
Costs can vary significantly between DIY and professional waterproofing. DIY is usually cheaper upfront, but professional services often come with warranties and more durable results. In the long run, professional waterproofing can be more cost-effective if it prevents recurring issues and repairs.
About the cost breakdown, are there affordable DIY steps you’d recommend for someone on a student budget, or is hiring a professional usually unavoidable if you spot signs like mold or peeling paint?
For a student budget, you can tackle some DIY steps like sealing cracks with waterproofing caulk, applying waterproof paint, and improving drainage around your home. These can help with mild issues like peeling paint. However, if you find widespread mold, it’s safer to consult a professional, since improper handling can worsen health risks.
You mention using a moisture meter to find hidden dampness—do you have any tips for figuring out if the water problem is coming from surface water or groundwater without calling in a professional?
You can check after heavy rain—if dampness appears quickly on walls or floors, surface water may be the culprit. If the moisture seems constant, even during dry weather, groundwater is more likely. Also, look for patterns: water marks higher up the wall usually mean surface water; at the floor joint, it’s often groundwater.
When hiring a professional versus attempting DIY waterproofing, how much does the risk of missing hidden cracks or water sources impact the overall long-term cost?
Missing hidden cracks or water sources during a DIY job can lead to continued leaks and costly repairs down the road. Professionals use specialized tools to find these issues early, which can help prevent future damage and expenses. So, the risk of missing problems with DIY can definitely increase your long-term costs.
When you mention using a moisture meter for hidden dampness, are there particular brands or features you’d recommend for homeowners doing a one-time project?
For a one-time basement project, look for a simple, pin-type moisture meter from trusted brands like General Tools or Klein Tools. Choose a model with clear digital readouts and basic wood and masonry settings. You don’t need advanced features—just ensure it can test both walls and floors for moisture.
You mention moisture meters for detecting hidden dampness—are there models you recommend for homeowners on a tight budget, or is there a way to check for moisture without buying special tools?
For those on a tight budget, basic pin-type moisture meters are affordable and work well; brands like General Tools or Dr. Meter offer models under $30. If you prefer not to buy a tool, look for signs like musty smells, damp spots, or use aluminum foil taped to the wall—if moisture appears underneath after 24 hours, you likely have a dampness issue.
If I find visible efflorescence and some damp spots in my basement, is that an early enough stage to use DIY waterproofing methods, or should I call in a professional right away?
Visible efflorescence and damp spots usually mean moisture is present but may not indicate major structural issues yet. You can start with DIY methods like sealing cracks, improving drainage, and applying waterproof coatings. However, if the dampness gets worse, or you notice persistent water infiltration, consulting a professional is a good idea.
Can you give more details on what moisture meter brands or models work best for homeowners on a budget? Are there any key features I should look for when shopping for one?
For homeowners on a budget, brands like General Tools, Extech, and Klein Tools offer reliable and affordable moisture meters. Look for key features such as pin or pinless measurement options, clear digital displays, and a wide moisture range. Models like the General Tools MMD4E or Klein Tools ET140 are often praised for their balance of value and performance.
How do I know when it’s time to call in a professional instead of using DIY tools like a moisture meter and inspection mirror as mentioned in the article?
If you notice persistent water leaks, large cracks in your basement walls or floor, mold growth, or if your DIY efforts haven’t fixed the problem, it’s best to call a professional. They can identify hidden issues and recommend long-term solutions that go beyond what simple tools can handle.
The article lists musty odors and bubbling paint as warning signs. If I only notice a faint odor but no visible damage, should I still go through the full waterproofing process, or are there less involved steps to start with?
If you only notice a faint musty odor and no visible damage, you can start with less involved steps like improving ventilation, using a dehumidifier, and checking for minor leaks or moisture sources. If the smell persists or worsens, then consider a full waterproofing assessment.
If I spot some musty odors and a few small damp spots after heavy rain, would a DIY approach with basic tools be effective, or should I call in a professional right away?
For minor musty smells and small damp spots, a DIY approach like improving ventilation, sealing cracks, and using a dehumidifier can be effective at first. If the problem persists or worsens, or you notice mold or structural issues, it’s best to consult a professional.
If standing water is already present after a heavy rain, should homeowners address the drainage and grading outside first, or can they start with interior waterproofing solutions right away? I’m wondering what order yields the best results.
It’s best to address exterior drainage and grading issues first. Fixing these problems helps prevent water from entering your basement in the first place. Once you’ve improved outside drainage, you can consider interior waterproofing for added protection if needed.
You mention a moisture meter for detecting hidden dampness—are there any budget-friendly models that work well for homeowners, or is it worth investing in a professional-grade tool?
Many homeowners find affordable moisture meters like the General Tools MMD4E or the Dr. Meter MD918 reliable for basic basement checks. These models typically cost under $40 and are accurate enough for most home use. Unless you need highly precise readings for major renovations, a budget-friendly option should be sufficient.
How much should I budget for the basic tools you mentioned, like a moisture meter and inspection mirror, if I want to do a simple DIY check before deciding to call in a professional?
For a basic DIY check, you can expect to spend around $40–$80 in total. A decent moisture meter usually costs $25–$50, and an inspection mirror is about $10–$20. These tools are widely available at hardware stores and should be sufficient for an initial assessment.
Could you elaborate on how to determine if the water issue is coming from surface water versus groundwater before starting the waterproofing process?
To tell if water is from surface sources, look for moisture after rain, especially near walls or windows, and check for obvious grading or gutter problems. Groundwater issues usually show up as ongoing dampness or seepage even without recent rain, often along the floor or where the wall meets the floor. Monitoring when and where water appears helps you pinpoint the source.
When checking for warning signs mentioned like efflorescence or musty odors, how can I tell if the problem is severe enough to need professional help versus tackling it myself?
If you notice widespread efflorescence, persistent musty odors, peeling paint, or visible mold, it may indicate a deeper moisture problem needing professional help. If the issue is limited to a small area and there’s no standing water or mold growth, you could try DIY solutions first. Always consider professional advice if you’re unsure or if the problem persists.
If I notice efflorescence and musty odors but no actual standing water, would you recommend starting with a moisture meter before calling a professional?
Using a moisture meter is a smart first step if you’re noticing efflorescence and musty odors. It will help you confirm if there’s excess moisture present in the walls or floors before deciding if you need professional help. This can save you time and money.
If I see only efflorescence but no standing water after rain, is that still a sign I should waterproof my basement now, or can it wait until more serious symptoms appear?
Efflorescence means moisture is seeping through your basement walls, even if you don’t see standing water. It’s a sign to address waterproofing now, as waiting could lead to worsening issues like mold or structural damage. Early action is usually less costly and helps prevent bigger problems.
Could you explain a bit more about how to use a moisture meter correctly to find hidden damp spots in the basement? I want to make sure I am checking the right areas before starting any repairs.
To use a moisture meter, press its sensor firmly against basement walls, floors, and corners, especially near windows, pipes, and foundation cracks. Slowly move it across surfaces, taking multiple readings in each area. Pay extra attention to spots that feel cool or musty—these often hide moisture. Make note of higher readings to target repairs more effectively.
You mention that improper grading can cause water to collect around the foundation. What’s the simplest way for a homeowner to check if their yard is graded correctly before starting any basement waterproofing?
To check your yard’s grading, walk around your home and look at the ground slope near the foundation. The soil should slope away from the foundation at least 6 inches over the first 10 feet. You can use a level and a long board or a tape measure to check the slope if you’re unsure.