Introduction: Why Attic Insulation Upgrades Matter
Attic insulation is one of the most impactful yet overlooked upgrades you can make in your home. Whether you’re seeking lower energy bills, a more comfortable living space, or improved property value, proper attic insulation delivers significant benefits. Many homeowners assume their attic is adequately insulated, but older homes, DIY renovations, or even recent construction can leave gaps that compromise thermal performance. Upgrading attic insulation is not just about piling on more material—it’s a strategic process involving the right materials, careful installation, and adherence to building codes. In this detailed guide, you’ll learn how to evaluate your attic, plan an upgrade, estimate costs, ensure compliance, and execute each step with confidence. We’ll also cover common pitfalls, insulation types, and maintenance tips to maximize your investment and comfort for years to come.
Understanding the Role of Attic Insulation
Energy Efficiency and Comfort
Heat rises, and in a poorly insulated home, much of it escapes through the attic. Proper insulation acts as a barrier, keeping heat in during winter and out during summer. This reduces the workload on your HVAC system, cutting utility bills and stabilizing indoor temperatures. The U.S. Department of Energy estimates that proper attic insulation can save 10-50% on heating and cooling costs, depending on your climate zone and starting conditions.
Types of Attic Insulation
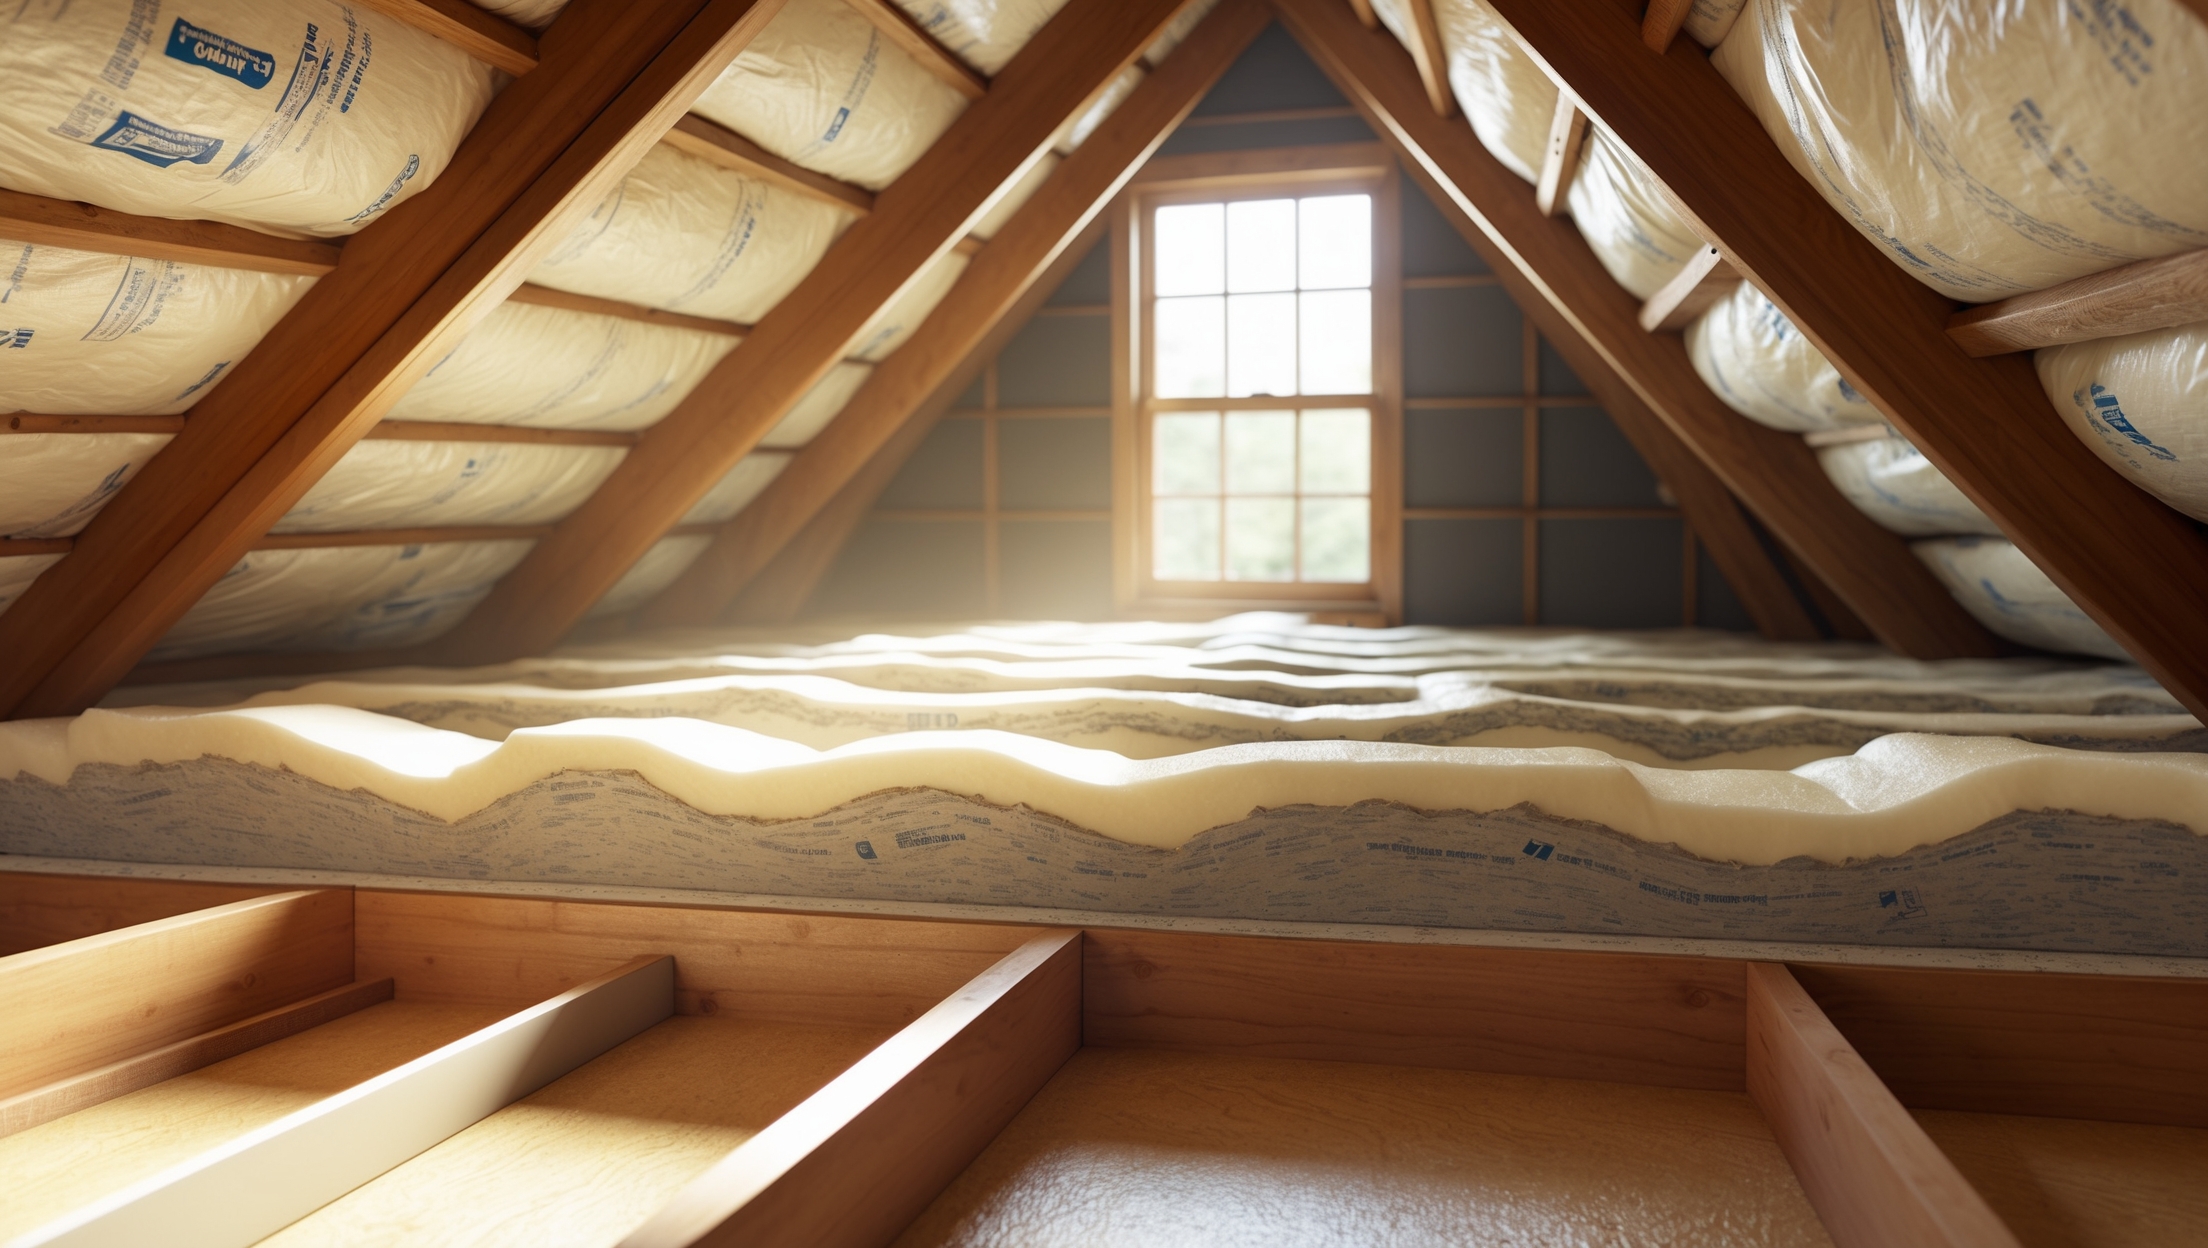
- Batt Insulation (Fiberglass or Mineral Wool): Pre-cut panels that fit between joists. Easy to install for DIYers.
- Blown-In Insulation (Cellulose or Fiberglass): Loose-fill material blown into place, ideal for filling gaps and irregular spaces.
- Spray Foam Insulation: Expands to fill gaps, provides air sealing, but is more expensive and often requires professional installation.
- Rigid Foam Board: Used for special applications, such as rafters or knee walls. High R-value per inch but generally not used for floor insulation.
Step 1: Assessing Your Attic’s Current State
Inspect Existing Insulation
Before planning an upgrade, assess what you have. Wear protective gear—gloves, mask, and long sleeves—and bring a flashlight. Examine:
- Depth: Use a ruler to measure insulation depth. The recommended R-value for most attics is R-38 to R-60 (about 10–20 inches, depending on material).
- Condition: Look for signs of moisture, mold, pest infestation, or compressed insulation.
- Coverage: Are there gaps, bare spots, or uneven areas?
Identify Air Leaks and Ventilation
Insulation is only effective if air leaks are sealed. Check for gaps around:
- Attic hatches and pull-down stairs
- Plumbing stacks and vent pipes
- Recessed lighting and electrical wiring penetrations
Proper ventilation is also essential to prevent moisture buildup. Ensure soffit, ridge, and gable vents are unobstructed.
Step 2: Planning Your Attic Insulation Upgrade
Choosing the Right Insulation Material
Consider your budget, DIY skill level, attic accessibility, and local climate. Fiberglass batts are budget-friendly and easy to install, while blown-in cellulose provides better coverage in hard-to-reach areas. Spray foam is ideal for air sealing but generally costs more and may require professional application.
Calculating Material Needs
Measure the square footage of your attic floor. Multiply by the recommended depth (in inches) for your climate zone. Manufacturers provide coverage charts to help you buy the right amount of material.
Budgeting: Cost Breakdown
- Batt Insulation (DIY): $0.50–$1.50 per square foot
- Blown-In Insulation (DIY, rental blower): $1–$2 per square foot
- Spray Foam (Professional): $2–$4 per square foot
- Labor (if hiring out): $1–$2 per square foot extra
- Additional Supplies: Air-sealing materials ($20–$100), safety gear, rental equipment
For a 1,000 sq. ft. attic, expect total costs from $1,000 (DIY batts) to $6,000+ (professional spray foam).
Compliance and Permits
Many municipalities require permits for insulation upgrades, especially if you’re adding or replacing large amounts. Check with your local building department for requirements. Common compliance points:
- Minimum R-value for your region (see DOE’s recommendations)
- Fire safety: Maintain clearance around recessed lights, chimneys, and vents
- Proper ventilation: Do not block soffit or ridge vents with insulation
Step 3: Preparing the Attic for Insulation
Safety First
- Wear gloves, safety goggles, N95 mask, and long sleeves
- Work on sturdy boards laid across joists to avoid stepping through the ceiling
- Use adequate lighting
Remove Old or Damaged Insulation (If Needed)
If insulation is moldy, wet, or infested, remove it before installing new material. For vermiculite insulation, which may contain asbestos, hire a certified abatement contractor.
Seal Air Leaks
- Use expanding foam or caulk for small gaps (around wiring, pipes)
- Install weatherstripping on attic access doors
- Cover large gaps with rigid foam and seal edges
Protect Light Fixtures and Chimneys
- Install insulation dams or metal flashing around recessed lights (unless rated IC for insulation contact)
- Maintain a minimum 3-inch clearance around chimneys and flues
Step 4: Installing Attic Insulation—Step-by-Step
Installing Batt Insulation
- Unroll batts and lay them between ceiling joists. Do not compress.
- Stagger seams for a tighter fit and cover entire surface without gaps.
- If additional layers are needed, lay them perpendicular to the first layer to reduce gaps.
Installing Blown-In Insulation
- Rent a blower (often free with purchase at home centers).
- Set depth markers to ensure even coverage.
- Work from the perimeter toward the access hatch, filling all cavities evenly.
Spray Foam Application
Due to fumes and expansion, spray foam should be applied by professionals. They will seal cavities, joist bays, and rim joists for a complete air barrier.
Insulation Baffles and Ventilation
- Install baffles (rafter vents) where the attic floor meets the roof to keep soffit vents clear.
- Check that ridge and gable vents are unobstructed.
Step 5: Final Checks and Compliance Verification
Inspect for Coverage and Depth
- Double-check for gaps or compressed spots
- Use a ruler to confirm consistent depth across attic
Document Your Upgrade
- Take before/after photos
- Keep receipts for materials and labor (may be needed for rebates or resale)
- Record insulation type, R-value, and installation date
Schedule an Inspection (if required)
If your locality requires permits, contact your building department for a final inspection. Inspectors will check R-value, fire safety clearances, and ventilation.
Maintenance and Long-Term Care
Annual Attic Checks
- Look for signs of moisture, leaks, or pest activity
- Ensure insulation hasn’t shifted or been compressed by foot traffic or stored items
- Check that vents remain clear
Addressing Issues Promptly
Wet or compacted insulation loses effectiveness. Fix roof leaks immediately and replace any damaged insulation. Avoid storing heavy items on insulated attic floors to prevent compression.
Rebates and Tax Credits
Many utility companies and state governments offer rebates or tax credits for insulation upgrades. Save all documentation and research local programs before you begin.
Common Mistakes to Avoid
- Blocking Ventilation: Insulation should never cover soffit or roof vents.
- Leaving Gaps: Even small gaps can undermine effectiveness.
- Ignoring Air Leaks: Insulation alone won’t stop drafts—seal leaks first.
- Insufficient R-value: Always meet or exceed code for your climate zone.
- Overlooking Safety: Don’t skip protective gear or proper clearance from heat sources.
Conclusion: Unlocking Home Comfort and Savings
Upgrading your attic insulation is a smart investment that pays dividends in comfort, energy savings, and home value. By following the proper steps—thorough assessment, careful planning, air-sealing, correct installation, and ongoing maintenance—you can ensure your attic delivers peak performance for years to come. Remember that every home is unique, so tailor your approach to your property’s needs, local climate, and building codes. Don’t be afraid to seek professional advice for complex situations like spray foam application or asbestos removal. Most importantly, take pride in the work: a well-insulated attic is a hidden hero, quietly making your home more comfortable and affordable every season. Whether you choose to DIY or hire a pro, the knowledge and diligence you apply now will reward you with lower bills, fewer drafts, and a healthier, more resilient home. Start your project today and enjoy the lasting benefits of a properly insulated attic.
Can you break down the estimated costs between using spray foam versus blown-in cellulose for a 1,000 square foot attic? I’m trying to figure out which option makes the most sense for our budget.
For a 1,000 square foot attic, spray foam insulation typically costs $2,000 to $4,000, depending on whether you choose open or closed-cell foam. Blown-in cellulose usually ranges from $600 to $1,500. Spray foam is pricier but offers higher R-values and air sealing, while cellulose is more budget-friendly for good thermal performance.
When evaluating my attic, how can I tell if I need to add more insulation or just replace the old material? Is there a way to measure effectiveness before committing to a full upgrade?
To assess your attic insulation, check for thin or uneven areas, moisture, or signs of mold. Measure the thickness of the insulation—if it’s below recommended levels (often around 10–14 inches for fiberglass), adding more can help. If the insulation is damp or damaged, replacement is best. An energy audit or using an infrared thermometer can also help gauge effectiveness before upgrading.
How do I figure out what R-value I actually need in my climate zone before deciding on which insulation material to buy?
To determine the right R-value for your attic, first find out your climate zone by checking your location on a climate zone map. Then, look up the recommended attic insulation R-value for that zone—these guidelines are usually provided by the Department of Energy or local building codes.
How do I estimate the total cost for both materials and labor if I want to upgrade my attic insulation but need to ensure I’m meeting current local building codes? Are there any hidden expenses I should watch for?
To estimate your total cost, measure your attic’s square footage and check local code requirements for insulation type and R-value. Get quotes from contractors for both materials and labor. Watch for hidden costs like air sealing, old insulation removal, disposal fees, and possible electrical or ventilation upgrades to stay code-compliant.
You mention spray foam is pricier and usually needs a pro. For someone on a tight budget, would combining batt and blown-in insulation give similar benefits, or is there a big performance gap I should know about?
Combining batt and blown-in insulation is a cost-effective option and can work well if installed properly. While spray foam offers higher air sealing, batt and blown-in together still provide good thermal performance and are much more budget-friendly. Just make sure gaps are minimized and coverage is consistent for best results.
What should I budget for a professional spray foam installation in a standard-sized attic, and are there hidden costs homeowners often overlook during this process?
For a standard-sized attic, professional spray foam installation typically costs between $2,000 and $6,000, depending on size and foam type. Homeowners often overlook costs like air sealing, repairing ventilation, or disposing of old insulation, which can add to the total price. It’s wise to get detailed quotes and ask about potential extras.
Are there specific building code updates or required inspections that commonly catch homeowners off guard when upgrading attic insulation, especially in older homes?
Yes, homeowners are often surprised by newer code requirements for attic ventilation, vapor barriers, and minimum R-values for insulation. In older homes, electrical wiring may also need to be inspected or updated. Many localities require a permit and final inspection to ensure all upgrades meet energy and safety codes.
If I do a DIY batt insulation install, are there common code compliance mistakes small business owners like me should watch out for during the process?
Watch for gaps or compressed batts, as these reduce effectiveness and may not meet code. Make sure insulation fully covers all areas, stays clear of recessed lighting unless rated IC, and doesn’t block attic ventilation. Also, check local codes for minimum R-value and vapor barrier requirements.
In the article, you mention the importance of compliance with building codes when upgrading attic insulation. Can you clarify what specific codes or permits homeowners should be aware of before starting the project?
Before upgrading attic insulation, homeowners should check local building codes regarding minimum insulation R-values, vapor barrier requirements, and fire safety standards. Permits may be needed, especially if electrical work is involved or if insulation affects ventilation. It’s best to contact your local building department to confirm specific regulations in your area.
If my house is about 30 years old and I’m not sure what type of insulation is in the attic now, is there an easy way to identify what I already have before planning an upgrade?
Yes, you can usually identify your attic insulation by looking at its appearance and texture. Common types are fiberglass batts (pink or yellow, fluffy rolls), blown-in cellulose (gray, loose, paper-like), and spray foam (hard, rigid surface). Wearing gloves and a mask, gently examine a small section to help determine the type before planning your upgrade.
The article mentions building codes and compliance—are there specific rules for attic insulation upgrades that homeowners should watch out for, especially if we want to do the work ourselves?
Yes, there are specific building codes for attic insulation upgrades. You’ll need to meet minimum R-value requirements for your climate zone and ensure proper ventilation and vapor barriers. Local codes may have additional rules, so it’s important to check with your city or county building department before starting any DIY work.
If I find gaps in my existing attic insulation, do I need to remove the old material before adding more, or can I just layer new insulation on top?
You usually don’t need to remove old insulation unless it’s wet, moldy, or infested. If it’s in good condition, simply fill any gaps and then layer new insulation on top. Just make sure not to compress the insulation, as that reduces its effectiveness.
Can you give a rough estimate on the total cost difference between hiring a professional for spray foam insulation versus doing a DIY blown-in cellulose upgrade for a 1,200 square foot attic?
For a 1,200 square foot attic, hiring a professional for spray foam insulation can cost between $4,000 and $7,200, while a DIY blown-in cellulose project typically ranges from $800 to $1,500 for materials and equipment rental. The cost difference is often $3,000 or more, with spray foam being the pricier option.
How much should I budget for a professional spray foam job versus doing blown-in fiberglass myself in a 1200 square foot attic?
For a 1200 square foot attic, hiring a pro for spray foam usually costs $3,000 to $6,000 depending on thickness and location. Doing blown-in fiberglass yourself typically runs $600 to $1,200 for materials and a rental blower. Spray foam is pricier, but offers better air sealing, while fiberglass is more budget-friendly.
When upgrading attic insulation in an older home, how do you determine if you need to remove old insulation first, or can you just add new material on top?
To decide whether to remove old insulation, check its condition first. If it’s damp, moldy, rodent-infested, or compressed, it should be removed. If it’s dry, clean, and in decent shape, you can usually add new insulation on top. Always address any moisture or pest issues before adding more insulation.
You mention complying with building codes—are there specific insulation R-value requirements that vary by region, and how do I find out what my area requires before starting the upgrade?
Yes, attic insulation R-value requirements do vary depending on your region and local climate zone. To find out what’s required for your area, check with your city or county building department. You can also look up your local energy code or ask a local insulation contractor for guidance.
Could you elaborate on the potential challenges when installing blown-in insulation in attics with lots of irregular spaces or existing wiring?
Installing blown-in insulation in attics with irregular spaces can be tricky because it’s harder to get even coverage, especially around beams and tight corners. Existing wiring adds another challenge, as you need to avoid covering junction boxes and make sure wires don’t overheat. Careful preparation and possibly baffles or barriers are needed to keep insulation clear of electrical components.
I’m curious about the installation process for spray foam insulation compared to blown-in cellulose. Are there situations where one is clearly preferable due to attic layout or existing insulation types?
Spray foam creates an air seal and works well in attics with irregular shapes, hard-to-reach areas, or when you want moisture control. Blown-in cellulose is often better for open, accessible attics or topping up existing insulation. If you have old insulation, cellulose is usually easier to install on top, while spray foam may require a full removal first.
When evaluating my attic for an insulation upgrade, are there specific signs or trouble spots I should look for besides just visible gaps? I live in an older home and want to catch any less obvious issues.
Absolutely—besides visible gaps, check for uneven insulation levels, compressed or damp insulation, signs of mold or mildew, and evidence of pests. Pay attention to areas around pipes, ducts, chimneys, and attic hatches, as these can be common trouble spots, especially in older homes. Addressing these issues will help boost your attic’s efficiency.
For older homes with DIY renovations, how can I identify if any insulation gaps are severe enough to require a full replacement rather than just adding more material? Are there warning signs to look for before starting the upgrade process?
In older homes, warning signs of severe insulation gaps include uneven indoor temperatures, drafts, high energy bills, visible gaps or thin spots in the insulation, or signs of moisture and mold. If insulation looks compressed, deteriorated, or you see exposed joists, a full replacement is likely needed instead of just adding more material.
If I have an older home and I’m not sure what type of insulation is already in my attic, what’s the best way to evaluate whether it’s up to current code before starting any upgrades?
You can start by visually inspecting the insulation in your attic and measuring its thickness. Then, compare what you find to your local building codes or the Department of Energy’s recommended R-values. If you’re unsure about identifying materials or gauging their effectiveness, consider hiring a professional energy auditor for an assessment.
Is there a certain type of attic insulation that works best for older homes with lots of small gaps? The article mentions spray foam for air sealing, but is that overkill for a basic energy upgrade?
For older homes with many small gaps, spray foam is highly effective because it both insulates and seals air leaks. However, if you’re looking for a simpler upgrade, you can use blown-in cellulose or fiberglass combined with targeted caulking or spray foam just around gaps and penetrations. That way, you balance performance and budget without fully committing to spray foam throughout.
The article mentions spray foam is more expensive and usually needs a professional. Can you give a ballpark range of cost difference between spray foam and blown-in insulation for a standard attic?
Spray foam insulation typically costs between $2 to $6 per square foot, while blown-in insulation usually ranges from $1 to $2 per square foot. So, spray foam can be about two to three times more expensive for a standard attic, mostly due to materials and professional installation.
You mention that spray foam insulation usually needs professional installation. Is it unsafe or just really tough for a beginner to do themselves, and what would happen if I tried it as a DIY project?
Spray foam insulation is both challenging and potentially unsafe for beginners because it involves handling chemicals that require protective gear and careful mixing. DIY attempts can lead to improper application, poor sealing, or health risks from fumes. For safety and effectiveness, it’s best left to professionals.
When upgrading attic insulation in an older home, how do you determine if the existing insulation needs to be completely removed first or if you can just add more on top?
Check the existing insulation for moisture, mold, pest damage, or significant dirt—if you find any of these, it should be removed. If it’s dry, in good condition, and not compressed, you can usually add new insulation on top. Always make sure there are no vapor barriers between layers and address any underlying issues first.
When evaluating our attic for an insulation upgrade, how can I tell if the problem is mostly due to old insulation or if there are also gaps from past DIY projects that need separate attention?
To check if the main issue is old insulation or gaps, inspect the attic for areas with thin, compressed, or discolored insulation—these usually point to age. Look for visible gaps, missing sections, or uneven coverage, which often result from previous DIY changes. Address both by topping up old insulation and sealing any identified gaps before adding new material.
I noticed you mentioned batt, blown-in, spray foam, and rigid foam board. For a DIYer in a typical US climate, which type would be the most straightforward and cost-effective to install?
For most DIYers in a typical US climate, blown-in insulation and fiberglass batts are the easiest and most cost-effective to install. Batts require less equipment and are straightforward if your attic has standard joist spacing, while blown-in insulation covers gaps well but needs a rented blower.
After upgrading attic insulation, are there any regular maintenance steps I should plan for to make sure the insulation keeps performing well over the years?
Absolutely, it’s wise to check your attic insulation every year or two. Look for moisture, mold, pests, or areas where insulation has shifted. Also, make sure vents are clear and there are no roof leaks. Promptly address any issues so your insulation continues to perform effectively.
I’m interested in blown-in insulation for my attic since there are a lot of odd-shaped spaces. Is this something a first-time DIYer can tackle, or would it be safer to hire a professional for installation?
Blown-in insulation can be done by a first-time DIYer, especially if you rent the right equipment and follow safety guidelines. However, tricky spaces, wiring, or potential for air leaks might make professional installation safer and more effective, especially if your attic is hard to access.
Can you provide some typical cost ranges for a DIY attic insulation upgrade versus hiring a professional, especially for spray foam installation?
For a DIY attic insulation upgrade with fiberglass or cellulose, costs usually range from $0.50 to $2 per square foot. Hiring a professional for spray foam insulation is pricier, typically $2 to $6 per square foot, since the equipment and expertise are specialized.
When estimating costs, what factors tend to make the price go up the most for attic insulation upgrades? Is labor or material type usually the biggest part of the budget?
Material type and attic accessibility are typically the biggest cost drivers. High-performance insulation like spray foam is more expensive than fiberglass or cellulose. If your attic is hard to reach or requires removal of old insulation, labor costs can rise quickly, but material choice usually has the largest impact on the overall budget.
If my home already has some older batt insulation, is it better to add more on top or should I remove and replace it completely to avoid potential gaps or compression issues?
If your existing batt insulation is dry, free of mold, and still in decent shape, you can usually add new insulation right on top. However, if it’s compressed, damaged, or moldy, it’s best to remove and replace it to maintain proper coverage and avoid future issues.
How much of a price difference should I expect between blown-in cellulose and spray foam for a standard-size attic, and are there any specific code compliance issues unique to spray foam installations?
Blown-in cellulose typically costs $1–$2 per square foot, while spray foam can range from $3–$6 per square foot, sometimes higher. With spray foam, make sure it meets local fire safety and vapor barrier codes—some areas require ignition barriers or specific fire-retardant coatings that aren’t needed for cellulose insulation.
How do I know if my newer construction home actually needs an attic insulation upgrade, since you mentioned even recent builds can have gaps?
To check if your newer home needs an attic insulation upgrade, inspect the attic for uneven or thin insulation coverage, visible joists, or drafts. Even recent builds can have under-insulated areas or gaps. Measuring insulation depth and comparing it to local recommendations can help you decide if an upgrade is necessary.
If my attic already has some older batt insulation but not enough, can I just add new batts on top, or do I need to remove the old material first for the best results?
You can usually add new batts right on top of your existing insulation as long as the old batts are dry, not moldy, and in good condition. Just make sure the new batts don’t have a vapor barrier and lay them perpendicular to the old ones for the best coverage.
Do you have any tips for estimating the total upgrade cost, including professional installation versus a DIY approach, for a standard-sized attic?
To estimate total upgrade costs, first measure your attic’s square footage. DIY costs usually range from $1 to $2 per square foot for materials. Professional installation often adds $1 to $2 per square foot in labor. Request quotes from local contractors and compare with material prices at home improvement stores to decide which approach fits your budget.
You mentioned spray foam is more expensive—do you have a ballpark figure for how much more it typically costs compared to blown-in options for a standard-size attic?
Spray foam insulation usually costs around $2 to $5 per square foot, while blown-in insulation like cellulose or fiberglass ranges from $1 to $2 per square foot. For a standard-size attic, spray foam can be roughly twice as expensive as blown-in options, though prices can vary by location and project specifics.
How can I tell if my attic really needs more insulation if my house was built in the last ten years? Are there warning signs I should look for before tearing anything up?
Even in newer homes, you might need more insulation if your attic feels much colder or hotter than the rest of your house, if your energy bills seem unusually high, or if you notice uneven temperatures between rooms. Before starting any work, check for visible gaps in the insulation, thin coverage, or areas where you can see the attic floor.
For a busy family on a tight budget, is blown-in cellulose a more cost-effective choice than spray foam, or would the savings on energy bills justify the higher up-front cost of spray foam?
Blown-in cellulose is generally more affordable upfront and still improves energy efficiency, making it a smart option if your budget is tight. Spray foam does offer higher insulation value and long-term energy savings, but the initial cost is much higher, so it may take many years before you see financial payback compared to cellulose.
You mentioned that proper insulation can save up to 50% on heating and cooling. Roughly how long would it take to see a return on investment if I opt for professional installation with higher-cost materials like spray foam?
With professional installation and premium materials like spray foam, the payback period is usually between 3 to 7 years, depending on your climate, energy costs, and home size. The initial investment is higher, but spray foam performs better and delivers long-term energy savings compared to other insulation types.
When estimating costs, do you include potential upgrades to attic ventilation or air sealing, or is that a separate project from insulation? Just trying to budget realistically before starting.
Attic insulation upgrades often go hand-in-hand with air sealing and sometimes ventilation improvements, since these steps maximize energy savings. However, most cost estimates list insulation separately. For a realistic budget, consider factoring in both air sealing and any needed ventilation upgrades, as these may be additional expenses.
You mention that attic insulation upgrades can cut heating and cooling costs by up to 50%. About how long does it usually take to notice those savings on your utility bills after upgrading?
You’ll typically start seeing lower utility bills in the very first billing cycle after upgrading your attic insulation. Full savings may become clear within one to three months, depending on your home’s energy use and the season.
If I decide to upgrade my attic insulation myself, how do I make sure I’m meeting local building codes and compliance requirements? Is this something a homeowner can check on their own, or should I hire a professional?
You can check local building codes yourself by contacting your city or county building department, or by visiting their website for guidelines on attic insulation. However, if you’re unsure about interpreting the requirements or want peace of mind, consulting a professional or a building inspector is a good idea.
For older homes that may have existing insulation in poor condition, do you recommend removing the old material entirely before upgrading, or can new insulation be added on top safely?
If the existing insulation is wet, moldy, or heavily compacted, it should be removed before adding new material. However, if it’s dry and in fair condition, you can usually add new insulation on top. Always check for signs of moisture or pest damage first to avoid future issues.
You mention compliance with building codes during installation. Are there specific permits or inspections required for attic insulation upgrades in most US states?
Permit and inspection requirements for attic insulation upgrades vary by state and even by city. In many areas, simple insulation upgrades may not need a permit, but some jurisdictions do require one, especially if electrical work is involved or if the project significantly changes the structure. It’s best to check with your local building department before starting.
You mentioned spray foam is more expensive and usually needs a professional, but does it really make a big difference in energy savings compared to just using fiberglass batts or blown-in cellulose?
Spray foam usually provides better air sealing than fiberglass batts or blown-in cellulose, which can translate into greater energy savings, especially in homes with lots of gaps or irregular spaces. However, the actual improvement depends on your attic’s condition and climate. In some cases, the extra cost may take years to offset through energy savings alone.
When upgrading attic insulation in an older home, how do you determine if the existing material should be removed completely or just topped up? Are there warning signs to look out for that suggest a full replacement is necessary?
You should consider full removal if the existing insulation is wet, moldy, infested with pests, or contains hazardous materials like asbestos. If it’s dry, in good shape, and evenly spread, topping up might be enough. Always look for signs of water damage, strong odors, or visible contamination when deciding.
When estimating upgrade costs, does your breakdown include the potential need to install additional attic ventilation, or is that usually a separate project?
The cost breakdown in the article mainly focuses on insulation materials and installation. If your attic needs extra ventilation, that’s typically considered a separate expense, since requirements can vary depending on your home’s existing setup and local building codes.
Is there a significant difference in energy savings between blown-in cellulose and fiberglass for attics in colder climates?
Blown-in cellulose generally offers slightly better energy savings in colder climates because it provides a higher R-value per inch and fills gaps more effectively than fiberglass. However, both materials can perform well if installed properly, so your choice may also depend on factors like cost and availability.
Is there a recommended way to tell if my current attic insulation is actually up to code, especially if my house is older and I’m not sure what was used before?
To check if your attic insulation meets current code, measure its thickness and try to identify the insulation type. Then, compare these details to your area’s recommended R-value for attics. If you’re unsure or can’t identify the material, a home energy audit or inspection by a professional can provide a clear answer.
If I already have some insulation in my attic but it looks patchy and thin in places, should I remove the old material first or can I just add new insulation on top for the best results?
You can usually add new insulation over the existing material, as long as it’s not wet, moldy, or infested. First, check the condition of the old insulation. If it’s in good shape, just add enough new insulation to reach the recommended depth and coverage.
Does upgrading attic insulation always require removing the existing material, or can you add new insulation over what’s already there to meet current building codes?
You don’t always have to remove existing attic insulation unless it’s wet, moldy, or damaged. Most building codes allow you to add new insulation on top of old material, as long as the combined depth meets the required R-value and the original insulation is in good condition.
Once you upgrade your attic insulation, are there maintenance tasks or checks you recommend to make sure it stays effective and compliant over the years?
After upgrading your attic insulation, it’s wise to check for moisture buildup or water leaks yearly, as these can compromise insulation. Also, inspect for any settling or gaps and watch for pests. Ensure vents remain clear for proper airflow and periodically review local codes to stay compliant if standards change.
For a DIY attic insulation upgrade, how do labor costs and material costs typically compare, and are there any hidden expenses like tool rentals or permit fees I should watch out for?
For a DIY attic insulation upgrade, you’ll only pay for materials since you handle the labor yourself. Material costs vary by insulation type but are usually the biggest expense. Watch out for hidden costs like renting protective gear or insulation blowers, plus disposal fees for old insulation. Permit fees are rare for basic upgrades, but it’s wise to check local regulations just in case.
You mention that spray foam provides air sealing but is more expensive and usually needs a professional. For a small attic, is the extra cost worth it compared to upgrading with blown-in cellulose?
For a small attic, blown-in cellulose is typically a cost-effective choice and provides good insulation. Spray foam’s air sealing is valuable, but its higher cost and need for professional installation may not be justified unless you have major air leakage or moisture issues. Most homeowners find cellulose sufficient for small attics.
Could you clarify how to determine if recent construction has inadequate attic insulation, even if it looks properly installed on the surface?
To check if recent construction has inadequate attic insulation, measure the thickness and compare it to recommended R-values for your area. Even if insulation looks good, gaps, compressed spots, or missing areas can reduce effectiveness. You can also use an infrared thermometer to spot uneven heat loss, which may indicate issues beneath the surface.
If I have a mixture of old batt insulation and want to add blown-in on top, are there any compatibility or moisture issues I need to watch out for during installation?
You can add blown-in insulation over old batt insulation as long as the batts are dry and free from mold. Make sure not to compress the batts, as this reduces their effectiveness. Also, check for any signs of moisture or leaks and address them before adding new insulation to prevent future problems.
If my attic already has some old fiberglass batts but not enough, is it okay to just add new batts on top, or do I need to remove the old ones first?
You can usually add new fiberglass batts directly on top of existing ones, as long as the old insulation is dry, not moldy, and in decent shape. Make sure the new batts are unfaced, and lay them perpendicular to the old ones to reduce gaps and improve coverage.
When checking if my attic insulation meets current building codes, are there specific R-values I should look for, or does it depend entirely on where I live?
The required R-value for attic insulation does depend on your location. Building codes specify different R-values based on climate zones. Check your local code or energy department guidelines to find the recommended R-value for your area before upgrading your insulation.
If I choose blown-in insulation to fill irregular attic spaces, are there any common mistakes people make that reduce its effectiveness over time?
Yes, some common mistakes include not applying a thick enough layer, leaving gaps around rafters or wiring, and compressing the insulation during installation. Also, failing to air seal the attic before adding insulation lets drafts reduce its effectiveness. Regularly check for settling or displacement over time.