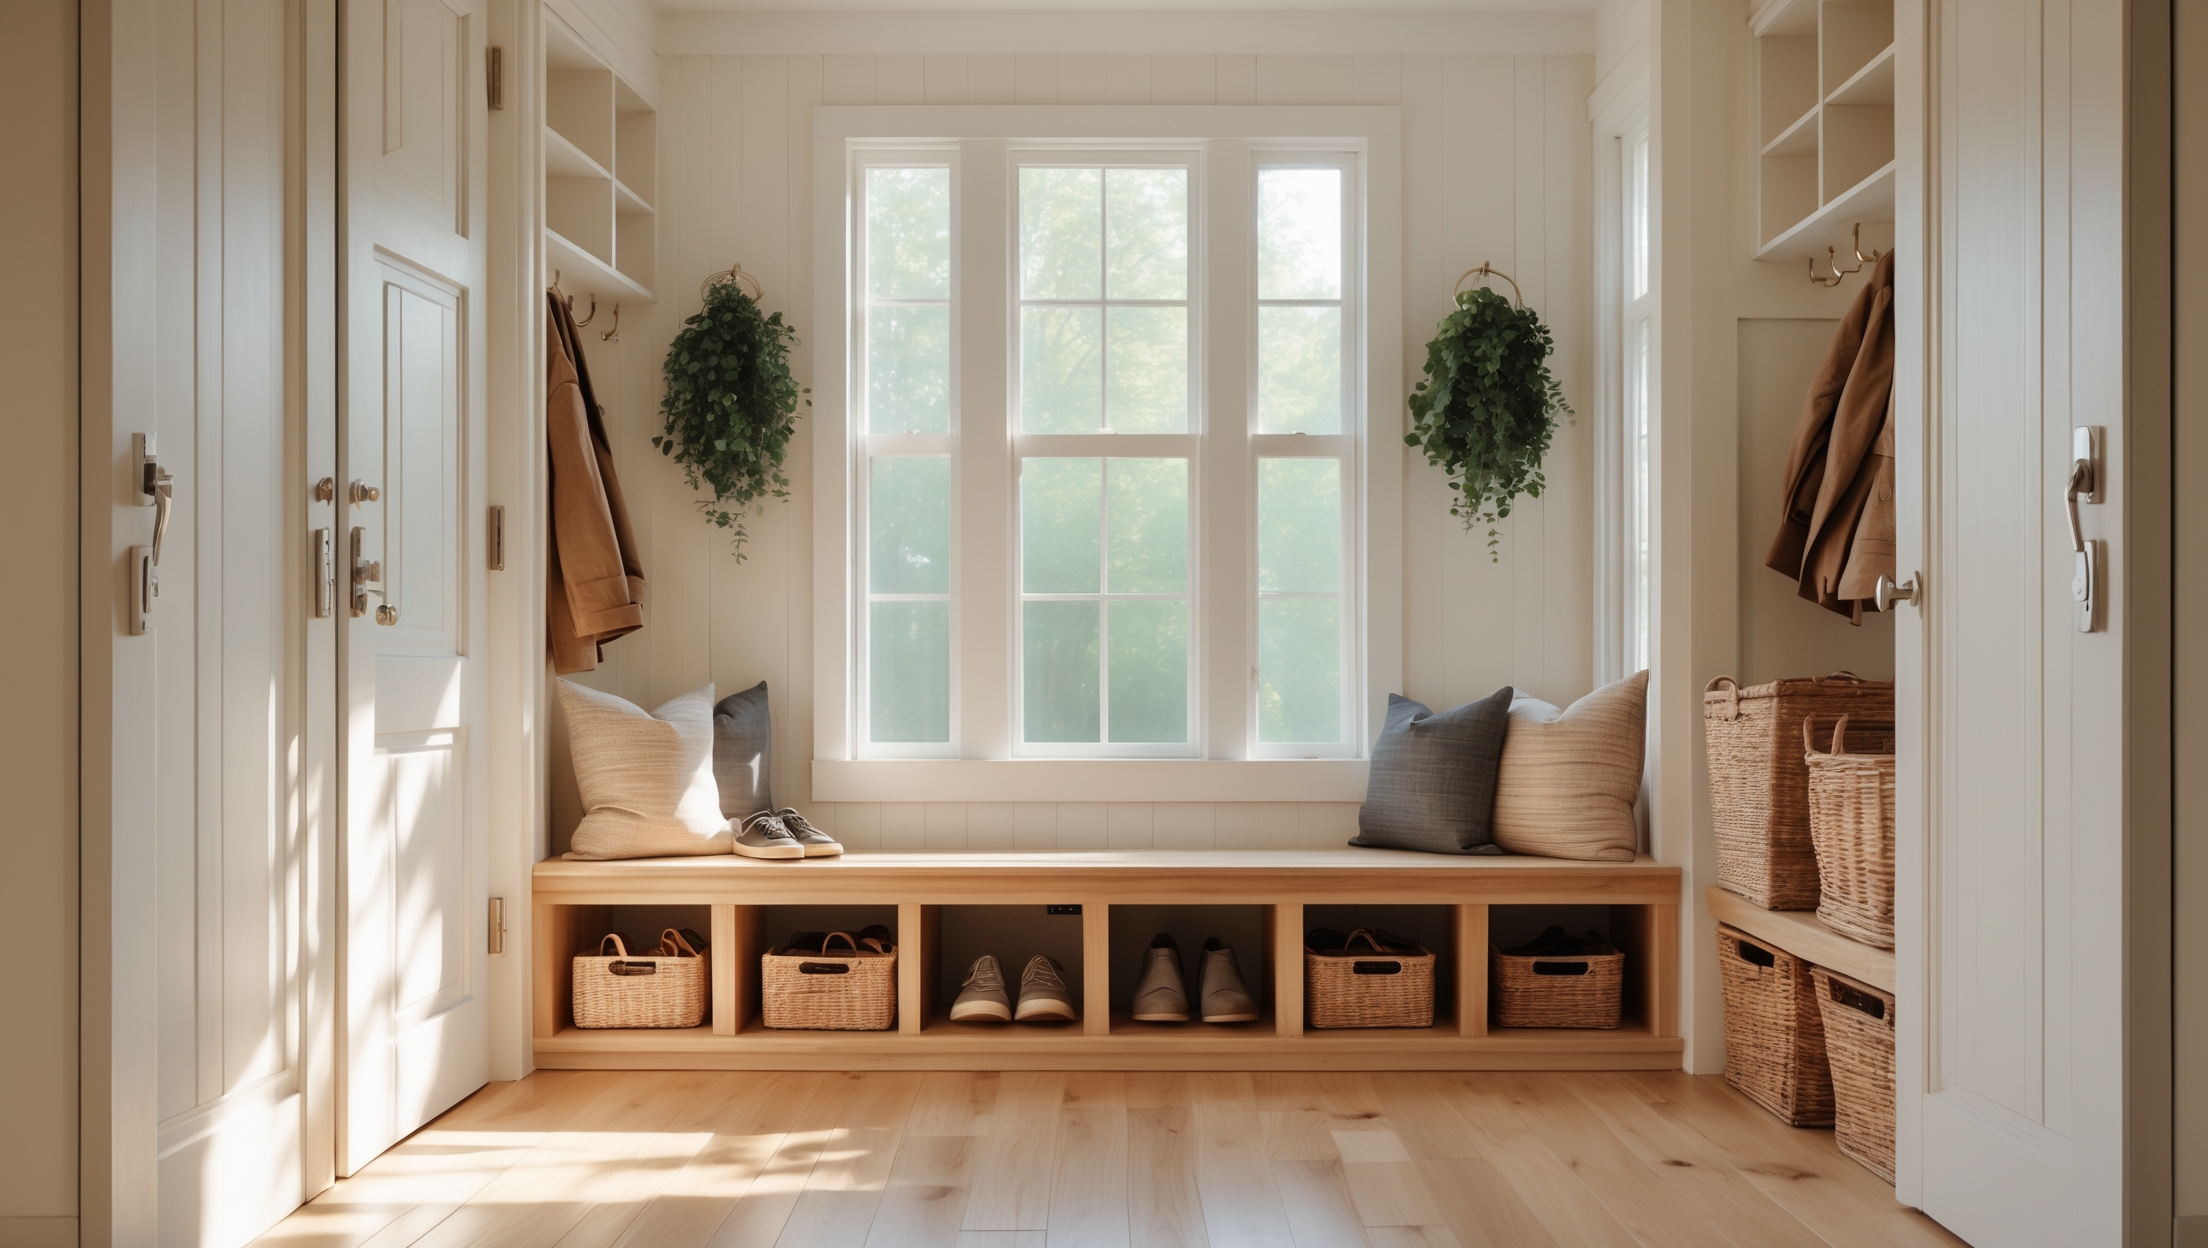
Introduction: Why a Mudroom Bench With Storage Transforms Your Entryway
First impressions matter—and for many homes, the entryway sets the stage. Yet, it’s also the zone most prone to clutter: shoes, bags, coats, pet leashes, and the odds and ends of daily life. If you’re tired of tripping over sneakers or searching for lost gloves, a custom mudroom bench with built-in storage could be the perfect solution. More than just a seat, this DIY upgrade offers a dedicated place for every essential, helping the entire household stay organized from the moment they walk in. Plus, building your own allows you to tailor the size, style, and storage configuration to your family’s unique needs and your home’s dimensions.
This comprehensive, step-by-step tutorial will walk you through the process—from planning and budgeting to final touches. Whether you’re a seasoned DIYer or tackling your first major project, you’ll learn which tools matter most, how to avoid common pitfalls, and how to ensure a safe, durable result. Ready to reclaim your entryway and add lasting value to your home? Let’s dive in.
Planning Your Mudroom Bench: Design, Function, and Measurements
Assessing Your Entryway Needs
Start with a clear-eyed look at how your household uses the entry space. Consider these questions:
- How many people will use the bench daily?
- Do you need storage for shoes, boots, bags, or sports equipment?
- Would cubbies, drawers, or baskets best suit your family’s habits?
- Is there wall space for hooks, or do you need a back panel?
Sketch a rough floor plan, marking doors, windows, and electrical outlets. This ensures your bench won’t block walkways or access points.
Choosing Bench Dimensions
- Height: Standard bench height is 18–20 inches for comfortable sitting.
- Depth: 15–18 inches offers enough space for sitting and under-seat storage.
- Length: Measure your available wall space, allowing at least 6–12 inches clearance from adjacent doors or walkways.
Take precise measurements and double-check before purchasing materials.
Deciding on Storage Options
- Open cubbies: Great for shoes and baskets. Easiest to build and clean.
- Drawers: Provide concealed storage, ideal for gloves, hats, or pet gear.
- Lift-top benches: Offer deep storage for seasonal items but require sturdy hinges and safety considerations.
- Wall hooks or shelf: Consider a matching upper section for coats, bags, or hats.
Budgeting Your Project: Cost Breakdown and Smart Savings
Materials Estimate
- Lumber (plywood, MDF, or hardwood): $80–$250 depending on size and wood type
- Wood screws, nails, fasteners: $10–$20
- Wood glue: $5–$10
- Paint, stain, or finish: $20–$50
- Drawer slides or hinges: $15–$40 (if adding drawers or lift-top)
- Baskets or bins (optional): $30–$60
- Hooks (if adding an upper section): $15–$40
Total estimated cost: $160–$470 depending on complexity and finish.
Ways to Save
- Use MDF or plywood for hidden structural parts to cut costs.
- Check local hardware stores for off-cut lumber or surplus materials.
- Repurpose baskets or bins you already own.
- Watch for seasonal sales on paint and hardware.
Essential Tools & Equipment Guide
Having the right tools makes a world of difference, both for safety and for professional-looking results. Here’s what you’ll need:
- Measuring tape and carpenter’s square: For accurate cuts and layouts.
- Circular saw or miter saw: For straight, clean cuts on lumber and panels.
- Drill/driver set: For assembling the frame and attaching hardware.
- Jigsaw: Useful for cutting openings or notches.
- Sander or sanding block: For smoothing edges and prepping for paint or stain.
- Paintbrushes or rollers: For finishing touches.
- Clamps: To hold pieces in place during assembly and gluing.
- Safety gear: Safety glasses, dust mask, and hearing protection.
Step-by-Step: Building Your Mudroom Bench With Storage
Step 1: Cut All Panel and Frame Pieces
Using your measurements, cut the following:
- Top panel (the seat)
- Side panels (ends that support the seat)
- Bottom panel (base)
- Dividers (for cubbies or drawer sections)
- Back panel (optional, for added rigidity or if attaching to the wall)
Label each piece to avoid confusion during assembly.
Step 2: Assemble the Bench Box
Lay out the sides, bottom, and dividers. Apply wood glue at the joints and secure with screws, using clamps to hold everything square. Pre-drill holes to prevent splitting. Attach the back panel if using.
Step 3: Install Storage Features
- Cubbies: Slide in horizontal shelves or vertical dividers as planned. Secure with screws and glue.
- Drawers: Build simple drawer boxes from plywood. Install drawer slides according to manufacturer instructions.
- Lift-top: Attach the seat with safety hinges to prevent finger pinching.
Step 4: Attach the Bench Top (Seat)
Position the top panel and secure with screws from underneath or inside for a clean look. If you’re using a lift-top design, ensure hinges are rated for the weight and operate smoothly.
Step 5: Sand and Prepare for Finishing
Sand all surfaces, focusing on edges and corners to prevent splinters. Wipe down with a tack cloth to remove dust. Fill any screw holes or gaps with wood filler and sand again once dry.
Step 6: Paint, Stain, or Seal
- Select a durable paint or stain that complements your home’s style. Semi-gloss paint is easy to clean and resists scuffs in high-traffic areas.
- Apply primer if using paint, then two coats of your chosen finish. Allow each coat to dry fully before sanding lightly and applying the next.
Step 7: Add Finishing Touches
- Install baskets, bins, or drawer pulls.
- Attach a matching upper shelf or coat hooks if desired.
- Secure the bench to the wall with L-brackets for added safety, especially in homes with children.
Safety Checklist: Build and Install With Confidence
- Always wear safety glasses when cutting or sanding wood.
- Use a dust mask when sanding or handling MDF/plywood.
- Keep your workspace well-ventilated, especially when painting or staining.
- Double-check all screws and joints for stability before use.
- Secure the bench to wall studs to prevent tipping accidents.
- Choose hardware rated for the intended weight (especially for lift-tops or drawers).
- Keep tools out of reach of children during and after the project.
Maintenance Best Practices for Long-Lasting Results
Your new mudroom bench is built for everyday use, but a little care goes a long way. To keep it looking and functioning its best:
- Wipe surfaces regularly with a damp, non-abrasive cloth.
- Treat scuffs with a matching touch-up marker or paint.
- Inspect for loose screws or hardware every few months and tighten as needed.
- Clean baskets or bins to prevent dust and debris buildup.
- Reapply a protective finish every couple of years, especially if the entryway is exposed to heavy moisture or mud.
Common Myths Debunked: DIY Mudroom Benches
- Myth: Only professionals can make built-ins look good.
Reality: With careful planning and attention to finishing details, DIYers can achieve a polished, custom look. - Myth: Storage benches require advanced woodworking skills.
Reality: Basic carpentry skills and patience are enough for most designs. Modular plans and pre-cut panels make it even easier. - Myth: Built-ins can’t be moved or adapted.
Reality: Many DIY benches are freestanding or semi-permanent, so you can relocate or update them as needs change.
Creative Upgrades: Personalizing Your Mudroom Bench
- Add a cushioned seat pad in a durable, washable fabric for extra comfort.
- Install under-bench LED strip lights for added visibility and style.
- Use contrasting paint or stain colors for the seat and base for a designer touch.
- Mount a personalized nameplate or chalkboard labels on cubbies for each family member.
Conclusion: Enjoying Your Organized, Functional Entryway
Building a custom mudroom bench with storage isn’t just about adding furniture—it’s about transforming the way your household enters and exits the home each day. With a place for everything and everything in its place, you’ll reduce daily stress, minimize clutter, and even boost your home’s resale appeal. The skills you learn in this project—from precise measuring and safe tool use to creative finishing techniques—can empower you for future DIY adventures.
Remember, your bench is more than an organizational tool: it’s a reflection of your family’s personality and routines. By customizing the design, storage, and finish, you create a solution that truly fits your needs. And by tackling the build yourself, you gain the satisfaction of a job well done—along with a welcoming, practical entryway that makes every return home a little bit easier.
So, gather your tools, follow these steps, and enjoy the lasting benefits of a clutter-free, stylish mudroom. Whether it’s corralling muddy boots after a rainy day or organizing backpacks for school, your new bench will quickly become one of the most appreciated features of your home.
If I want to add extra shoe storage for a family of five, should I increase the depth or length of the bench beyond the standard measurements mentioned?
To add extra shoe storage for a family of five, it’s usually best to increase the length of the bench rather than the depth. This way, you can fit more individual cubbies or shelves for shoes without making the bench stick out too far into the room, keeping the space comfortable and accessible.
Could you provide an estimate of the total time and basic materials cost for someone tackling this project for the first time?
For a first-time builder, expect the project to take about 1 to 2 full weekends, including planning and finishing time. Basic materials like plywood, lumber, screws, paint, and hardware typically cost between $150 and $300, depending on local prices and specific design choices.
I noticed the article suggests leaving a 6–12 inch clearance from doors and walkways. If the available space is tight, what’s the minimum clearance you’d recommend for safety and usability?
If space is limited, try to maintain at least a 3–4 inch clearance between the bench and doors or walkways. This is the bare minimum to allow doors to open fully and for people to pass by safely, though a bit more space is always better if possible.