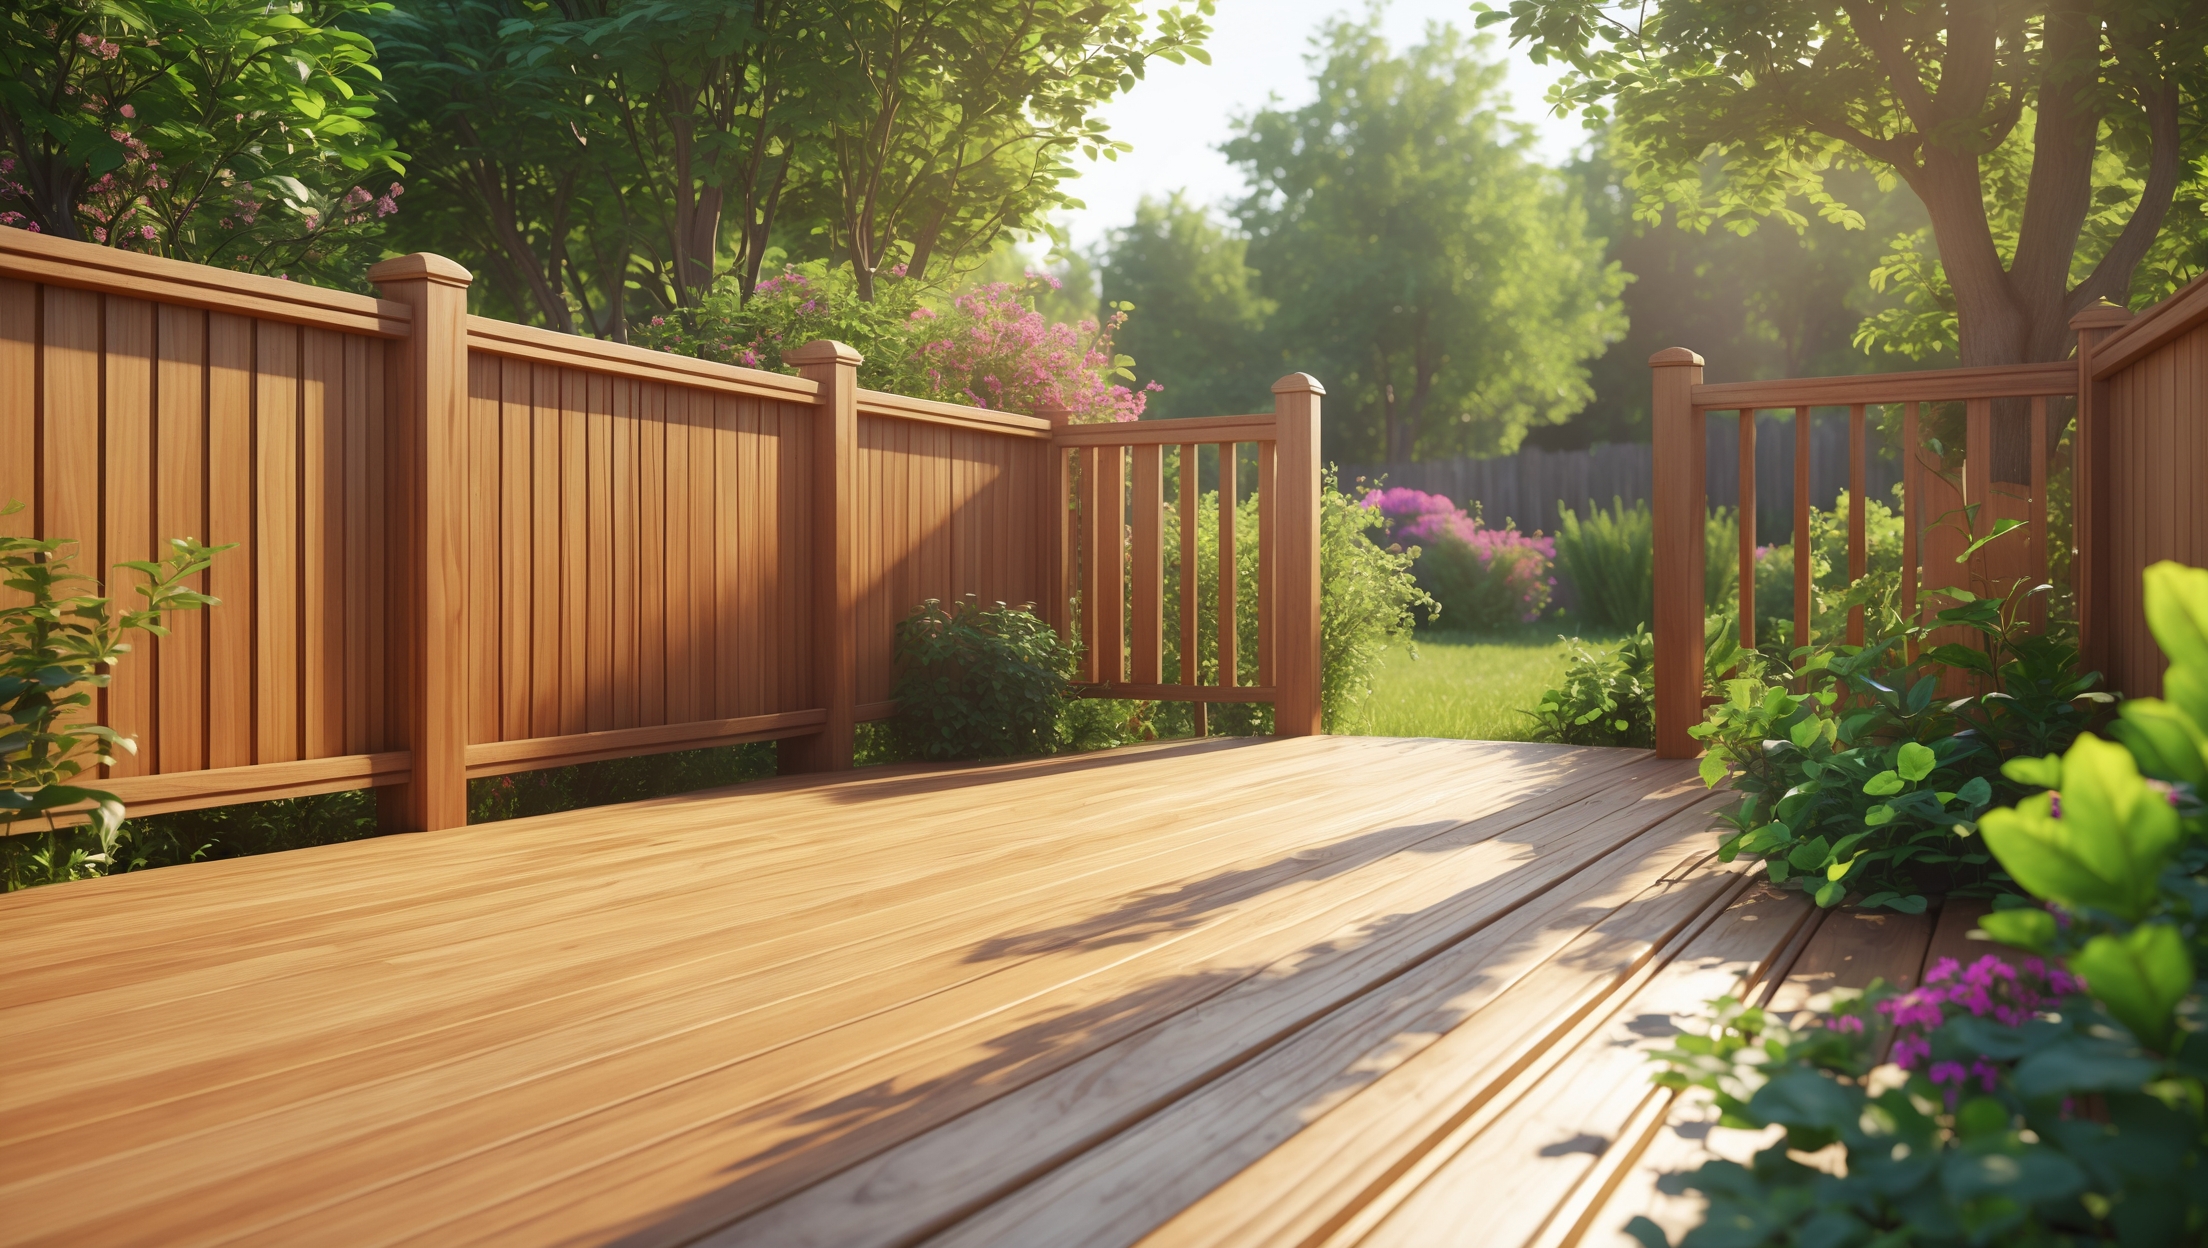
Introduction: The Importance of Exterior Wood Maintenance
Wood is a classic, beautiful choice for home exteriors—think decks, fences, railings, siding, pergolas, and trim. However, all that curb appeal comes with a challenge: exposure to sun, rain, wind, and insects can quickly degrade even the finest woodwork. Without proper care, you risk rot, discoloration, warping, and costly repairs. The good news? With the right maintenance strategies, you can dramatically extend the life and beauty of your home’s exterior wood features. This guide delivers practical, field-tested best practices for every step, from routine cleaning to long-term preservation. Whether you’re a new homeowner or a seasoned DIYer, you’ll find actionable advice to protect your investment and keep your wood looking its best year after year.
Understanding the Enemies of Exterior Wood
Moisture and Water Damage
Water is the primary enemy of exterior wood. Prolonged exposure leads to swelling, warping, and eventually rot. Even treated wood will succumb over time if water is allowed to pool or seep in. Leaky gutters, overflowing planters, and inadequate drainage all accelerate deterioration.
Sunlight and UV Exposure
UV rays break down the lignin in wood, leading to fading, graying, and surface checking. The loss of natural oils causes wood to become brittle and more susceptible to cracking.
Insects and Fungi
Termites, carpenter ants, and wood-boring beetles are notorious for damaging exterior wood. Fungi, especially wood-decay fungi, thrive in damp environments and can destroy wood from the inside out.
Temperature Swings and Physical Stress
Freeze-thaw cycles, heavy snow loads, and even foot traffic can stress wood, causing splits, raised grain, and fastener loosening. Choosing the right wood and maintenance approach for your climate is essential.
Routine Inspection: The Foundation of Effective Maintenance
When and How Often to Inspect
Plan to inspect all exterior wood features twice a year: once in the spring, and once in the fall. After severe weather events—such as storms or heavy snowfall—conduct an additional spot check.
What to Look For
- Discoloration: Fading, graying, or black spots may indicate sun damage, mold, or mildew.
- Soft Spots: Press gently with a screwdriver—soft or spongy areas can signal rot.
- Cracks and Splits: Note any new or widening splits, as these allow water intrusion.
- Loose or Missing Fasteners: Check for protruding nails, screws, or brackets.
- Insect Activity: Look for small holes, sawdust piles, or mud tubes.
- Surface Growth: Moss, algae, or lichen can trap moisture and accelerate decay.
Documenting and Tracking Issues
Keep a maintenance log. Note inspection dates, observed issues, repairs, and treatments. Photos taken with your smartphone are invaluable for monitoring changes over time.
Cleaning: The First Step to Preservation
Why Regular Cleaning Matters
Dirt, pollen, and organic debris trap moisture against wood, creating a breeding ground for mold and mildew. Regular cleaning not only preserves appearance but also exposes minor issues before they escalate.
Step-by-Step Cleaning Procedure
- Remove Debris: Use a broom or leaf blower to clear leaves, twigs, and dirt from surfaces and between boards.
- Rinse: Gently spray down surfaces with a garden hose. Avoid pressure washers unless you’re experienced; excessive force can damage wood fibers.
- Apply Cleaner: For general cleaning, mix warm water with a few drops of dish soap. For mildew or algae, use a solution of 1 cup oxygen bleach per gallon of water. Apply with a soft-bristle brush.
- Scrub Gently: Work in the direction of the wood grain. Pay attention to crevices and joints.
- Rinse Thoroughly: Remove all cleaning residue. Let the wood dry completely before inspecting further or applying treatments.
When to Use Pressure Washing
Pressure washing can rejuvenate grayed wood but must be used with caution. Use the lowest effective pressure (typically under 1500 psi), a wide fan tip, and keep the nozzle at least 12 inches from the surface. Always test on an inconspicuous area first.
Repairing Damage: Addressing Problems Early
Dealing With Rot
- Identify the Extent: Probe suspect areas with a screwdriver. If wood crumbles or feels spongy, it’s likely rot.
- Remove Affected Wood: Use a chisel or saw to cut out all damaged sections, extending slightly into healthy wood.
- Apply Wood Hardener: For minor surface rot, apply a liquid wood hardener to stabilize fibers before filling.
- Fill or Replace: Use exterior-grade wood filler for small repairs. For significant damage, replace boards or trim entirely.
Fixing Cracks and Splits
Clean out cracks thoroughly. Fill with high-quality, paintable exterior caulk or wood epoxy. For structural splits, reinforce with galvanized metal brackets or fasteners as needed.
Re-Securing Loose Fasteners
Remove and replace any rusted or protruding nails with stainless steel or hot-dipped galvanized alternatives. Tighten loose screws and consider upgrading to longer fasteners for improved hold.
Protective Treatments: Stain, Seal, or Paint?
Choosing the Right Finish
The ideal finish depends on your wood type, climate, and aesthetic preferences:
- Clear Sealers: Highlight natural grain but offer the least UV protection. Best for covered or shaded areas.
- Semi-Transparent Stains: Add subtle color while allowing grain to show. Good balance of protection and appearance.
- Solid Stains: Opaque, providing strong UV and weather protection. Hide imperfections in older wood.
- Paint: Maximum barrier against the elements, but can peel or blister if not properly applied. Choose high-quality exterior latex or acrylic paint.
Application Best Practices
- Only apply finishes to clean, completely dry wood. Wait 24–48 hours after washing or rain.
- Sand rough or raised grain areas lightly. Remove sanding dust with a tack cloth.
- Apply with a brush, roller, or sprayer, following the wood grain. Watch for drips or puddling in joints.
- Follow manufacturer’s instructions for number of coats and drying times.
- Reapply sealers or stains every 2–3 years, or as recommended. Painted surfaces may last 5–7 years between repaints if properly maintained.
Don’t Skip the End Grain!
End grain absorbs water quickest and is most prone to rot. Always saturate cut ends with sealer or paint, and consider using end-grain preservative on deck and fence posts.
Climate-Specific Strategies
Wet and Humid Regions
- Select rot-resistant species (cedar, redwood, pressure-treated pine).
- Ensure all wood is elevated off the ground, using concrete piers or metal post bases.
- Maintain wide gaps between deck boards for airflow and drainage.
- Inspect for mold frequently and treat promptly with fungicidal wash.
Dry and Sunny Climates
- Choose UV-resistant stains or paints, and recoat regularly.
- Sand and remove surface checks before finishing to prevent deeper cracks.
- Install shade structures or awnings to reduce direct sun exposure.
Cold and Snowy Areas
- Use water-repellent preservatives to minimize freeze-thaw damage.
- Clear snow promptly to avoid ice buildup and excessive weight.
- Check fasteners each spring—freeze cycles can loosen them over time.
Preventing Pest and Fungal Attacks
Physical Barriers and Design Choices
- Maintain at least 6 inches of clearance between wood features and soil.
- Cap fence and deck posts with metal or vinyl toppers to shed water.
- Keep shrubs and vines trimmed away from wood to promote air circulation.
Chemical Treatments
- Apply borate-based preservatives to vulnerable areas, especially cut ends and ground-contact points.
- Use insecticidal treatments only as needed, and always follow safety guidelines.
Seasonal Maintenance Checklist
Spring
- Clean all exterior wood surfaces.
- Inspect for winter damage: cracks, rot, loose fasteners.
- Touch up finishes or reapply as needed.
- Trim back vegetation and clear debris.
Summer
- Monitor for UV damage, fading, or splitting.
- Water nearby landscaping carefully to avoid over-saturating wood.
- Inspect for insect activity and treat if necessary.
Fall
- Deep clean and remove moss or algae.
- Repair minor damage before winter freezes set in.
- Apply fresh stain or sealer if due.
Winter
- Clear snow and ice promptly with plastic shovels (avoid metal tools that can gouge wood).
- Check drainage and ensure water flows away from wood structures.
Proactive Upgrades for Long-Term Durability
Flashing and Water Management
- Install metal flashing where decks meet houses, along railings, and atop posts.
- Use drip edges on sills and horizontal trim to direct water away.
- Maintain gutters and downspouts to prevent overflow near wood features.
Hardware and Fastener Choices
- Upgrade to stainless steel or coated fasteners to prevent rust streaks and corrosion.
- Replace old hardware as needed—especially in coastal or humid environments.
Frequently Overlooked Maintenance Tips
- Store unused stain, paint, and cleaning supplies in a cool, dry place for touch-ups.
- Label and date all products so you can match finishes in the future.
- Check for hidden wood—under stairs, behind planters, or beneath railings—where problems often start.
- Don’t forget to maintain wood accents like shutters, window boxes, and porch ceilings.
Conclusion: Protecting Your Investment for Years to Come
Exterior woodwork is a hallmark of a warm, inviting home—but it demands care and attention to stay that way. By understanding the specific threats posed by weather, moisture, and pests, you set yourself up for success. Routine inspection and cleaning, timely repairs, and the right choice of protective finishes can add decades to the life of your decks, fences, and siding. Adapt your maintenance approach to your climate and don’t neglect seasonal tasks—these small, consistent efforts pay off with lasting beauty and structural integrity. Even the most meticulously crafted wood features can fall victim to neglect. With these best practices, you’ll not only avoid costly repairs but also enjoy your home’s curb appeal and outdoor spaces to the fullest. Make wood maintenance a regular part of your home care routine, and you’ll reap the rewards every time you step outside.
For a small business with a high-traffic wood entryway, is there a recommended maintenance schedule or product type to help minimize wear and prevent raised grain or cracking?
For a high-traffic wood entryway, clean and inspect the surface weekly, and reapply a high-quality exterior polyurethane or marine-grade varnish every 6–12 months. Use mats to reduce wear, and address any scratches or raised grain promptly by lightly sanding and resealing those areas.
You mention sun and UV exposure causing wood to become brittle and gray. Are there any specific types of stains or sealers that are particularly good at protecting against UV damage for homes in very sunny climates?
For very sunny climates, look for exterior wood stains or sealers labeled as UV-resistant or with added UV inhibitors. Semi-transparent or solid-color stains usually offer better UV protection than clear sealers because they contain more pigments, which help shield the wood from sun damage and keep it looking vibrant longer.
My deck gets a lot of afternoon sun and some boards are already looking faded and dry. Is it better to use a sealer, a stain, or something else for UV protection, especially in hot climates?
For decks in hot, sunny climates, a high-quality semi-transparent stain is usually best—it offers both UV protection and moisture resistance. Sealers protect against water but don’t usually shield wood from UV rays. Re-stain every couple of years to keep your deck looking its best and prevent further fading.
Can you elaborate on how to spot the early signs of insect or fungal damage during a routine inspection? I’m not sure what to look for beyond obvious holes or rot.
During your inspection, look for subtle signs like blistering or peeling paint, fine sawdust piles (frass), small exit holes, or discolored patches on the wood. Tap the surface to check for hollow sounds, which can indicate hidden damage. For fungal issues, watch for soft, spongy spots, white or gray growths, and musty odors.
If I’ve already noticed some graying and minor cracking from sun exposure on my deck, is it better to sand down the affected areas before applying a new protective finish, or will cleaning alone suffice?
If your deck has graying and minor cracking, sanding the affected areas before applying a new finish is recommended. This removes weathered wood and smooths the surface, helping the protective finish adhere better. Cleaning alone might not restore the wood’s appearance or ensure long-lasting protection.
I have a couple of kids and not a lot of spare time for upkeep. What would you say are the most important maintenance steps to prioritize if I can only check on my wood deck and fence maybe once or twice a year?
If you’re only able to check your deck and fence once or twice a year, focus on cleaning off debris, looking for signs of rot or damage, and reapplying a water-repellent sealant if needed. Catching problems early and keeping surfaces sealed are the most important ways to extend their lifespan with limited maintenance.
You talk about both UV exposure and moisture as major threats, but is there a wood finish or treatment you’ve found that works best against both issues in humid climates?
In humid climates, a high-quality exterior-grade spar varnish or marine-grade polyurethane offers excellent protection against both UV rays and moisture. Look for products with UV blockers and water-repellent properties. Regularly reapply as recommended by the manufacturer to maintain the protection and keep your wood features looking great.
If my wood deck is already starting to gray from sun exposure, is it better to restore it with a cleaner and brightener, or should I just sand and reseal it?
If your deck is showing gray from sun exposure, starting with a wood cleaner and brightener can often restore much of its color without heavy sanding. After cleaning and brightening, you can reseal it. Sanding is best if the surface feels rough or the graying is deep.
Are certain wood species naturally more resistant to sun and moisture damage, or is proper maintenance equally important no matter what kind of wood you have outside?
Some wood species like cedar, redwood, and teak are naturally more resistant to sun and moisture damage due to their natural oils and density. However, even these woods benefit from regular maintenance, such as sealing and cleaning, to maximize their lifespan and keep them looking their best.
I live in an area with heavy snowfall and big temperature swings in winter. Are there specific wood types or protective finishes you recommend that can handle these freeze-thaw cycles better?
For harsh winters with lots of snow and temperature changes, woods like cedar, redwood, and pressure-treated lumber hold up best outdoors. Use high-quality exterior stains or paints that offer water resistance and flexibility, such as penetrating oil-based stains or acrylic latex paints, to help the wood handle freeze-thaw cycles.
If exterior wood has already started to turn gray from UV exposure, is there a way to restore its color before applying a protective finish, or is it too late?
You can restore the color of exterior wood that’s turned gray by cleaning it with a wood cleaner or brightener, which helps remove the gray layer caused by UV exposure. After cleaning and allowing it to dry fully, you can apply your protective finish for best results.
How do you suggest we handle frequent inspections during wet seasons when our fences are more prone to water damage? Is twice a year really enough if we’ve had unusually heavy rainfall?
If your area has experienced unusually heavy rainfall, it’s wise to inspect your fences more often than just twice a year. Consider checking them every couple of months during wet seasons. Look for early signs of water damage, like discoloration or soft spots, and address any problems quickly to prevent further deterioration.
Could you clarify what specific products or treatments are most effective for protecting exterior wood from UV damage, and how often they should be reapplied in a sunny climate?
For strong UV protection, use high-quality exterior wood stains or sealers with UV inhibitors, such as oil-based stains or clear finishes labeled for UV resistance. In sunny climates, reapply these products every 1–2 years, or sooner if you notice fading or weathering. Regular cleaning before reapplication helps ensure the treatment adheres properly.
Maintaining wood can get expensive with labor and materials. Could you suggest budget-friendly approaches for keeping fences and trim in decent shape if we can only treat them once a year?
To save costs, choose a quality, long-lasting sealant or stain that’s designed for annual application. Clean surfaces well before treating, and use a brush to ensure even coverage. Trim back nearby plants to reduce moisture and decay. Spot-treat damaged areas between yearly maintenance to prevent small issues from spreading.
Can you recommend the easiest ways to tell if my deck or fence is starting to rot or attract insects? I don’t always notice small changes until it’s a bigger problem.
To spot early signs of rot, press a screwdriver gently into the wood—soft spots mean trouble. Look for discoloration, flaking, or spongy areas. For insects, check for tiny holes, sawdust piles, or mud tubes along the wood. Regularly walking around and inspecting corners or hidden spots helps catch these issues early.
When you talk about water damage being the biggest threat, are there specific signs during an inspection that would show early rot or leakage, especially in places like decks or fences?
Yes, early signs of water damage or rot in decks and fences include soft or spongy wood, discoloration, peeling paint, and visible mold or mildew. You might also see cracks, warping, or areas where fasteners are rusting or pulling away. Regularly check joints, ends of boards, and anywhere wood meets the ground.
If I live in an area with really harsh winters and a lot of temperature swings, should I be doing anything differently for wood decks or fences beyond the basic cleaning and sealing?
In areas with harsh winters and big temperature swings, it’s important to inspect your wood decks and fences more frequently for cracks, warping, or peeling. Consider sealing them more often, use a high-quality, flexible wood sealant, and remove snow buildup promptly to prevent moisture damage.
How can I tell if water is getting into my deck, especially around fasteners or in hidden spots? Is there a way to spot early signs before the damage gets bad?
To spot early signs of water intrusion, look for discoloration, soft spots, raised or rusting fasteners, and swelling around joints. Press on boards near fasteners to check for softness. Check the underside and less visible areas for mold or mildew. Regularly inspecting after rain can reveal damp patches before major damage develops.
When you mention routine cleaning as part of maintenance, are there specific cleaning methods or products that are best for preventing both UV and moisture damage, or should those be treated separately?
Routine cleaning mainly removes dirt and mildew, which helps maintain the wood but doesn’t directly prevent UV or moisture damage. For those issues, use a gentle soap solution for cleaning, then apply separate products: a UV-protective sealant and a water-repellent finish. These specialized treatments should be done after cleaning for best results.
Can you recommend how to tell the difference between regular weathering and signs of insect or fungi damage during those twice-yearly inspections?
Look for changes in color and surface texture. Regular weathering usually causes even fading or graying. Insect damage often shows tiny holes, sawdust, or tunnels, while fungi or rot appear as soft, spongy areas, discoloration like black or white patches, or cracking. If you notice wood crumbling or a musty smell, that’s more likely fungi.
Do you have any recommendations for low-maintenance wood types or treatments that would hold up better in areas with a lot of rain and frequent freeze-thaw cycles?
For wet and freeze-prone climates, consider woods like cedar, redwood, or pressure-treated pine, as they resist moisture and decay well. Applying high-quality, penetrating sealants or stains regularly helps protect against water damage and temperature swings, reducing maintenance needs over time.
I noticed you mention leaky gutters and poor drainage can worsen wood rot. Are there any quick ways to spot these drainage issues before they start causing serious problems for wood decks or fences?
You can spot drainage issues early by checking for water pooling near your deck or fence after rain, looking for soil erosion around posts, and inspecting gutters for clogs or overflow. Catching these signs quickly can help prevent wood rot and other damage.
You mentioned UV rays breaking down the lignin in wood and causing it to gray. For someone dealing with faded decking, is it better to use a tinted stain or a clear sealer to restore color and protect from further sun damage?
For faded decking, a tinted stain is usually the better choice. It helps restore color and provides stronger UV protection than a clear sealer, which mainly guards against moisture but offers minimal sun defense. Choose a stain shade that matches your desired look for the best results.
For areas that get a lot of rain or snow, do you recommend any particular type of sealant or protective coating that holds up better over time? I’m wondering if some finishes are really worth the extra cost.
For rainy or snowy climates, a high-quality, oil-based exterior wood sealer or a marine-grade spar varnish provides excellent long-term protection. While these finishes may cost more upfront, they’re worth it because they resist moisture and UV damage much better than standard sealants, helping your wood features last longer with less frequent reapplication.
You mention that UV exposure can make wood brittle and cause surface checking. Do certain types of finishes or stains offer better protection against sun damage, and how often should they be reapplied in harsh climates?
Yes, finishes with UV-blocking properties, such as high-quality exterior stains or clear sealers with added UV inhibitors, provide better protection against sun damage. In harsh climates, these should typically be reapplied every 1 to 2 years to maintain their effectiveness and keep your wood looking its best.
For someone in a really humid climate, are there any extra steps I should take to prevent rot or fungal problems on my deck, besides just routine cleaning and inspection?
In humid climates, it’s helpful to apply a high-quality, water-repellent wood sealant to your deck and reapply it as recommended. Make sure there’s good airflow around the deck by trimming nearby plants and avoid letting leaves or debris accumulate, as these trap moisture and encourage rot or fungal growth.
For someone dealing with both hot summers and snowy winters, are there certain types of finishes or sealants that hold up better against those temperature swings and moisture changes mentioned in the article?
In climates with both hot summers and snowy winters, look for high-quality exterior wood finishes labeled as ‘UV-resistant’ and ‘water-repellent.’ Oil-based sealants or penetrating stains generally offer better flexibility and protection against temperature swings and moisture. Reapply every few years, and make sure surfaces are properly prepped before each application for best results.
Could you give specific advice for dealing with wood features in a rainy climate where moisture is a big issue? I worry about rot starting under planters or along the fence line.
In rainy climates, use water-repellent sealants on wood and reapply them regularly. Make sure planters have drainage and sit on risers so moisture doesn’t collect underneath. For fences, keep the base slightly above ground and clear away leaves or debris that trap moisture. Regular inspections for soft spots can help catch rot early.
If I’m on a budget, are there affordable maintenance steps I can take to prevent UV and water damage before investing in full professional treatments for my wood siding?
Absolutely, you can do a lot on a budget. Regularly clean your wood siding with mild soap and water, and use a clear UV-protective sealant for added defense. Trimming back plants and ensuring gutters drain away from the siding also helps prevent moisture issues until you’re ready for professional treatments.
What’s the typical cost difference between treating wood features yourself and hiring a professional for annual maintenance? I want to make sure my fence and siding last but am trying to budget realistically.
Doing the maintenance yourself usually costs between $50 and $200 per year for supplies like sealant and brushes. Hiring a professional can range from $500 to $1,500 annually, depending on the size and condition of your fence and siding. DIY saves money but takes more time and effort.
For those of us on a tight budget, are there DIY preservation methods or products you recommend that are still effective against moisture and insects?
Absolutely! You can use affordable options like linseed oil or homemade borax water solutions to help protect wood from moisture and insects. Regular cleaning, prompt repair of damage, and applying a basic water-repellent sealer every year can also go a long way without breaking the bank.
You mention inspecting exterior wood twice a year—what specific signs of insect or fungus damage should I look for during those checks, especially if I live in a humid climate?
When inspecting exterior wood, look for small holes, sawdust piles, or tunnels as signs of insect activity. For fungus, check for soft, spongy wood, discoloration, cracking, or visible mold and mildew. In humid climates, pay close attention to shaded or damp areas where moisture can linger and promote fungal growth.
How do you know if the damage to your exterior wood is from moisture or from sun exposure? Are there certain signs you should look for during inspections?
Moisture damage usually appears as soft, spongy, or discolored wood, sometimes with mold or peeling paint. Sun exposure, on the other hand, often causes fading, cracking, or warping but the wood remains dry. During inspections, check for softness to the touch and dark spots for moisture, and for grayness, splintering, or dryness for sun damage.
You mention the importance of routine inspections—could you give more specifics on what signs of water damage or insect activity I should look for as a busy parent with limited time?
When inspecting, look for peeling paint, soft or spongy wood, dark stains, or mold, which can indicate water damage. For insect activity, check for small holes, sawdust piles, or wood that sounds hollow when tapped. Focusing on these visible signs during a quick walk-around can help you spot problems early.
How much maintenance should I budget for exterior wood upkeep each year if I live in a region with heavy rain and freeze-thaw cycles? I’m trying to balance curb appeal with realistic time and money costs.
In regions with heavy rain and freeze-thaw cycles, plan for annual maintenance costs of $1–$3 per square foot for exterior wood. This includes cleaning, sealing, touch-up painting or staining, and minor repairs. Set aside a weekend or two each year for the work to keep curb appeal high and prevent costly long-term issues.
I see that sunlight and UV rays can cause wood to fade and crack. Are there specific finishes or products you’d recommend to prevent this, especially for decks that get a lot of direct sun?
For decks exposed to a lot of sun, use a high-quality exterior wood stain with UV protection or a clear sealer that offers UV inhibitors. Look for products labeled as ‘UV-resistant’ or ‘UV-blocking.’ Semi-transparent stains generally offer better protection while letting the wood grain show through.
How do I know if I need to completely replace a section of wood, or if it’s enough to just clean and seal it? I want to avoid unnecessary costs but still keep things durable.
Check the wood for signs like deep rot, softness, or crumbling when pressed with a screwdriver—these mean replacement is needed. If the wood is solid but just dirty or weathered, a thorough cleaning and resealing should be enough to restore durability without extra costs.
If my home’s wood siding is already showing signs of graying from sun exposure, is it too late to reverse the damage, or are there specific restoration steps I should try before considering replacement?
Graying wood siding from sun exposure usually isn’t permanent. You can often restore its appearance by cleaning with a wood cleaner, lightly sanding the surface, and applying a wood brightener. Once dry, seal or stain the wood to protect it. Replacement is only needed if the wood is rotted or severely damaged.
If I find slight surface graying or minor cracking during inspection, how do I know if it needs professional repair, or if a DIY touch-up is enough to keep the wood durable?
Slight surface graying and minor cracks usually just need cleaning, light sanding, and resealing for maintenance. If the cracks are deep, the wood feels soft, or large sections are affected, it’s best to consult a professional. Regular touch-ups can extend durability if caught early.
How do you tell the difference between damage caused by fungi versus insects? Are there specific signs I should look for during the twice-yearly inspections?
Fungal damage often shows as discoloration, soft or crumbly wood, and sometimes a musty odor. Insect damage usually appears as small holes, tunnels, sawdust-like frass, or hollow-sounding wood. During inspections, look for these signs to help identify which issue you might be facing.
You mention that water is the main enemy of exterior wood. If I have a deck that tends to get puddles after heavy rain, what’s the best way for a beginner to improve drainage and prevent long-term damage?
To improve drainage on your deck, start by clearing debris from between the boards to allow water to flow through. Check if the deck boards are level—if not, you may need to slightly tilt them or sand high spots so water runs off. Also, keep nearby gutters and downspouts clear to prevent extra water from pooling.
If I discover early signs of rot or insect activity during my inspection, what’s the most cost-effective way to address it before it turns into a larger repair job?
When you spot early signs of rot or insect activity, remove any affected wood and treat the area with a wood preservative or borate solution. Seal cracks and repaint or reseal exposed surfaces. Acting quickly with these basic repairs usually prevents the problem from spreading and avoids costly replacements later.
For families on a budget, are there maintenance steps or products you recommend that offer good protection for exterior wood without spending a lot every season?
For budget-friendly maintenance, regular cleaning and applying a simple exterior wood sealant once a year can go a long way. Look for water-based sealers, which are often affordable and easy to apply. Also, keeping wood surfaces free of debris and trimming nearby plants helps prevent moisture damage at no extra cost.
The article mentions inspecting exterior wood twice a year, but what specific signs of early insect or fungus problems should I look for to avoid major repairs down the line?
Watch for small holes in the wood, sawdust-like residue, or fine webbing, which may signal insect activity. For early fungus issues, look for soft or discolored patches, black, white, or green spots, and any musty odors. Catching these signs early makes treatment much easier and helps prevent bigger issues.
What are some effective ways to restore exterior wood features that have already begun to gray from UV exposure, especially if replacing the wood isn’t an option?
To restore grayed exterior wood, start by thoroughly cleaning the surface with a wood cleaner or brightener. After cleaning, lightly sand the wood to remove the gray layer and smooth the surface. Once dry, apply a high-quality exterior wood stain or sealant to protect against future UV damage and help bring back the wood’s natural color.
Our climate has pretty extreme temperature swings and a lot of freeze-thaw in winter. Is there a certain type of wood or finish that stands up better to these conditions for things like railings and pergolas?
For climates with extreme temperature swings and freeze-thaw cycles, hardwoods like cedar, redwood, or pressure-treated lumber hold up well outdoors. As for finishes, look for high-quality, flexible exterior wood stains or paints labeled for all-weather protection—these expand and contract with the wood, helping prevent cracking and peeling.
If I missed a year of inspection and notice some warping and raised grain on my fence, what should I do first—should I sand it down, apply a sealant, or replace damaged boards?
Start by inspecting how severe the warping and raised grain are. If the boards are still sturdy, sand down the raised grain to smooth the surface. After sanding, clean and dry the wood before applying a quality sealant. Replace only any boards that are severely warped or rotten.
I’m curious about insect and fungi protection. Are there preventative treatments you suggest applying during routine inspections, or should that only be done if you notice a problem?
Preventative treatments are recommended even if you don’t notice any issues. Applying a quality wood preservative or sealant during routine inspections helps protect against insects and fungi. Regular maintenance like cleaning and reapplying these treatments every few years greatly reduces the risk of problems developing.
For homes in regions with heavy snow or frequent freeze-thaw cycles, are there additional maintenance steps you suggest beyond what’s listed here to prevent splitting or warping of wood features?
In snowy or freeze-thaw regions, it’s helpful to ensure wood surfaces are well-sealed with a high-quality, weather-resistant finish. Regularly clear snow and ice buildup, especially near joints, to reduce moisture absorption. Also, inspect for cracks more often during winter to catch early signs of splitting or warping and address them promptly.
You mention twice-yearly inspections, but what signs should I look for between those that might mean immediate action is needed, especially in wetter climates?
Between regular inspections, watch for peeling or blistering paint, soft or spongy wood, mold or mildew growth, and areas with persistent dampness. Also, check for visible cracks, swelling, or discoloration. If you notice any of these signs, especially after heavy rain or storms, it’s wise to address them right away to prevent further damage.
What’s a realistic yearly budget for maintaining exterior wood features like fences or pergolas, factoring in both routine cleaning and any long-term preservation products mentioned in your guide?
A reasonable yearly budget for maintaining exterior wood features is typically between $100 and $300. This covers basic supplies like cleaners, brushes, and long-term preservation products such as sealants or stains. Costs can vary with the size of your wood structures and whether you hire professional help.