Introduction: Why Proper Bathroom Ventilation Matters
Upgrading your bathroom’s ventilation system is one of the smartest, yet most often overlooked, home improvement projects. Proper ventilation is crucial not only for comfort but also for safeguarding your home against moisture damage, mold growth, and persistent odors. Without an effective exhaust fan or venting solution, steam from showers and baths settles on walls, ceilings, and fixtures, leading to peeling paint, warped wood, mildew, and costly repairs down the road. For DIYers, tackling a bathroom ventilation upgrade can seem intimidating, especially with considerations like duct routing, electrical connections, and compliance with building codes. However, with the right guidance, you can confidently improve your bathroom’s air quality, extend the lifespan of your finishes, and even boost your home’s resale value. In this comprehensive guide, you’ll learn how to plan, budget, select, install, and maintain a bathroom ventilation upgrade—from start to finish—while avoiding common pitfalls and ensuring a safe, code-compliant project.
Understanding Bathroom Ventilation: Basics and Benefits
What Is Bathroom Ventilation?
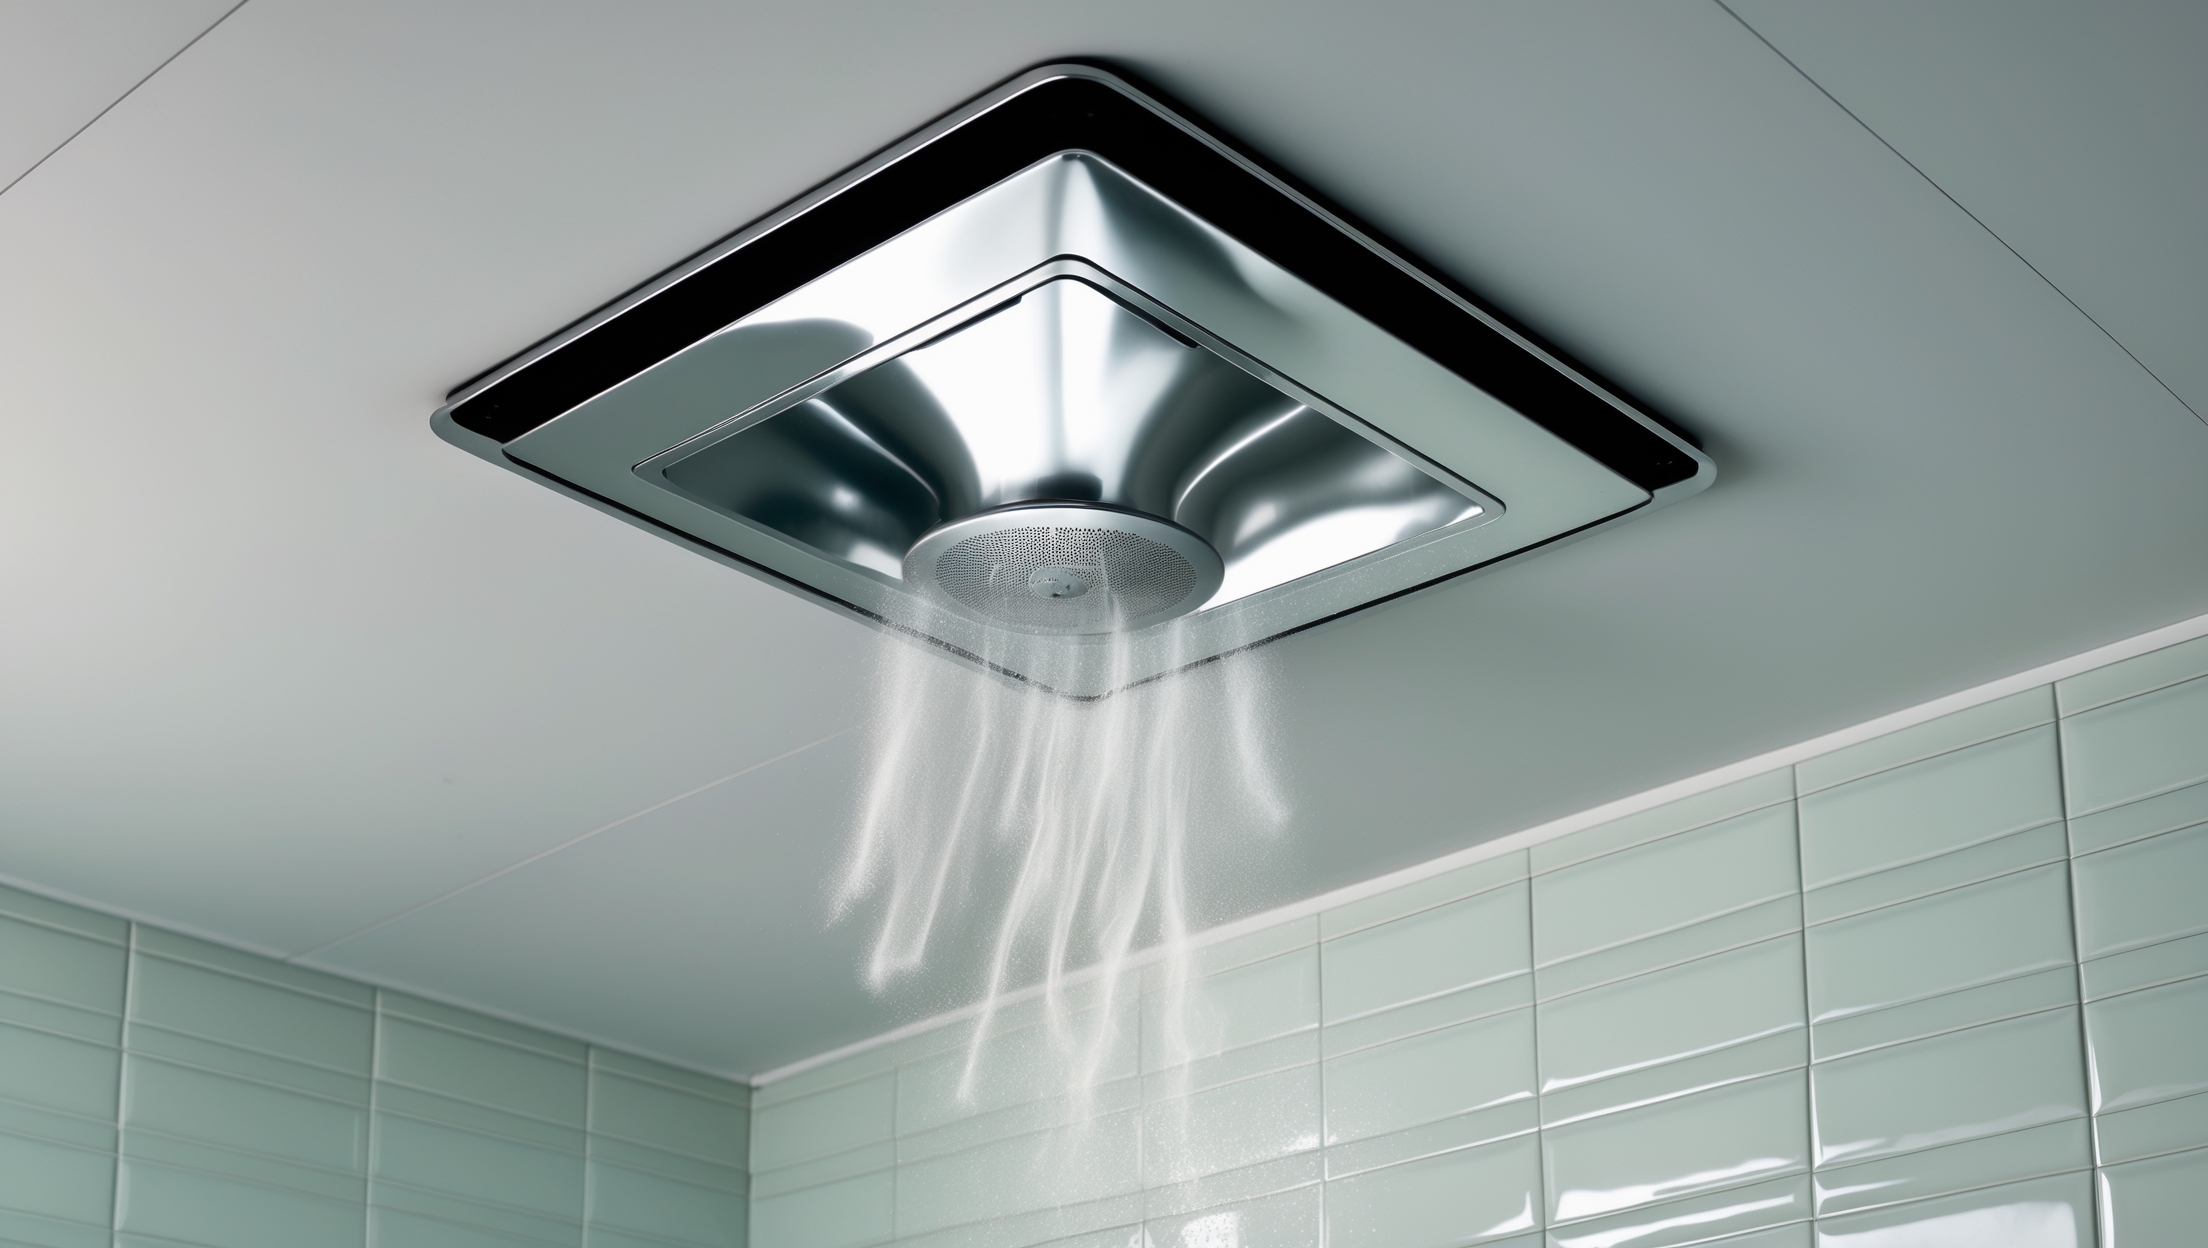
Bathroom ventilation refers to the process of removing moist, stale air from the bathroom and replacing it with fresh air. Most commonly, this is achieved with an exhaust fan that draws air out through a duct to the exterior of the house. Some older homes may rely on window ventilation, but this is rarely sufficient, especially in climates with high humidity or cold winters.
Why Is It Important?
- Prevents Mold and Mildew: Removing moisture before it can settle prevents mold spores from taking root.
- Protects Building Materials: Excess humidity can warp wood, blister paint, and damage drywall.
- Reduces Odors: Proper ventilation clears out musty or unpleasant smells.
- Improves Air Quality: Keeps your living environment healthier for your family.
- Compliance: Many building codes require mechanical ventilation in bathrooms without operable windows.
Planning Your Upgrade: Key Decisions and Preparation
Assessing Your Bathroom’s Current Ventilation
- Is there an existing exhaust fan or just a window?
- Does your current fan vent outdoors, or does it discharge into the attic (a common mistake)?
- Is the fan adequately sized for the room?
- Is the fan noisy, inefficient, or showing signs of age?
Start by switching on your current fan and holding a piece of tissue near the grille. If the tissue sticks, there’s suction. Next, check the exterior vent for airflow and signs of blockage. Inspect for moisture stains or mold around the bathroom ceiling or walls—these are red flags for poor ventilation.
Choosing the Right Type of Upgrade
- Replacement: Swapping an old fan for a new, more efficient model.
- New Installation: Adding a fan where none exists.
- Upgrading Ductwork: Replacing flex duct with rigid for improved airflow; rerouting for shorter, straighter runs.
- Smart Features: Fans with humidity sensors, timers, or integrated lighting.
Tools & Materials Checklist
- Drill/driver and bits
- Drywall saw or oscillating tool
- Screwdrivers
- Wire stripper and voltage tester
- Foil tape and duct clamps
- New exhaust fan (with mounting kit)
- Ductwork (flex or rigid, as required)
- Exterior vent hood or cap
- Caulk and insulation
- Protective gear: gloves, goggles, mask
Cost Breakdown and Budgeting Tips
Typical Costs
- Basic fan replacement: $60–$200 for a quality fan; $10–$30 for supplies
- Upgraded fan (quiet, smart features): $150–$350
- Ductwork and vent hood: $40–$100
- Electrical supplies: $10–$25
- Optional professional electrical work (if needed): $80–$200
Labor is your biggest savings as a DIYer, but don’t cut corners on safety or compliance. Allocate 10–15% of your budget for unexpected issues (e.g., larger drywall patch, replacing a faulty switch).
Budget-Smart Tips
- Choose ENERGY STAR-rated fans for long-term savings.
- Measure your bathroom’s square footage and match CFM (cubic feet per minute) rating accordingly—for most bathrooms, 50–110 CFM is sufficient.
- Look for combo kits (fan, duct, vent cap) to save money and ensure compatibility.
- Compare warranty periods; a longer warranty often signals better build quality.
Step-by-Step Setup: Installing or Upgrading Your Bathroom Fan
1. Safety First: Power Off and Prepare
- Turn off power at the breaker to the bathroom.
- Test with a voltage tester to confirm circuits are dead.
- Lay down a drop cloth and wear protective gear.
2. Remove the Old Fan (If Applicable)
- Remove the cover and disconnect wiring.
- Unscrew or pry loose the old housing from the ceiling joists.
- Carefully detach any attached ductwork and set aside.
3. Prepare the Ceiling Opening
- Check if the new fan housing fits the existing hole; adjust with a drywall saw as needed.
- Ensure the opening is clear of insulation and debris.
4. Plan the Duct Route
- Shortest, straightest run to the exterior is best for airflow.
- Never vent into attic, soffit, or crawlspace—always outside.
- Use rigid duct wherever possible; seal joints with foil tape.
5. Install the New Fan Housing
- Mount the housing securely to a ceiling joist or use the provided brackets.
- Feed wiring through the knockout, using a cable clamp.
- If working in a finished ceiling, consider “old work” retrofit models for easier install.
6. Connect Ductwork and Exterior Vent
- Attach duct to the fan’s outlet with a clamp and foil tape.
- Route duct to the exterior wall or roof vent cap; secure all connections tightly.
- Seal around the vent cap with caulk; add insulation if passing through unconditioned spaces.
7. Complete Electrical Wiring
- Connect wiring according to the manufacturer’s diagram (usually black to black, white to white, green/bare to ground).
- Secure connections with wire nuts and verify tightness.
- For fans with lights or smart features, follow specific wiring instructions.
- Replace old switches with timer or humidity-sensing controls if desired.
8. Final Assembly and Testing
- Install the fan motor and grille per instructions.
- Restore power and test all functions.
- Check airflow at the exterior vent and listen for excessive noise or vibration.
- Patch any ceiling gaps with drywall and touch up paint as needed.
Compliance and Permit Essentials
Do You Need a Permit?
Many municipalities require a permit for electrical work or new duct penetrations, especially if adding a new circuit or cutting holes in the exterior. Always check with your local building department before starting.
Key Code Requirements
- Bathroom exhaust fans must vent to the outdoors, not the attic or crawlspace.
- Minimum airflow: 50 CFM for intermittent, 20 CFM for continuous operation (verify with local code).
- Wiring must comply with electrical codes—use GFCI-protected circuits if required.
- Penetrations through fire-rated assemblies may require firestop caulk or collars.
Documentation and Inspections
- Retain manuals, permit documents, and receipts for warranty or resale purposes.
- Schedule required inspections promptly to avoid delays.
Maintenance Best Practices for Long-Term Performance
Cleaning and Upkeep
- Clean the fan grille every 3–6 months with a vacuum and damp cloth.
- Wipe down fan blades and housing to remove dust buildup.
- Check and clean the exterior vent cap; remove lint, leaves, or nests.
Performance Checks
- Test suction with tissue paper monthly.
- Listen for unusual noises indicating loose or worn parts.
- Confirm the damper flap closes when fan is off (to prevent drafts).
Replacing Filters and Parts
- Some fans have replaceable filters; check annually.
- Replace worn or noisy motors to maintain efficiency and quiet operation.
- Upgrade controls (timers, humidity sensors) as technology improves.
Common DIY Mistakes and How to Avoid Them
- Improper Duct Routing: Avoid long runs, sharp bends, and venting into unconditioned spaces.
- Undersized Fan: Calculate required CFM for your bathroom’s volume.
- Poor Sealing: Gaps in ductwork or around the vent cap allow moisture to escape into the attic.
- Ignoring Permits: Skipping permits can lead to failed inspections or problems during resale.
- Electrical Hazards: Always confirm power is off before wiring; when in doubt, consult a licensed electrician.
- Neglecting Maintenance: A neglected fan quickly becomes noisy and ineffective.
Advanced Upgrades: Smart Features and Energy Efficiency
Smart Controls
- Humidity-sensing switches automatically turn on the fan when moisture rises.
- Timers ensure the fan runs long enough to clear the air after showers.
- Remote controls and app integration for convenience.
Energy-Efficient Models
- Look for ENERGY STAR-rated fans for lower energy use and quieter operation.
- Brushless DC motors last longer and consume less power.
- Integrated LED lights offer bright, efficient illumination.
Conclusion: Invest in Healthy, Worry-Free Living
Upgrading your bathroom’s ventilation is a project with lasting benefits for both your home and your family’s health. By following the practical steps outlined here—planning carefully, budgeting wisely, selecting the right equipment, and adhering to safety and code requirements—you’ll avoid the common pitfalls that lead to moisture damage, mold growth, and costly repairs. Remember, a good ventilation system is more than just a fan: it’s about effective airflow, robust ductwork, secure electrical connections, and regular maintenance. Don’t underestimate the value of smart features, which can further enhance convenience, efficiency, and peace of mind. Whether you’re replacing an outdated fan or installing a new system from scratch, your efforts will pay off in fresher air, cleaner surfaces, and a bathroom that remains comfortable and beautiful for years to come. Take your time, prioritize quality over shortcuts, and don’t hesitate to seek professional help for any part of the project that feels beyond your expertise. With the right approach, you’ll achieve a result you can be proud of—and your home will thank you for it.
Could you explain a bit more about how to make sure the new bathroom exhaust fan complies with building codes? Are there common code requirements or pitfalls DIYers run into when doing this upgrade themselves?
To ensure your exhaust fan meets code, check for required duct sizes (usually at least 4 inches), proper venting to the outside (not just into the attic), and suitable fan capacity (CFM rating). Common mistakes include using undersized ducts, skipping backdraft dampers, or failing to secure permits where needed. Always consult local codes, as exact rules can vary.
Could you explain more about how to make sure my new bathroom exhaust fan is properly vented to the outside, especially in an older home where there isn’t an existing duct?
To vent a bathroom exhaust fan to the outside in an older home, you’ll need to install a duct that runs from the fan through the attic or wall to an exterior vent (like a wall cap or roof vent). Use rigid or flexible ductwork, keep the run as short and straight as possible, and seal all joints to prevent leaks. Never vent into the attic, as this can cause moisture problems.
I have an older home that currently relies on window ventilation in the bathroom. Based on your guide, is it absolutely necessary to upgrade to a mechanical exhaust fan, or are there any effective alternatives that still meet building codes?
If your local building code allows window ventilation and the window meets size and operability requirements, you might not need a mechanical exhaust fan. However, mechanical fans are often required in newer codes because they provide more consistent moisture control. Check your local codes to confirm if window ventilation is still compliant.
If my bathroom only has a window for ventilation but I live in a really humid area, is adding an exhaust fan absolutely necessary, or are there other effective upgrades I could try first?
In a humid area, relying only on a window for bathroom ventilation may not be enough to prevent moisture problems. While you can use a dehumidifier or moisture-absorbing products as temporary measures, installing an exhaust fan is the most reliable long-term solution for humidity control and mold prevention.
When budgeting for this upgrade, what are the most common hidden costs that first-time DIYers like me might run into during installation?
Some common hidden costs include unexpected wiring or electrical work, the need for additional ductwork or vent materials, purchasing specialized tools, repairing any drywall damage after installation, and possibly upgrading your vent cover to meet code requirements. It’s also wise to budget for extra trips to the hardware store for missing parts.
Do you have any tips for budgeting this kind of bathroom upgrade? I’m worried about unexpected costs, especially with electrical work and running new ducts.
Start by getting quotes for major tasks like electrical work and duct installation, even if you plan to DIY, to set realistic expectations. Reserve extra funds (about 20%-30% of your budget) for surprises, especially if your home is older. Make a checklist of needed permits, materials, and tools to avoid last-minute purchases that can add up.
For older homes that only have window ventilation, is there a way to retrofit an exhaust fan without making major structural changes, or would that typically require cutting into walls and ceilings?
Retrofitting an exhaust fan in older homes with only window ventilation often requires cutting into walls or ceilings to install ductwork and the fan itself. However, some low-profile or through-the-wall exhaust fans are designed to minimize structural changes by fitting directly through an exterior wall, which can be less invasive than ceiling installations.
The article mentions picking the right fan, but how do I know what size or strength exhaust fan is best for a small versus a large bathroom?
To choose the right fan size, check the CFM (cubic feet per minute) rating. For small bathrooms (up to 50 sq ft), a 50 CFM fan usually works. For larger spaces, calculate 1 CFM per square foot. If your bathroom is 100 sq ft, aim for a 100 CFM fan.
If my bathroom only has window ventilation right now, are there any interim steps to improve air quality until I can install a proper exhaust fan?
Yes, you can improve bathroom air quality in the meantime by keeping the window open during and after showers, using a portable dehumidifier, and wiping down wet surfaces to minimize moisture. You might also use a small fan to help circulate air out the window.
The article mentions the importance of compliance with building codes. Could you clarify what the main code requirements typically are for bathroom ventilation systems in most U.S. states?
Most U.S. states require bathroom ventilation to exhaust air directly outdoors, not into attics or crawl spaces. A typical minimum is a 50 CFM fan for intermittent use or 20 CFM for continuous use. Ducts should be as short and straight as possible, and some areas may require timers or humidity controls. Always check your local code for specific details.
Could you give a ballpark estimate of what a DIY bathroom ventilation upgrade might cost, including typical materials and tools? I need to budget for this before starting.
A basic DIY bathroom ventilation upgrade usually costs between $100 and $300. This includes a quality vent fan ($60–$150), ducting and vent covers ($20–$60), and incidental materials like screws, foil tape, and caulk. If you don’t already have tools like a drill or drywall saw, budget an extra $20–$50 for basic tools.
I live in an older home that currently only has a window for bathroom ventilation. Are there specific challenges I should expect when upgrading to a mechanical exhaust fan system?
Upgrading from window-only ventilation in an older home can involve challenges like cutting through thick walls or ceilings, dealing with outdated wiring, and finding a good route for ductwork to the exterior. You may also need to check for asbestos or lead paint. Consulting a professional for tricky parts is often a good idea.
You mention that older homes sometimes rely on window ventilation instead of an exhaust fan. If I’m upgrading an older bathroom, is it still code compliant to use only a window, or do I really need to install a mechanical fan?
Building codes vary by location, but many now require a mechanical exhaust fan in bathrooms without adequate windows. Even if a window is present, some codes still mandate a fan for better moisture control. Check your local building regulations to be sure, but installing a fan is usually the safest option.
I’m curious about budgeting for this kind of upgrade—how much should I expect to spend on average if I try to do everything myself versus hiring a professional?
If you do the bathroom ventilation upgrade yourself, expect to spend $100 to $300 on materials like the fan, ductwork, and installation supplies. Hiring a professional usually costs $400 to $1,000 depending on labor rates and complexity. DIY saves money but requires confidence with electrical and venting work.
The article mentions compliance with building codes—what are some common mistakes DIYers make that could lead to failed inspections when upgrading a bathroom exhaust fan?
Common mistakes include using undersized ductwork, improper venting into attics instead of outdoors, not installing a backdraft damper, failing to use GFCI protection for wiring, and poor sealing around penetrations. These issues often result in failed inspections because they violate safety and ventilation requirements.
If my bathroom only has window ventilation right now, what are the main things I should watch out for when installing a mechanical exhaust fan to meet code requirements?
When adding a mechanical exhaust fan, make sure it’s vented directly outdoors—not into the attic—to prevent moisture problems. Use the correct fan size for your bathroom, install a proper duct, and check local codes for minimum airflow rates and electrical safety standards. Also, ensure the fan has a backdraft damper to stop outside air from coming in.
You mention that routing the duct to the exterior of the house is necessary. My bathroom is on the first floor and pretty far from any exterior wall. Are there tips for routing the duct efficiently in this kind of setup?
In setups like yours, try running the duct through floor joists or along basement ceilings toward the nearest exterior wall or rim joist. Keep the duct as straight and short as possible, use smooth metal ducting, and add insulation to prevent condensation. Minimize bends to maintain airflow efficiency.
When upgrading a bathroom exhaust fan as a DIYer, how can I make sure my new duct routing meets local code requirements, especially in an older house where access is tight?
To ensure your duct routing meets local code, check your city or county’s building codes before starting. Pay attention to duct size, material, and venting location (preferably outside). In tight spaces, consider flexible duct rated for bath fans, but avoid sharp bends. If unsure, a quick call to your building inspector can clarify requirements for older homes.
Can you give a ballpark estimate of how much a basic DIY bathroom fan upgrade typically costs, including necessary materials and electrical work?
A basic DIY bathroom fan upgrade usually costs between $75 and $200. This includes a mid-range fan, some ductwork or venting materials, and basic electrical supplies. If you need to hire an electrician for wiring, expect to add $100–$200 more to the total.
You mentioned building codes for bathroom fans—are there any specific CFM requirements or rules about venting direction I should be aware of if I live in a colder climate?
Yes, building codes usually require bathroom fans to have a minimum CFM rating—often 50 CFM for most bathrooms. In colder climates, it’s important to vent the fan directly outdoors, not into attics or crawlspaces, to prevent moisture problems and ice buildup. Always check your local codes, as some areas have additional insulation or venting requirements due to cold weather.
The article mentions boosting resale value with a ventilation upgrade. Do real estate agents or inspectors actually check for exhaust fans vented to the outside, or is window ventilation ever accepted during a home sale?
Most home inspectors and real estate agents do check for properly vented exhaust fans, especially in areas prone to moisture like bathrooms. Venting to the outside is generally preferred and sometimes required by code. Relying only on a window for ventilation may be accepted in older homes, but it can lower appeal and value for buyers expecting modern standards.
You mention building codes for bathroom ventilation—what are some common code requirements DIYers should look out for, and how strict are inspectors about things like duct routing or fan placement?
Common code requirements include venting the bathroom fan directly outdoors, using smooth and rigid ductwork where possible, and sizing the fan correctly for the room. Inspectors are usually quite strict about duct routing—no venting into attics or crawlspaces. Fan placement typically must be near the shower or tub to effectively remove moisture.
If my building currently uses window ventilation but I want to switch to an exhaust fan, what are the main steps or challenges I should expect with duct routing and electrical connections?
Switching to an exhaust fan involves cutting a hole for ductwork, routing ducts to the exterior (which can be tricky if walls or ceilings are crowded), and ensuring a proper weatherproof exterior vent. For electrical, you’ll need to safely wire the fan to a switch and possibly run new wiring. Local codes and safety should always be followed.
What kind of budget should I plan for a full DIY ventilation upgrade, considering both materials and any tools I might need for ductwork and installation?
For a full DIY bathroom ventilation upgrade, plan for a budget of $150 to $400. This covers a quality fan ($60–$200), ductwork and materials ($40–$100), plus essential tools like a drill, saw, and duct tape. If you need to buy tools you don’t already own, budget an extra $50–$100.
I noticed the article mentions the importance of following building codes for bathroom ventilation upgrades. Are there specific code requirements or permits I should be aware of if I’m planning to do this myself in an older home?
Yes, most areas require bathroom ventilation to vent directly outdoors and meet certain airflow rates—often at least 50 cubic feet per minute. Older homes may also need updated wiring or ductwork to comply with electrical and fire codes. Always check your local building department’s requirements, as a permit is often needed for electrical or mechanical changes.
Roughly how much should I budget for a DIY upgrade, including both materials and possible permit costs if I need to re-route ductwork or change electrical connections?
For a typical DIY bathroom ventilation upgrade, expect to budget $150–$400 for materials, depending on fan quality and ductwork length. If re-routing ductwork or altering electrical, permits can add $50–$200. Costs vary by region, so check with your local building department for exact permit fees.
Could you explain a bit more about how to handle duct routing in older homes, especially if exterior venting isn’t straightforward due to finished walls or ceilings?
In older homes, if direct exterior venting is tricky, try routing ducts through an attic or closet where possible. Flexible ductwork can help navigate tight spaces. If walls or ceilings are finished, consider soffits or boxed chases to conceal ducts without major demolition. Always seal joints and insulate ducts to prevent condensation and leaks.
Do most building codes in the US require a specific type of exhaust fan, or is window ventilation sometimes enough to pass an inspection in older homes?
In many parts of the US, building codes allow either a properly sized exhaust fan or an operable window for bathroom ventilation, especially in older homes. However, requirements can vary by state and local code, so it’s important to check with your local building department before starting upgrades.
You mentioned budgeting for a ventilation upgrade—are there specific features in exhaust fans, like humidity sensors or quieter operation, that are worth the extra cost for a DIYer on a mid-range budget?
For a mid-range budget, features like humidity sensors and quieter operation are definitely worth considering. Humidity sensors help prevent mold by running only when needed, and quieter fans make your bathroom more comfortable. Both can be good long-term investments for convenience and efficiency.
When it comes to budgeting for a bathroom ventilation upgrade, what are the typical hidden costs I should be aware of beyond just buying the fan itself and some ductwork?
Beyond the fan and ductwork, hidden costs can include hiring an electrician if new wiring is needed, patching or repairing drywall, upgrading switches, roof or wall vent caps, and purchasing extra tools or hardware. If your bathroom lacks existing ventilation, cutting through walls or ceilings may increase labor or material costs.
If my bathroom only has window ventilation right now and no existing ductwork, what are some of the biggest challenges I should expect when installing a new exhaust fan myself?
Adding an exhaust fan without existing ductwork can be tricky. You’ll need to cut a vent hole in the ceiling or wall, run new ductwork to the exterior, and handle electrical wiring safely. Navigating attic or wall spaces and ensuring a proper weatherproof vent outside are also important challenges to anticipate.
The article mentions that window ventilation is rarely sufficient in older homes. If I live in an older house without an existing exhaust fan, how difficult is it to retrofit one, and what should I watch out for during installation?
Retrofitting an exhaust fan in an older home is definitely doable, but you’ll need to plan for wiring, cutting a vent path, and properly sealing around the fan. Watch out for hidden wiring or plumbing in walls and be sure to vent to the outside, not the attic. Hiring a licensed electrician is often recommended for safety.
The article mentions budgeting for a bathroom ventilation upgrade. Can you give some guidance on what the main cost drivers are and whether there are ways to keep expenses in check for a small operation?
The main cost drivers are the type of fan you choose, ductwork length and materials, electrical work, and any needed repairs. To save money, consider using existing wiring and ducts if possible, choose a fan with adequate but not excessive power, and do as much prep work yourself as you feel comfortable with.
If I’m replacing an old window ventilation setup in my shop’s bathroom with a new exhaust fan, how do I know if my existing electrical wiring is sufficient or if I need to upgrade it for code compliance?
To determine if your existing wiring is adequate, check the circuit’s amperage and compare it to the exhaust fan’s requirements. Also, ensure the wiring insulation and grounding meet current code. If in doubt, consult a licensed electrician to verify compliance and safety.
Can you give some guidance on how to figure out if my current bathroom fan is powerful enough, or if upgrading to a bigger one would really make a noticeable difference in air quality?
To check if your bathroom fan is powerful enough, look for its CFM (cubic feet per minute) rating—this should match your bathroom size (about 1 CFM per square foot). If your mirror stays foggy or odors linger, upgrading to a higher CFM fan could noticeably improve air quality.
When upgrading bathroom ventilation in an older home that only has window ventilation, what should I look out for in terms of duct routing and possible compliance issues?
When upgrading from window-only ventilation, ensure your duct routes as directly as possible to the exterior to minimize airflow resistance. Check for local codes requiring venting outside, not into attics or crawlspaces, and watch for asbestos or lead paint during installation in older homes.
If I want to upgrade the exhaust fan in my older bathroom that only has a small window, how can I tell if the current venting setup is up to code, and what should I look out for during the DIY process?
To check if your current venting is up to code, look for a dedicated exhaust duct that leads all the way outdoors, not just into the attic. The duct should be at least 4 inches wide and sealed at joints. When upgrading, ensure proper wiring, use a fan rated for bathroom use, and prevent air leaks or backdrafts.
You mention that older homes sometimes rely on window ventilation, but it’s rarely sufficient. Are there affordable ways to upgrade ventilation in historic buildings without extensive renovations?
Absolutely, there are several options. You can install slim-profile or inline duct fans that fit in tight spaces and require minimal structural changes. Some modern exhaust fans are designed for easy retrofitting and can vent through an exterior wall instead of the roof, reducing the need for extensive renovations.
Could you clarify how to determine if my current bathroom fan setup is actually compliant with local building codes before I start upgrading?
To check if your bathroom fan setup meets local building codes, find out the required airflow rating (CFM), venting method, and wiring standards for your area. You can contact your local building department or look up their code online. Compare your fan’s specs and installation to those rules before starting upgrades.
The article mentions planning and budgeting for a bathroom ventilation upgrade. Is there a ballpark estimate for costs, especially if I already have basic electrical skills and plan to do the installation myself?
If you have basic electrical skills and plan to DIY, expect to spend about $75 to $250 for a standard bathroom fan and installation materials. Higher-end fans or special features like humidity sensors can increase the total, but typical projects land within this range.
When upgrading bathroom ventilation in an older home that only has window ventilation, how challenging is it to add new ductwork through finished ceilings or walls? Are there ways to minimize drywall damage during installation?
Adding new ductwork in older homes with finished ceilings or walls can be challenging, as it often requires cutting into drywall to access spaces for routing ducts. To minimize damage, use flexible ducting where possible and plan the shortest, most direct route. Cutting small, precise access holes and working from attic or crawl spaces can also help reduce the amount of drywall repair needed.
If our bathroom already has some minor mold spots on the ceiling, should we address that before installing a new fan, or will improved ventilation take care of it on its own?
It’s best to address existing mold spots before installing a new fan. Clean away the mold using a suitable cleaner, let the area dry thoroughly, and consider repainting with a mold-resistant paint. Improved ventilation will help prevent future mold growth, but it won’t remove what’s already there.
The article mentions that proper duct routing is important for bathroom fan installations. Are there specific materials or layouts you recommend to minimize moisture buildup and noise in older homes?
For older homes, use smooth, rigid metal ducts rather than flexible ones to reduce moisture buildup and noise. Keep duct runs as short and straight as possible, avoiding sharp bends. Insulate ducts running through unheated spaces to prevent condensation. A vent cap with a backdraft damper also helps minimize noise and backflow.
If my bathroom already has a small window, is it still essential to install a mechanical exhaust fan to meet building codes, or can I rely on natural ventilation in certain climates?
Whether you can rely solely on a window depends on your local building codes. Some codes allow natural ventilation if the window is large enough and operable, but many now require a mechanical exhaust fan regardless of window size. It’s best to check with your local building department to be sure.
I have an older home that currently uses window ventilation in the bathroom. Based on what you mentioned about its limitations, do I need to completely remodel to add an exhaust fan or are there less invasive options?
You don’t necessarily need a full remodel to add an exhaust fan. Many modern exhaust fans can be retrofitted into existing ceilings or walls with minimal disruption. An electrician or handyman can usually install one by running ductwork through the attic or an exterior wall, making it much less invasive than a complete remodel.
You talk about extending the lifespan of finishes with better ventilation, but how do I know if my current exhaust fan is actually doing enough? Are there signs to look for before deciding to upgrade?
If your bathroom still feels humid after running the fan, or you notice persistent foggy mirrors, peeling paint, or mildew, your current exhaust fan may not be effective enough. These are clear signs it’s struggling, and you might benefit from upgrading.
If I have an older house that currently only uses a window for bathroom ventilation, what would be the rough budget range for installing a proper exhaust fan and ductwork to meet code?
For an older home, installing a bathroom exhaust fan with ductwork typically costs between $300 and $800, depending on local labor rates, fan quality, and how far the duct needs to run. If electrical upgrades or significant wall or ceiling work are needed, costs could be higher.
I want to upgrade my bathroom fan, but I’m not sure how to tell if my current duct routing is up to code or needs changing. Are there clear signs I should look for before starting the project?
Check if your duct vents directly outdoors, not just into the attic or ceiling. Look for flexible plastic ducts, long runs with sharp turns, or any signs of mold or moisture near the duct path—these suggest possible code or performance issues. Metal ducts with minimal bends and proper insulation are generally up to code.
Can you give more details on how to route the exhaust duct in older homes with limited attic space? I worry about causing moisture buildup if the path to the exterior is not straightforward.
In older homes with limited attic space, consider running the exhaust duct horizontally through an exterior wall instead of upwards. Use rigid metal ducting with as few bends as possible, and insulate the duct to prevent condensation. Always terminate the vent outside, never into the attic, to avoid moisture buildup.
Could you give more details about how to figure out the best path for duct routing, especially in older homes where space is tight or walls are thick?
In older homes, start by locating the shortest and straightest possible route from the bathroom fan to the exterior, ideally through an attic or soffit. Use a stud finder to map out wall structures, and consider flexible ducting if rigid options won’t fit. If walls are thick, you may need to core drill carefully or reroute through closets or utility spaces.
I have an older home that only has window ventilation in the bathroom, and I live in a pretty humid area. The article says that’s rarely sufficient, so what are the first steps for someone like me to upgrade to an exhaust fan?
You’re right—window ventilation often isn’t enough in humid climates. Your first step is to choose a suitable exhaust fan rated for your bathroom size. Then, plan an installation route to the exterior for venting. If you’re not comfortable with electrical work and cutting through exterior walls or ceilings, consulting a licensed electrician or contractor is a good idea.
When upgrading my bathroom vent, how do I make sure the duct is routed to the exterior correctly and avoids moisture getting trapped in the attic? Any tips for older homes where running new ductwork might be tricky?
To ensure proper routing, always run the duct straight to an exterior wall or roof vent, never just into the attic. Use smooth, rigid ductwork with few bends and seal all joints tightly. In older homes, consider surface-mount duct covers or telescoping ducts to navigate tight spaces, and always insulate ducts to prevent condensation.
Could you give some guidance on how to estimate the total budget for upgrading an old bathroom fan, including both materials and potential hidden expenses like wiring or ductwork repairs?
To estimate your budget, add up the fan price, vent ducting, wall or ceiling cover, and any tools you need. Allow extra for unexpected costs like upgrading wiring, fixing damaged drywall, or replacing old ductwork. Setting aside about 20% above your materials estimate can help cover surprises.
You mention boosting resale value by upgrading the fan—does it make a big difference if I just replace the old fan with a quieter one versus redoing the whole venting system?
Simply replacing an old, noisy fan with a quieter, efficient model can positively impact resale value, especially if the existing venting works well. Fully redoing the venting system is usually only necessary if there are issues like poor airflow or moisture problems. For most homes, a quality fan upgrade is enough.
When planning a bathroom ventilation upgrade, how do I know if my current duct routing is actually compliant with building codes, especially in older homes?
To check if your current duct routing meets building codes, look for key requirements like venting directly outdoors (not into attics), proper duct size (usually at least 4 inches), and minimal bends. Reviewing your local building code or consulting a licensed inspector is the safest way, especially in older homes where past upgrades might not be compliant.
When upgrading the ventilation in an older bathroom that still relies on window ventilation, do I need to upgrade the wiring as well to install a modern exhaust fan, or can I usually use the existing electrical setup?
When adding a modern exhaust fan, you often need to upgrade the wiring, especially in older bathrooms where the electrical system may not meet current safety codes or handle the new fan’s power requirements. It’s best to check the fan’s specifications and consult an electrician to ensure your wiring is safe and adequate.
I’m trying to estimate costs for a basic bathroom ventilation upgrade like the one described. Any tips on where a small business owner like me could realistically save money without compromising code requirements or long-term durability?
You can save by sourcing a quality yet energy-efficient fan suited for your bathroom size, and handling removal of the old unit yourself if comfortable. Use existing ductwork if it’s still in good condition, but always ensure all work meets local code and invest in proper sealing to prevent moisture issues.
Can you explain how to tell if my current bathroom exhaust fan and duct setup actually meets building code, or if I should be upgrading for compliance as well as better ventilation?
To check if your fan and duct meet code, confirm the fan’s airflow rating (CFM) matches your bathroom size (usually 50 CFM minimum for most baths) and that the duct vents outdoors, not just into the attic. Also, duct diameter and length must follow manufacturer and local code specs. If unsure, consult your local building office or a licensed contractor.
How do I figure out the best route for the ducting if my bathroom is in the middle of the house, not against an exterior wall?
When your bathroom is in the middle of the house, route ducting through the attic or between ceiling joists to reach the nearest exterior wall or roof. Aim for the shortest, straightest path possible to minimize airflow loss, and use smooth, rigid ducting if you can. Always vent to the outdoors, never into attics or crawlspaces.
Can you explain how to tell if my current exhaust fan is actually doing a good job at removing moisture, or if I need to upgrade it?
To check if your exhaust fan is effectively removing moisture, run it during and after a hot shower, then observe if your mirror and walls clear up within 10–15 minutes. Lingering condensation, persistent mold, or musty smells are signs your fan may be underperforming and could need an upgrade.
The article mentions choosing between ducted fans and using existing window ventilation, but how do I know if my climate really makes window ventilation insufficient for my bathroom?
Assess your climate by considering humidity and temperature levels. If you live in a humid or cold area, windows often won’t ventilate enough, especially in winter or rainy seasons. Persistent condensation, mold growth, or lingering odors after using the bathroom are signs that window ventilation alone may not be sufficient.
When budgeting for a DIY bathroom ventilation upgrade, what are the most common hidden costs that first-time installers might not anticipate?
First-time installers often overlook costs like unexpected ducting or vent extensions, purchasing extra sealant or insulation, hiring an electrician for wiring if needed, replacing damaged drywall, and buying specialized tools. Also, if your bathroom ceiling is inaccessible, you might need to patch paint or repair after installation, which adds to the expense.
Could you clarify what the most common code compliance issues are for DIYers installing bathroom ventilation themselves? I want to be sure I don’t overlook anything that might cause trouble when selling my house.
Common code compliance issues include venting exhaust fans directly into attics instead of outside, using undersized ductwork, not installing a backdraft damper, and failing to follow minimum clearance requirements. Make sure your fan vents outdoors, uses the right duct size and material, and is properly wired to meet local electrical codes.
The article mentions planning and budgeting, but what are some unexpected costs that DIYers should look out for when upgrading bathroom ventilation?
Some unexpected costs DIYers may face include discovering hidden water damage or mold that needs repair, updating old or unsafe wiring to meet code, purchasing specialized tools, or needing to replace damaged drywall or insulation after vent installation.
Could you provide a rough estimate of how much a typical DIY bathroom ventilation upgrade might cost, especially when trying to avoid the most common mistakes mentioned in the article?
A typical DIY bathroom ventilation upgrade usually costs between $100 and $300. This range covers a quality vent fan, basic ducting, and necessary tools or materials. Planning carefully and following the guide can help you avoid extra expenses from mistakes like improper installation or choosing the wrong fan size.
When planning a bathroom ventilation upgrade, how do you determine the best route for ductwork if your bathroom is in the middle of the house and there’s limited attic access?
When attic access is limited and your bathroom is centrally located, consider routing ductwork horizontally through an adjacent room or closet, or down through a soffit or wall cavity. Aim for the shortest, straightest route to an exterior wall or roof to maximize airflow. Consulting a professional for unique layouts can help you avoid costly errors.
When planning a DIY bathroom ventilation upgrade, how do I make sure I’m meeting local building codes, and are there common code requirements I should double-check before starting?
To ensure you meet local building codes, contact your city or county building department for specific ventilation rules before starting. Common requirements to double-check include minimum fan capacity (measured in CFM), duct type and length, exterior venting (not just into the attic), and proper electrical wiring practices.
Do you have tips for ensuring the new duct routing won’t interfere with existing plumbing or wiring in older buildings during a DIY installation?
Before starting your installation, carefully inspect your attic or wall spaces to locate existing plumbing and wiring. Use a stud finder with electrical and metal detection, and review any available building plans. When cutting, make small exploratory holes first to check behind surfaces. If unsure, consult a professional to help avoid accidental damage.
I’m a little concerned about accidentally damaging the ceiling or walls while cutting holes for ducts. Are there safe methods or tools you recommend for this part of the installation?
To minimize damage when cutting holes, use a stud finder to avoid beams and wires, and outline your cuts with a pencil first. A drywall saw or oscillating multi-tool gives you better control than power saws. Cut slowly and check behind the surface as you go to prevent unexpected issues.
If I live in a really humid area, are there specific types of exhaust fans or duct materials that work better for long-term durability and moisture control?
For humid climates, look for exhaust fans rated for continuous use and with higher CFM (cubic feet per minute) ratings. Choose ducting made from corrosion-resistant materials like aluminum or insulated flexible duct to prevent condensation and mold growth. Also, ensure exterior vent hoods have backdraft dampers to keep moisture out.
When upgrading a bathroom ventilation system, how do you know if your existing duct routing is good enough, or if you need to completely redo it for better results?
Check if your current duct runs straight to the exterior with minimal bends and is as short as possible. If you notice long runs, sharp turns, or flexible ducting, your airflow may be restricted. Signs like lingering moisture or odors also suggest your routing needs improvement or a redo for better results.
If my bathroom only has a window for ventilation right now, what are the most budget-friendly mechanical options that would still reduce mold risk effectively?
A budget-friendly option is installing a basic exhaust fan in the ceiling or wall. Look for models labeled as energy-efficient with humidity sensors, as they run only when needed. Even entry-level fans can greatly reduce mold risk if used after showers and paired with regular window ventilation.
If my bathroom doesn’t have existing ductwork, what’s the best way to route new ducts to the exterior without causing major disruption to the business during installation?
To minimize disruption, consider routing new ducts through an attic space or drop ceiling if available. Schedule installation during off-hours and use flexible ducting to reduce the need for major demolition. Wall-mounted fans that vent directly outside can also simplify the process.
If my bathroom already has a window, do I still need to install an exhaust fan, or is window ventilation enough for meeting building codes in most places?
Many building codes require a mechanical exhaust fan in bathrooms without an operable window, but if your window opens and is large enough, it might meet local requirements. However, fans are often recommended even with a window since they work better for moisture and odor control, especially in cold or humid climates. Check your local code to be sure.
Our bathroom doesn’t have an exterior wall nearby—could you clarify how to route the exhaust duct efficiently without causing issues with moisture getting trapped in the attic?
When an exterior wall isn’t nearby, it’s best to route the exhaust duct vertically through the attic and out the roof using a dedicated roof vent. Make sure all duct joints are sealed and insulated to prevent condensation, and never vent directly into the attic, as this can lead to serious moisture problems.
Could you clarify how to determine the best duct routing option if my bathroom is located far from an exterior wall? Are there specific guidelines or limitations I should be aware of?
When your bathroom is far from an exterior wall, you can route ductwork through the attic or between floors to reach the outside. Keep duct runs as short and straight as possible to maintain airflow; use smooth metal ducts if you can. Avoid too many bends, and check local building codes for maximum duct length and venting requirements.
If I currently just have a window for bathroom ventilation, are there any tricks to improve air flow until I’m ready to install a proper exhaust fan as recommended in your guide?
To boost airflow with just a window, try opening it fully during and after showers, and use a portable fan facing outward to help push humid air outside. Keeping the bathroom door slightly open can also promote cross-ventilation, which helps reduce moisture buildup until you install a proper exhaust fan.
If my house only has an old window for bathroom ventilation and I want to install an exhaust fan instead, how do I figure out the best spot to mount the fan and route the ductwork?
Start by locating the fan on the ceiling near the shower or tub, as moisture is highest there. Pick a spot between ceiling joists for easier installation. Plan a straight, short duct route to an exterior wall or roof to maximize airflow and minimize bends. Always check for electrical and plumbing obstacles before cutting.
If my home currently relies on an older window-only ventilation method, what are the biggest code compliance issues I should watch for when upgrading to a mechanical exhaust fan?
When upgrading from window-only to a mechanical exhaust fan, check that the fan vents to the outside, not just into the attic. Make sure it meets minimum airflow (usually 50 CFM for bathrooms), is properly wired, and has a backdraft damper. Also, confirm any required clearances and follow local electrical codes.
Could you elaborate on how to determine the best duct routing for an exhaust fan in an older home, especially if the bathroom isn’t adjacent to an exterior wall?
To determine the best duct routing in an older home where the bathroom isn’t next to an exterior wall, look for the shortest, straightest path to the outside—either through the roof or a gable wall. Avoid long runs with many bends, as these reduce efficiency. Check attic or crawl spaces for possible routes, and ensure all joints are well-sealed to prevent moisture leaks.
Can you explain what factors should be considered when choosing between different duct routing options during a ventilation upgrade?
When selecting duct routing options, consider the shortest, straightest path to the outside to maximize airflow and efficiency. Also, check for obstructions, ceiling or wall space availability, insulation needs to avoid condensation, and ease of access for installation and future maintenance.
Could you elaborate on what homeowners should look out for when checking local building codes before starting a DIY bathroom vent project?
When checking local building codes, homeowners should pay attention to ventilation requirements like minimum fan capacity (CFM), duct size, allowed vent routes, termination points (usually outside, not into attics), and electrical safety standards. These codes often vary by location, so it’s important to confirm specifics with your local building department.
If my bathroom only has a small window and no exhaust fan, is it really necessary to install a mechanical ventilation system, or could I just use the window for airflow?
Relying only on a small window can help a bit but usually isn’t enough to remove all the moisture from showers and baths. Over time, this can lead to mold and damage. Installing a mechanical exhaust fan is the best way to ensure proper ventilation and protect your bathroom.
Does the guide offer advice on how to budget for the electrical work if my bathroom currently doesn’t have a fan installed, or should I expect to hire a professional for that part?
The guide explains that installing a new fan where none exists often involves running new electrical wiring, which can be complex. It recommends budgeting for a licensed electrician unless you have significant electrical experience, as tackling this yourself can be risky and may violate local codes.
I’m new to this and a little confused about duct routing for exhaust fans. Is it always necessary to vent directly outside, or are there any safe alternatives if direct access isn’t possible in my bathroom?
For bathroom exhaust fans, venting directly to the outdoors is essential to prevent moisture buildup, mold, and structural damage. Venting into attics, crawlspaces, or indoor spaces is not safe and usually against code. If direct access isn’t possible, consider options like using longer duct runs with appropriate insulation or installing a roof or wall vent.
I’m planning to upgrade our old exhaust fan, but I’m not sure how to tell if the existing ductwork is adequate or needs replacing. Are there any signs I should look for before starting?
Check your current ductwork for any visible damage, rust, or sagging. If the ducts are flexible, make sure they aren’t crushed or kinked. Also, if you notice persistent moisture, mold, or weak airflow with the old fan, it could indicate undersized or poorly installed ducts that may need replacing.
How can I estimate a realistic budget for upgrading my bathroom exhaust fan and ducting, especially when considering possible electrical upgrades and code compliance?
To estimate your budget, start by listing costs for a quality fan, ducting materials, and any vent covers. Add labor if hiring help. For electrical upgrades and code compliance, consult a licensed electrician for an assessment and quote. Factor in permit fees if your area requires them, and add a 10–20% buffer for unexpected expenses.
If I want to improve air quality but have a small bathroom, is there such a thing as too powerful a fan, or could that cause issues with drafts or excessive noise?
Yes, installing a fan that’s too powerful for a small bathroom can create unwanted drafts, excessive noise, and even reduce energy efficiency. For best results, choose a fan rated appropriately for your bathroom size—typically 50–80 CFM for small bathrooms. This ensures effective ventilation without the downsides.
Are there significant budget differences between simply replacing an old exhaust fan and installing an entirely new ducted system if my bathroom never had forced ventilation before?
Yes, there are significant budget differences. Replacing an old exhaust fan is usually much cheaper since the wiring and ductwork are already in place. Installing a new ducted system in a bathroom without existing ventilation involves additional costs for ductwork, roof or wall vents, and possibly electrical work.
You mentioned building codes for bathroom ventilation. Is there a simple way to find out if my existing window setup is actually up to code before I start making upgrades?
To check if your window meets code, measure its size and confirm it opens. Most codes require an operable window with a minimum area—often at least 3 square feet, with half openable. You can also contact your local building department for exact requirements in your area.
If my bathroom currently only has a window for ventilation, is it really necessary to add an exhaust fan, or are there ways to make window-only ventilation effective enough in a humid climate?
In a humid climate, relying on just a window for ventilation can often lead to lingering moisture, which increases the risk of mold and mildew. While keeping the window open after showers and using a fan can help, adding an exhaust fan is usually the most reliable way to control humidity and protect your bathroom long-term.
If my bathroom only has a window for ventilation and not an exhaust fan, would installing a fan be required to meet most building codes, especially in colder states?
In many colder states, building codes require a mechanical exhaust fan if natural ventilation (like a window) isn’t sufficient or practical, especially during winter. Even if your window technically meets minimum code, an exhaust fan is often recommended or required for effective moisture control and to pass inspections.
What are some signs that my current exhaust fan isn’t meeting code or is undersized for the space? I want to make sure my upgrade will actually fix the problem.
Common signs your exhaust fan may be undersized or non-compliant include lingering humidity after showers, visible mold or mildew, peeling paint, and musty odors. If your bathroom mirror takes a long time to clear, that’s another indicator. Checking the fan’s CFM rating and comparing it to your bathroom size can confirm if it’s adequate.
Could you explain how to make sure the new exhaust fan meets building code requirements? Are there common mistakes people make when it comes to code compliance?
To ensure your new exhaust fan meets code, check the required CFM rating for your bathroom size, make sure it vents outside (not into an attic), and use approved duct materials. People often overlook proper venting or use undersized fans, both of which violate code and reduce effectiveness.
I’m planning to upgrade my bathroom’s exhaust fan myself but I’m worried about making mistakes with duct routing. Could you explain the main things to watch out for to make sure I stay up to code?
When routing your exhaust fan duct, use the shortest, straightest run possible with smooth-walled ducting, ideally metal. Avoid sharp bends and long flexible hoses, as these reduce airflow. Always vent air outdoors—never into attics or crawlspaces—and use a proper termination cap. Ensure duct joints are sealed and supported. Local codes may specify duct size and maximum length, so check those details before you start.
How can I determine if my current exhaust fan is actually venting moisture outside instead of just recirculating air within the attic or bathroom ceiling?
To check if your exhaust fan vents outside, turn it on and go outside to look for airflow from the exterior vent (usually on the roof or side wall). If you can’t find an exterior vent or feel no airflow, your fan may just recirculate air or vent into the attic instead.
You mention that window ventilation is rarely sufficient in humid climates. Would adding a more powerful exhaust fan compensate for the lack of a window, or is there a risk of over-ventilating?
A more powerful exhaust fan can effectively replace a window in humid climates, as long as it’s properly sized for your bathroom. There’s little risk of over-ventilating with standard bathroom fans, but make sure the fan matches your space’s square footage to avoid unnecessary energy use.
Could you elaborate on how to determine the best duct routing if the bathroom is in the middle of the house and far from an exterior wall?
When the bathroom is located in the center of your house, try routing the duct to the nearest feasible exterior point—often through the attic to a roof vent or sometimes to a soffit vent. Keep the duct as short and straight as possible, use smooth ducting, and minimize bends to maintain airflow efficiency.
How can I tell if my current bathroom exhaust fan is strong enough, or if I need to upgrade to a more powerful model to meet code and prevent moisture problems?
To check if your fan is strong enough, look for its CFM (cubic feet per minute) rating, usually on a label inside the fan. For most bathrooms, you need at least 1 CFM per square foot of floor space. If your mirror stays fogged or humidity lingers, an upgrade is likely needed to meet code and avoid moisture issues.
Could you give some advice on budgeting for this type of DIY bathroom vent project, especially when it comes to hidden costs like running electrical connections or opening up ceilings?
When budgeting, factor in not just the vent materials, but also possible extra costs like hiring an electrician if you’re not comfortable with wiring, patching drywall, and repainting. Always set aside an additional 20% of your estimated budget for surprises, since opening ceilings or walls can reveal unexpected issues.
For someone living in an older home that only has window ventilation currently, what are some practical tips or challenges when retrofitting a modern exhaust fan system?
Retrofitting an exhaust fan in an older home often means dealing with thicker walls, outdated wiring, and limited attic access. Make sure to choose a fan sized for your bathroom, plan a route to vent air outdoors, and check for possible electrical upgrades. Sealing any gaps after installation also helps prevent drafts and moisture leaks.
You mentioned duct routing can be intimidating—are there best practices for DIYers to avoid moisture problems if the shortest duct route isn’t possible in my house?
If a straight, short duct run isn’t possible, use smooth, rigid ductwork and minimize bends to reduce airflow resistance. Always slope ducts slightly toward the exterior vent to prevent moisture from pooling, and make sure all joints are tightly sealed. Insulating the duct also helps prevent condensation, especially in unconditioned spaces like attics.
Do you have any tips for choosing an exhaust fan that’s both effective and quiet? I find that the noise level is a big concern in my current setup.
When looking for a quiet yet effective exhaust fan, check the sone rating—the lower the sone, the quieter the fan. Aim for a rating of 1.5 sones or less. Also, match the fan’s CFM to your bathroom size for good airflow. Look for models with insulated housings for extra noise reduction.
For a small business building with multiple bathrooms, do I need a separate exhaust fan for each one, or is there an efficient way to ventilate several bathrooms together while staying code-compliant?
For a small business with multiple bathrooms, you might be able to use a central exhaust system with separate ducts and dampers for each bathroom. However, building codes often require dedicated ventilation for each bathroom to prevent odor and humidity transfer. Check your local code or consult a licensed contractor to ensure compliance.
What should someone expect to spend, on average, for a bathroom ventilation upgrade if they’re doing it themselves and want decent quality but not top-of-the-line?
If you’re doing a DIY bathroom ventilation upgrade with good, reliable quality but not the most premium options, you can expect to spend around $80 to $200. This usually covers the fan, ducting, vent cover, and some basic installation materials.
If my bathroom only has a window for ventilation right now, will switching to an exhaust fan make a noticeable difference in preventing mold and odors, or is it mainly for meeting building codes?
Installing an exhaust fan will make a noticeable difference. Unlike just opening a window, a fan actively removes moist air and odors, helping prevent mold growth more effectively. While it does help meet building codes, the main benefit is a drier, fresher bathroom environment.
Can you clarify how to determine whether your existing bathroom fan and ductwork meet current building codes before starting the upgrade, especially in older homes?
To check if your fan and ductwork meet current codes, locate the fan’s label for airflow (CFM) and noise rating (sones). Compare these to your local code requirements, which often specify minimum CFM based on bathroom size. Inspect duct size and type (smooth metal is commonly required today). If in doubt, consult your local building department or a licensed contractor for guidance.
When upgrading a bathroom fan, how do you determine the best route for ductwork if your bathroom isn’t adjacent to an exterior wall? Are there code requirements about maximum duct length or number of bends?
When your bathroom isn’t next to an exterior wall, it’s best to route the duct straight up through the ceiling and out the roof or to the nearest exterior wall, minimizing bends. Most building codes limit duct length (often 25 feet, reduced by 5 feet per 90-degree bend) and recommend as few bends as possible. Always check your local code for specifics.
When upgrading a bathroom exhaust fan in an older home that only has window ventilation, what are the main challenges in routing new ducts through existing walls or ceilings?
Routing new ducts in older homes often means dealing with limited space in walls or ceilings, possible obstacles like wiring or framing, and materials such as plaster that are harder to cut. Planning the duct path carefully and checking for obstructions before cutting can help avoid damaging existing structures.
If I already have a window in my bathroom, is there any situation where adding an exhaust fan is unnecessary, or is a mechanical fan always recommended regardless of window placement?
Even if your bathroom has a window, a mechanical exhaust fan is typically recommended for consistent moisture removal, especially in climates where opening a window isn’t practical year-round. However, in mild climates where the window can be easily opened after every shower, some building codes may not require a fan. Always check your local code for specific requirements.
I have an older house that currently relies on window ventilation in the bathroom. If I decide to add an exhaust fan, how do I make sure the duct routing complies with current building codes?
To ensure your new exhaust fan duct routing is up to code, check local building regulations for required duct materials, diameter, and venting location. Usually, ducts must vent outdoors, not just into the attic, and use smooth, rigid materials. It’s a good idea to consult local authorities or a licensed contractor before starting your project.
Are there any recommended ways to keep the project within a reasonable budget, especially when it comes to selecting between different fan models and ducting materials?
To stay within budget, compare fan models based on essential features like airflow (CFM) and noise level, rather than extras you may not need. For ducting, flexible aluminum or insulated flexible ducts are usually cost-effective and easy to install yourself. Always measure your bathroom size to avoid overspending on an oversized fan.
Could you clarify whether most bathroom exhaust fans need to be ducted to the outside, or are there any situations where recirculating or window ventilation is actually sufficient as a permanent solution?
Most bathroom exhaust fans should be ducted to the outside to effectively remove moisture and prevent mold. Recirculating fans or relying only on windows usually isn’t adequate for long-term moisture control. Building codes in many areas require direct venting to the exterior, so that’s generally recommended for permanent solutions.
Could you clarify what specific building codes or common code requirements I should be aware of before installing a new exhaust fan myself?
When installing a bathroom exhaust fan, you should check for requirements like venting directly outdoors (not into attics), using a duct of the correct diameter (usually 4 inches or more), proper electrical wiring with a dedicated circuit or GFCI protection, and ensuring the fan meets minimum airflow ratings (often 50 CFM or higher). Local codes can vary, so it’s wise to check with your municipality.
I live in an older house that currently just has a window for bathroom ventilation, like you mentioned. If I want to add a proper exhaust fan, are there specific code requirements for duct length or type of vent cover in the US?
Yes, US building codes generally require bathroom exhaust fans to vent directly outdoors using ductwork made of metal or rigid plastic. The maximum duct length is usually 25 feet, but this can be reduced by bends or elbows. The exterior vent cover should prevent backdrafts and entry of pests. Local codes can vary, so it’s always wise to check with your municipal building department before starting.
I’m curious about budget planning—what unexpected costs should DIYers watch out for when upgrading bathroom ventilation besides just the fan and ductwork?
When upgrading bathroom ventilation, DIYers should also budget for electrical wiring upgrades, patching or painting drywall after installation, possible mold remediation if old vents leaked, roof or exterior wall repairs if venting outside, and necessary permits. These costs can add up beyond the basic fan and ductwork.
You mention that DIYers need to consider duct routing—does venting through the roof versus an exterior wall make a difference in cost or performance?
Venting through an exterior wall is usually less expensive and simpler because it requires less ducting and fewer roof modifications. Roof venting can perform just as well, but it often costs more due to extra materials and weatherproofing steps. Both methods can be effective if ducts are short and properly insulated.
You mentioned building codes—are there any specific code requirements I should be aware of when upgrading the venting in an older home, especially regarding duct materials or allowable lengths?
Yes, most codes require bathroom vent ducts to vent directly outdoors and not into attics or crawl spaces. Typically, smooth metal ducts are preferred over flexible plastic, and there are limits on maximum length—often around 25 feet, reduced by bends. Always check your local building codes, as requirements can vary.
Can you give some advice on budgeting for both the materials and any tools I might need, especially if I don’t already have much electrical experience?
Start by listing all needed materials: the new fan, ducting, vent covers, and any insulation. For tools, budget for a drill, screwdriver, wire stripper, and possibly a voltage tester. If you lack electrical experience, consider setting aside extra funds for hiring an electrician for wiring tasks to ensure safety.
You mentioned code compliance for bathroom fans. How do I figure out if my local building codes require certain types of ventilation, and what are the most common mistakes DIYers make when trying to meet these requirements?
To check your local building codes, contact your city or county building department or visit their website for bathroom ventilation requirements. Common DIY mistakes include undersized fans, not venting to the outdoors, using improper duct materials, and missing required permits or inspections.
You mention budgeting for the upgrade—about how much should I expect to spend if I want to do this myself, including materials and any permits I might need?
For a DIY bathroom ventilation upgrade, typical costs range from $100 to $300 for materials like a new fan, ducting, and vent covers. If your local codes require a permit, that can add $50 to $150. Double-check with your city’s permit office to be sure.
The article mentions code compliance for installing bathroom exhaust fans. Can you explain what the main code requirements are in the US, and how DIYers can make sure they’re meeting them?
US building codes typically require bathroom exhaust fans to vent directly outdoors, not into attics or crawl spaces. The fan should provide at least 50 CFM (cubic feet per minute) for intermittent use. DIYers should check their local codes, use UL-listed fans, and follow manufacturer instructions for wiring, ducting, and vent termination to stay compliant.
You mention boosting home resale value with a ventilation upgrade. In your experience, is there a big difference in perceived value between a basic fan install and a high-end, humidity-sensing model?
Buyers generally notice the difference. A basic fan is expected, but a high-end, humidity-sensing model stands out as a modern upgrade. It signals energy efficiency and attention to detail, which can help your bathroom feel more luxurious and updated—often boosting perceived value beyond the cost difference.
I run a small property management business and was wondering if there are any particular building code requirements or common mistakes to watch out for when upgrading bathroom exhaust fans in older buildings.
Yes, building codes often require bathroom exhaust fans to vent directly outside, not into attics or crawlspaces. Common mistakes include using undersized ducting, neglecting to install backdraft dampers, and failing to upgrade electrical wiring safely. Always check local codes and consider consulting a licensed electrician or contractor for older buildings, as outdated wiring and insulation may pose challenges.
You mention that proper duct routing is important for effective bathroom ventilation. Can you explain how to best route ducts in a renovation project with limited ceiling space, especially in older homes?
In limited ceiling space, try running the duct as directly as possible to the outside with minimal bends. Use rigid ductwork for smoother airflow and insulate the duct to prevent condensation. If ceiling space is too tight, consider running the duct through a closet, soffit, or along a joist bay, ensuring each route remains as straight and short as possible.
Can you explain a bit more about how to figure out the best spot to install a new exhaust fan if the bathroom doesn’t already have one?
To choose the best spot for a new bathroom exhaust fan, locate it near the main source of moisture—usually above the shower or tub. Avoid placing it too close to doors or windows, as drafts can reduce effectiveness. Also, ensure there’s access above the spot (like in the attic) for venting outside and for wiring.
Do you have any advice for homeowners dealing with older properties that only have window ventilation? Is it possible to upgrade to an exhaust fan system without major renovations?
Upgrading from window-only ventilation to an exhaust fan is usually possible without major renovations. Many models are designed for retrofit and can be installed through the ceiling or wall. You’ll need access to electrical wiring and a way to vent air outside, often through the attic or exterior wall. Consulting an electrician can help ensure safety and compliance with local codes.
The article mentions boosting your home’s resale value with better ventilation. Are there certain fan features or brands that appraisers or buyers look for when considering this upgrade?
Appraisers and buyers often appreciate bathrooms with quiet, energy-efficient fans that have features like humidity sensors or built-in lighting. Brands like Panasonic and Broan are generally well-regarded. Look for models with high CFM ratings and low sones for noise, as these signal quality and performance to potential buyers.
The article mentions mold prevention as a big benefit—if I’m dealing with persistent mildew even after a recent fan upgrade, what troubleshooting steps would you suggest to check if my new setup is actually removing enough moisture?
Persistent mildew suggests your fan may not be removing moisture effectively. Check that the fan is properly vented outside, not just into the attic. Run the fan during and after showers for at least 20 minutes. Also, test its airflow by holding a tissue near the grille—if it barely moves, the fan may be underpowered or blocked.
If my local building codes require mechanical ventilation, what are some common mistakes people make that could lead to failed inspections or safety issues during installation?
Common mistakes include using undersized fans, improper ducting that causes poor airflow, venting into attics instead of outside, not installing a backdraft damper, and using incorrect wiring methods. It’s also important to properly seal duct connections and follow all electrical codes to avoid safety issues and failed inspections.
Could you explain how to make sure my DIY installation actually meets building codes? I want to avoid accidentally creating problems if I ever sell my house.
To ensure your DIY bathroom ventilation upgrade meets building codes, start by checking your local building requirements online or at your city office. Obtain any necessary permits before starting. Document your materials and methods, and consider having the finished work inspected. This helps avoid issues during future home sales.
The article mentions that codes often require mechanical ventilation. How can I check if my planned fan and installation will actually meet local building code requirements before I start the project?
To make sure your fan and installation meet local code, contact your city or county building department for their specific ventilation requirements. You can also ask if you need a permit and request an inspection checklist to ensure your project complies before you begin.
You mentioned that window ventilation is rarely enough, especially in humid or cold climates. Is there any situation where a window alone would be sufficient, or should everyone install an exhaust fan?
A window alone might be enough in very dry climates where humidity isn’t an issue or in bathrooms that see infrequent use. However, for most homes, especially those in humid or cold regions, an exhaust fan is much more effective for preventing moisture problems and mold.
Can you go into more detail about how to figure out the best way to route the ductwork safely, especially if there’s limited attic space above the bathroom?
When attic space is limited, consider routing the duct horizontally through a soffit or out a side wall instead of straight up. Use smooth, rigid duct to minimize bends, keep the run as short as possible, and always slope slightly downward to prevent moisture buildup. Check for obstructions before cutting, and insulate the duct if it passes through unconditioned spaces.
If my bathroom only has a window for ventilation and no existing ductwork, how complicated is it for a DIYer to add a mechanical exhaust fan and vent it to the outside?
Installing a mechanical exhaust fan in a bathroom without existing ductwork is a moderate to advanced DIY project. You’ll need to cut a hole in the wall or ceiling, install the fan, run new ductwork to the outside, and handle electrical wiring. Basic carpentry, electrical, and possibly roofing skills are required. If you’re comfortable with these tasks, it’s doable, but many people hire a professional for safety and code compliance.
For someone on a tight budget, are there effective ventilation improvements that make a real difference, or is it necessary to invest in a full exhaust fan installation to avoid mold and moisture damage?
You don’t have to install a full exhaust fan right away to see improvements. Opening windows after showers, using a dehumidifier, or even installing a window vent can help control moisture. However, for long-term mold prevention, an exhaust fan is most effective. Start with simple fixes, and plan for a fan when possible.
You mentioned electrical connections and building codes—are there common mistakes DIYers make with wiring or code compliance, and how can I avoid them during installation?
DIYers often make mistakes like using the wrong wire gauge, neglecting to install a dedicated circuit, or failing to use proper junction boxes. Another common error is not following local code requirements for exhaust fan placement and venting. To avoid these, always turn off power at the breaker, review local codes, use the right materials, and if unsure, consult a licensed electrician.
I noticed you mention duct routing as a potential challenge—do you have any tips on how to handle tricky runs in older homes with limited attic or crawl space access?
In older homes with limited access, consider using flexible ducting to navigate tight spaces, but keep runs as short and straight as possible to maintain airflow. If access is really tight, you might route the duct through a closet or soffit. Sealing all joints well and insulating ducts helps prevent moisture issues.
Can you give some tips on budgeting for this kind of ventilation project? I want to avoid unexpected costs, especially if I have to change ductwork or handle electrical upgrades.
Start by setting aside funds for both materials and possible professional help, especially for electrical work. Get quotes for any ductwork changes and inspect existing wiring before you begin. Factor in permits, new fixtures, and any tools you might need. Build in a 10-15% contingency for unexpected issues that might arise during the project.
If my bathroom only has a window right now and I want to switch to a fan venting outside, is it possible to do this without major renovations, or should I expect significant drywall and ceiling repairs?
Installing a bathroom fan vented outside will usually require some drywall or ceiling work, especially to run ducting and install the vent. While it may not be a full renovation, some patching and painting are likely needed after cutting openings for the fan and ductwork.
If my bathroom only has a window for ventilation right now, what are the main challenges I should watch out for when switching to a modern exhaust fan system, especially with older wiring?
When upgrading to an exhaust fan, you’ll need to watch for issues like inadequate or outdated wiring, which may not safely handle the new fan’s power needs. Also, properly venting the fan outside (not just into the attic) is critical. You might need to open walls or ceilings for safe installation, so planning for patchwork is important.
Can you explain how to determine the best route for ducting if my bathroom is in the middle of the house, away from exterior walls?
For a bathroom located in the center of your home, the best ducting route is usually straight up through the attic and out the roof. If that’s not possible, you can run ductwork horizontally through the attic or between ceiling joists to reach a suitable exterior wall or soffit vent. Always use the shortest, most direct route with minimal bends for optimal airflow.
You mention budgeting for the upgrade—are there any unexpected costs small business owners should watch out for, like extra electrical work or repairs, when retrofitting a vent in an existing bathroom?
Yes, when retrofitting a vent, small business owners might encounter unexpected costs like upgrading old wiring to meet code, repairing drywall after installation, or dealing with hidden water damage or mold. It’s wise to set aside extra funds for these surprises, especially in older buildings where electrical and structural issues are more common.
I’m interested in upgrading my exhaust fan, but how do I ensure the new fan will comply with local building codes regarding airflow and noise levels? Are there standard requirements I should look out for?
To ensure compliance, check your local building codes for specific requirements on minimum airflow (measured in CFM) and maximum noise levels (measured in sones). Many areas require at least 50 CFM for bathrooms, and quieter fans are often rated at 1.5 sones or less. Always confirm the code specifics with your local authority before purchasing.
Can you give a rough estimate of what a typical bathroom ventilation upgrade costs for a small business property versus a standard home? I’m especially interested in budget-friendly options.
For a standard home, a basic bathroom ventilation upgrade usually ranges from $150 to $400, including materials and basic installation. For a small business property, costs might be a bit higher, around $300 to $700, depending on building requirements. Budget-friendly options include choosing energy-efficient, standard-capacity fans and handling simple installation tasks yourself if possible.
If my bathroom already has a window but still feels super humid, does upgrading to an actual exhaust fan make a big difference, or is there a way to improve window ventilation instead?
Upgrading to an exhaust fan usually makes a noticeable difference because it actively removes moist air, unlike a window which relies on passive airflow. If you want to stick with your window, try keeping it open longer after showers and use a small fan to help move air out, but a powered exhaust fan is much more effective overall.
Are there any specific tips for balancing budget and effectiveness when choosing between different exhaust fan models for a small bathroom?
For a small bathroom, look for an exhaust fan with just enough CFM (cubic feet per minute) for your space—usually around 50 CFM is sufficient. Choose models with basic features to keep costs down, and focus on energy efficiency and noise level rather than extra functions you may not need.
If my bathroom only has a window for ventilation right now, is it possible to install an exhaust fan without major renovations, or would that require cutting into the ceiling and adding ducts?
You can usually install an exhaust fan with some modifications, but it does mean cutting into the ceiling or wall and adding ducts to vent air outdoors. The work can be manageable for DIYers if you have attic access above the bathroom, but it will require careful planning and some electrical work.
Do most building codes in the US require you to vent a bathroom exhaust fan all the way outside, or can you vent it into an attic if you use the right materials?
Most US building codes require bathroom exhaust fans to vent all the way outside, not just into the attic, regardless of the materials used. Venting into an attic can cause moisture problems and mold. Always check your local code, but exterior venting is the standard.
I saw that upgrading ventilation can raise home value, but what’s the typical cost range for a DIY bathroom fan installation, including possible electrical work? Just trying to get an idea for budgeting this project.
For a DIY bathroom fan installation, including basic electrical work, expect to spend between $100 and $350. This covers the fan unit itself ($50-$200) and materials like ducting, wiring, and supplies. If your bathroom lacks existing wiring or a vent, costs may go higher. Always prioritize safety with electrical tasks.
My house just has a bathroom window for ventilation right now. Is it a big jump in installation complexity to go from window-only to a fully ducted exhaust fan system?
Switching from window-only ventilation to a fully ducted exhaust fan system is a significant upgrade. It involves cutting a hole in the ceiling, running ductwork to the outside, and installing electrical wiring. If you’re comfortable with basic carpentry and electrical tasks, it’s manageable, but many homeowners choose to hire a professional to ensure proper airflow and compliance with local codes.
You mention compliance with building codes for bathroom ventilation upgrades. How can a small business owner make sure their DIY project meets local code requirements, especially if they’re not familiar with construction standards?
To ensure your DIY bathroom ventilation upgrade meets local code requirements, start by contacting your local building department for guidance and permit information. You can also request a copy of the relevant codes or ask about key ventilation standards. If you’re unsure, consider consulting a licensed contractor for advice or an inspection before finalizing your project.
I’m planning to upgrade my bathroom vent but I’m worried about routing the ductwork through my attic since it’s already pretty cramped up there. Are there any tips in the guide for handling tricky duct routes or working with limited space?
The guide does touch on tight attic spaces and suggests using flexible ducting to help maneuver around obstacles. It also recommends planning your route carefully, measuring before you start, and securing the duct to avoid kinks. If space is extremely limited, consulting a professional might be worth considering.
I noticed you mentioned code compliance—can you clarify if there are common ventilation mistakes DIYers make that could lead to failed inspections?
Absolutely—common mistakes that can cause inspection failures include ducting bathroom fans into attics instead of outside, using undersized or excessively long duct runs, and not installing backdraft dampers. Also, make sure your electrical wiring meets local code and you use the correct fan CFM rating for your bathroom size.
You mention compliance with building codes—could you clarify if there are specific rules or permits I should watch out for when routing the ductwork myself?
When routing bathroom vent ductwork yourself, check your local building codes, as many areas require permits for this kind of work. Common rules include venting directly outdoors (not into an attic), using approved duct materials, and following specific duct size and length limits. It’s best to consult your local building department before starting.
If our shop’s bathroom doesn’t have a window and the space is quite small, would one exhaust fan be enough for proper ventilation, or is there a particular size or power rating I should look out for?
For a small, windowless bathroom, one exhaust fan is usually enough, but it’s important to choose the right size. Look for a fan rated at least 50 CFM (cubic feet per minute) for very small bathrooms. For precise sizing, check the room’s square footage and match it to the manufacturer’s recommendations.
When upgrading my bathroom fan, how can I find out if my current ductwork is actually routed all the way to the exterior? I’m worried it just vents into the attic but I can’t easily access the attic space.
If you can’t access the attic easily, check outside your house for a vent cover or flap near where your bathroom is located. Have someone turn on the fan while you listen for airflow at exterior vents. You might also feel for air exiting or see condensation on cold days, confirming the duct leads outside.
The article mentions potential electrical connections—how difficult is it for a homeowner with basic wiring experience to handle this part safely, or should I always bring in a licensed electrician?
If you have basic wiring experience, connecting a bathroom fan is manageable for simple replacements, as long as you follow all safety steps and local codes. However, for new wiring or changes to circuits, hiring a licensed electrician is safest and may be required by regulations.
If my bathroom doesn’t currently have any exhaust fan installed and only relies on a window for ventilation, how challenging is it to retrofit a modern exhaust fan in terms of electrical work and duct routing?
Retrofitting a bathroom exhaust fan when there isn’t one already can be moderately challenging, mainly because you’ll need to run new electrical wiring and install ductwork to the outside. The difficulty depends on your home’s layout and attic access. You might need to hire an electrician and possibly a contractor for proper venting and safe electrical connections.