Introduction: Why Seasonal Exterior Caulking Matters
Every homeowner wants a comfortable, energy-efficient, and well-protected home. Yet, many overlook the simple but crucial task of inspecting and maintaining exterior caulking. Gaps and cracks around windows, doors, siding, and other exterior joints may seem minor, but they can allow water, air, and pests to enter—leading to costly repairs, mold growth, energy loss, and even structural damage. Seasonal caulking is a straightforward project that delivers huge returns by preventing leaks, drafts, and decay. This in-depth guide provides a practical, step-by-step exterior caulking checklist, covering the tools, materials, and best practices you need to keep your home secure through every season. Whether you’re a first-time DIYer or an experienced renovator, you’ll find detailed advice on identifying trouble spots, selecting the right caulk, applying it effectively, and maintaining your seals for long-term peace of mind.
Understanding Exterior Caulking: What, Where, and Why
What Is Exterior Caulking?
Caulking is a flexible material used to seal joints, seams, and gaps in a building’s exterior envelope. It prevents water, air, dust, and insects from entering through small openings where different materials meet—such as window frames and siding, or door jambs and brickwork. Modern caulks are formulated for specific uses and climates, providing a durable, weather-resistant barrier.
Critical Areas for Caulking
- Window and door frames
- Siding joints and trim
- Gaps between masonry and wood or metal
- Penetrations for pipes, vents, and cables
- Expansion joints
- Where different exterior materials meet
Why Seasonal Checks Are Essential
Caulking degrades over time due to temperature swings, moisture, and UV rays. Seasonal inspection—especially in spring and fall—ensures issues are caught before winter freezes or summer storms cause damage. Proactive maintenance keeps your home’s envelope tight, improving comfort and energy efficiency while protecting against rot, mold, and pests.
Tools and Materials: What You’ll Need
- Caulk Gun: Manual or dripless models for precision application.
- Exterior Caulk: Choose high-quality, paintable exterior-grade caulk (silicone, polyurethane, or advanced polymer blends for flexibility and weather resistance).
- Utility Knife or Scraper: For removing old, cracked caulk.
- Caulk Smoother or Finger: For finishing the bead.
- Painter’s Tape: To mask off areas for clean lines.
- Rags and Water (or Mineral Spirits): For cleanup, depending on caulk type.
- Ladder: For hard-to-reach areas—ensure it’s stable and appropriate for your home’s exterior.
- Gloves and Safety Glasses: To protect your hands and eyes from debris and chemicals.
- Wire Brush or Compressed Air: For cleaning out joints before caulking.
Step-by-Step Seasonal Exterior Caulking Checklist
1. Inspect All Exterior Joints Thoroughly
- Walk around your home, checking all windows, doors, siding seams, trim, and penetrations.
- Look for cracked, missing, or peeling caulk, as well as visible gaps or holes.
- Pay special attention to south-facing exposures, which often deteriorate faster due to sun exposure.
- Use a flashlight and a small mirror to inspect under sills and ledges.
- Mark areas needing attention with painter’s tape or a marker.
2. Remove Damaged or Failing Caulk
- Use a utility knife, scraper, or specialized caulk removal tool to carefully cut and pull away old caulk.
- Take care not to damage the underlying surfaces.
- Brush away debris and clean the joint with a wire brush, compressed air, or a damp rag.
- Allow surfaces to dry completely; caulk adheres best to clean, dry surfaces.
3. Select the Right Caulk
Exterior caulks must withstand temperature fluctuations, precipitation, and UV rays. Choose product types based on the job:
- Silicone Caulk: Superior flexibility and weather resistance; ideal for non-paintable applications.
- Polyurethane Caulk: Highly durable, paintable, and adheres to many surfaces.
- Advanced Polymer or Acrylic Latex Caulk: Easy to apply, paintable, and suitable for most trim and siding but less flexible than silicone or polyurethane.
Check labels for temperature application ranges and compatibility with your surfaces.
4. Mask and Prepare the Area
- Apply painter’s tape on both sides of the joint for crisp, professional lines.
- Insert backer rod (foam rope) into large gaps over 1/4 inch deep to provide a firm base for caulk.
- Lay drop cloths to protect landscaping and walkways from drips.
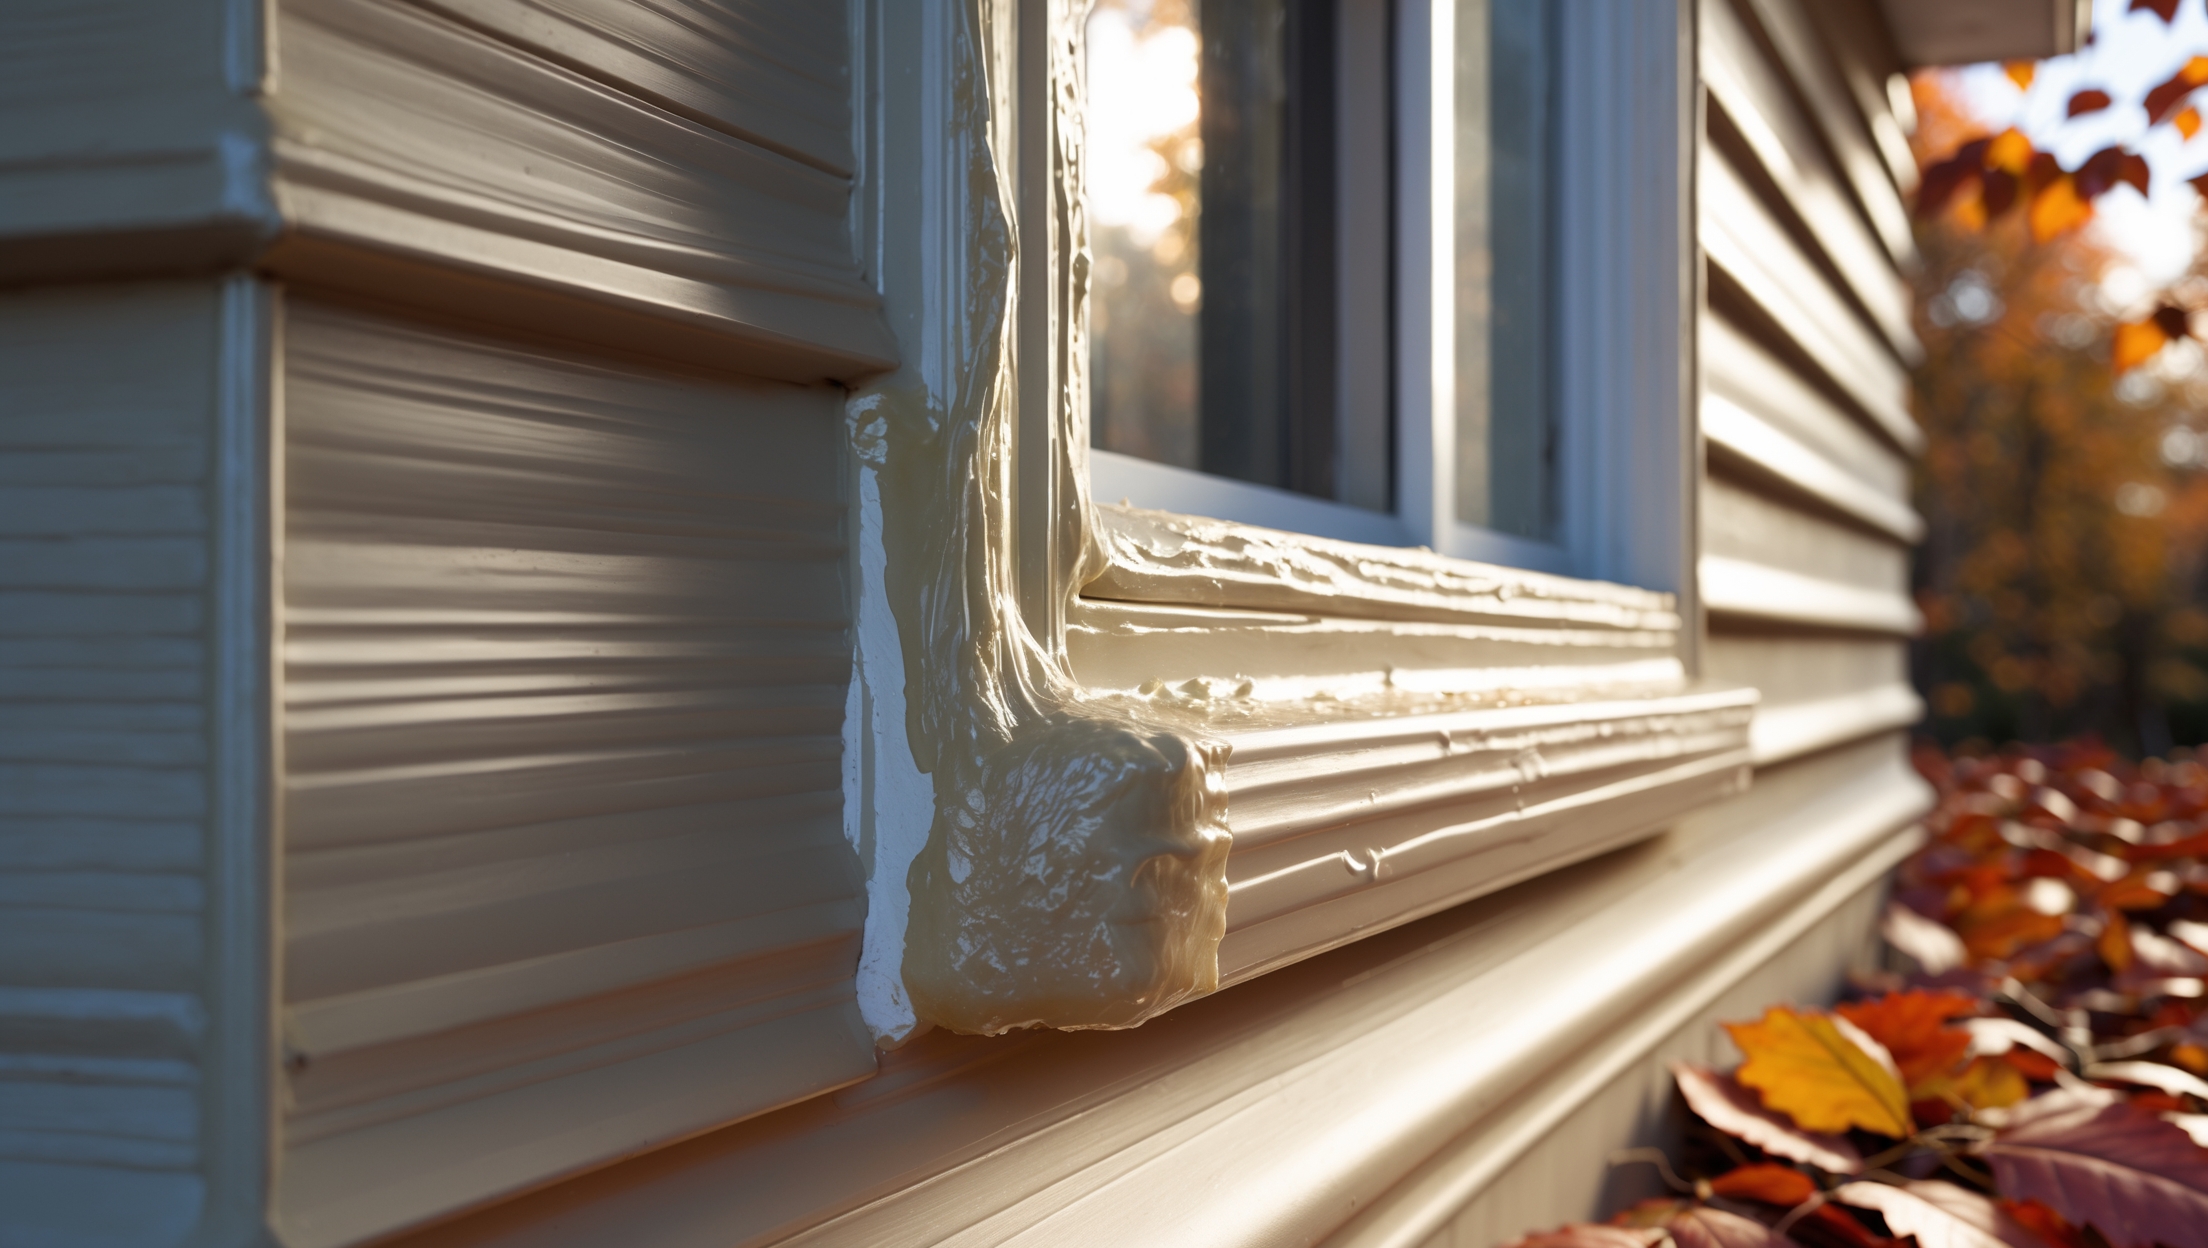
5. Apply Caulk Properly
- Cut the caulk tube tip at a 45-degree angle to match the joint width (usually 1/8 to 1/4 inch).
- Load the tube into your caulk gun and test flow.
- Apply a steady, continuous bead of caulk, moving the gun along the joint at a constant speed.
- Use a caulk smoother, dampened finger, or specialty tool to press and shape the bead, ensuring full contact and a neat finish.
- Remove painter’s tape before the caulk skins over for clean edges.
6. Allow Proper Curing Time
- Check manufacturer’s instructions for curing times. Most caulks require 24 hours to fully cure before painting or exposing to rain.
- Avoid disturbing the bead until fully set to ensure long-term adhesion.
7. Touch Up and Clean Up
- Inspect your work for gaps, missed spots, or messy lines. Reapply as needed.
- Wipe away excess caulk with a damp rag or mineral spirits, depending on the product used.
- Store leftover caulk tubes with the nozzle sealed to prevent drying out.
- Clean tools promptly for future use.
Seasonal Maintenance Schedule
- Spring: Inspect and repair caulking after winter freeze/thaw cycles. Look for shrinkage, cracks, or detachment.
- Fall: Re-check all seals before winter. Pay extra attention to weather-stripping and joints exposed to rain and snow.
- After Severe Weather: Inspect for storm damage and water infiltration.
Consistent attention each season keeps your home sealed and extends the lifespan of your exterior finishes.
Common Exterior Caulking Issues and Troubleshooting
- Cracking or Shrinking: Often caused by using the wrong caulk for the material or climate. Use flexible, high-quality exterior caulk for best results.
- Poor Adhesion: Surfaces may have been dirty, damp, or incompatible. Always clean thoroughly and ensure dryness before application.
- Mold or Mildew Growth: Occurs in damp, shaded areas or with non-mildew-resistant caulk. Use products with added mildewcide and improve ventilation.
- Peeling or Bubbling: Indicates moisture trapped beneath caulk or improper curing. Remove and reapply as needed.
Tips for a Long-Lasting Caulk Job
- Apply caulk on dry days with mild temperatures (50°F–80°F) for optimal adhesion.
- Don’t caulk over old, brittle, or mildewed caulk—always remove it first.
- Match caulk color to your siding or trim for a seamless look. Many caulks are available in a range of hues.
- Use backer rod in wide or deep joints to reduce caulk waste and improve flexibility.
- Store caulk in a cool, dry place and always check expiration dates before use.
Frequently Asked Questions About Exterior Caulking
How often should I re-caulk my home’s exterior?
Most exterior caulks last 5–10 years, but annual inspections are vital. Re-caulk areas showing wear, cracks, or separation right away to prevent water intrusion.
Can I caulk over old caulk?
It’s best to remove old, failing caulk completely. New caulk won’t adhere well to degraded or contaminated material, leading to premature failure.
Is there a difference between interior and exterior caulk?
Yes—exterior caulks are formulated for greater flexibility, weather resistance, and UV stability. Never use interior caulk outdoors.
What’s the best weather for exterior caulking?
Dry weather with temperatures between 50°F and 80°F is ideal. Avoid rainy, humid, or very cold/hot conditions, as they can affect curing and adhesion.
Conclusion: Make Exterior Caulking a Seasonal Priority
Regularly inspecting and maintaining your home’s exterior caulking is one of the most effective ways to prevent leaks, drafts, and costly repairs. By following the comprehensive checklist outlined above, you can easily identify vulnerable areas, remove old or damaged caulk, and apply a durable, weatherproof sealant. The result? Lower energy bills, enhanced comfort, and long-term protection against water damage, rot, and pests. While the job itself is straightforward, attention to detail—like choosing the right product for your climate and surfaces, applying caulk with care, and scheduling seasonal checks—makes all the difference in achieving lasting results. Don’t wait for visible leaks or damage to act; include exterior caulking in your spring and fall home maintenance routines for peace of mind year-round. With just a few hours of effort and minimal investment, you can safeguard your home’s value, comfort, and structural integrity for years to come.
After sealing gaps around pipes and vents, how often should those specific spots be re-checked compared to more sheltered spots like under siding trim?
Gaps around pipes and vents are more exposed to weather, so it’s best to check them twice a year, especially in spring and fall. Sheltered spots like under siding trim usually need inspection just once a year, as they’re less likely to degrade as quickly.
Could you clarify how to tell if old caulking around windows and doors really needs to be removed before adding new, or can I just apply a fresh layer over the existing caulk each season?
If the old caulk is cracked, peeling, missing, or pulling away from the surface, it should be fully removed before applying new caulk. If it’s still firmly attached, smooth, and intact, you can usually apply a fresh layer over it. Proper adhesion depends on a clean, stable base.
I noticed the article talks about caulk types for different climates. How do you know which caulk is best if you get both really hot summers and freezing winters?
For areas with both hot summers and freezing winters, look for caulks labeled as ‘all-weather,’ ‘elastomeric,’ or ‘silicone.’ These types stay flexible and adhere well despite temperature swings. Always check the product label for its recommended temperature range and durability to ensure year-round protection.
If I’m a first-time DIYer, what are some common mistakes to avoid when applying new caulk to windows and doors, especially to make sure the seal lasts through the winter?
When caulking as a first-time DIYer, avoid applying caulk over dirt or old caulk—clean and remove old material first. Don’t skip using painter’s tape for clean lines. Apply caulk in steady, continuous beads and smooth it right away. Make sure the area is dry and wait for the recommended curing time before exposing it to moisture.
How do you know if the caulk around your windows or doors really needs to be replaced, or if it’s still okay for another season?
To check if your caulk needs replacing, look for signs like cracks, gaps, peeling, or if it feels dry and crumbly when you press it gently. If caulk is still smooth, flexible, and well-adhered without gaps, it should be fine for another season.
How can you tell if the caulking around your windows and doors actually needs to be replaced, or if a touch-up will be enough?
Check for cracks, gaps, or areas where the caulk is pulling away from the surface. If you see small cracks or minor peeling, a touch-up should do. If the caulk is missing, crumbling, or letting in water or drafts, it’s best to replace it entirely.