Introduction
Crawl space encapsulation is a home improvement strategy that has gained significant traction over the past decade. Yet, despite its rising popularity, many homeowners remain skeptical about its value, cost, and complexity—often due to persistent myths and misconceptions. Some assume it’s an unnecessary luxury, while others believe it’s a prohibitively expensive or overly technical project. If you’ve ever wondered whether encapsulating your crawl space is worth the investment, or questioned whether it’s a manageable DIY task, this guide is for you.
In this comprehensive post, we’ll debunk the most common myths surrounding DIY crawl space encapsulation, break down the real costs involved, and highlight the long-term benefits for your home’s comfort, energy efficiency, and structural integrity. You’ll also learn practical tips for planning and executing an encapsulation project, plus how to avoid pitfalls that could undermine your efforts. Whether you’re a seasoned DIYer or a cautious beginner, understanding the facts will help you make informed decisions about your home’s foundation—and your family’s health.
Understanding Crawl Space Encapsulation: What Is It?
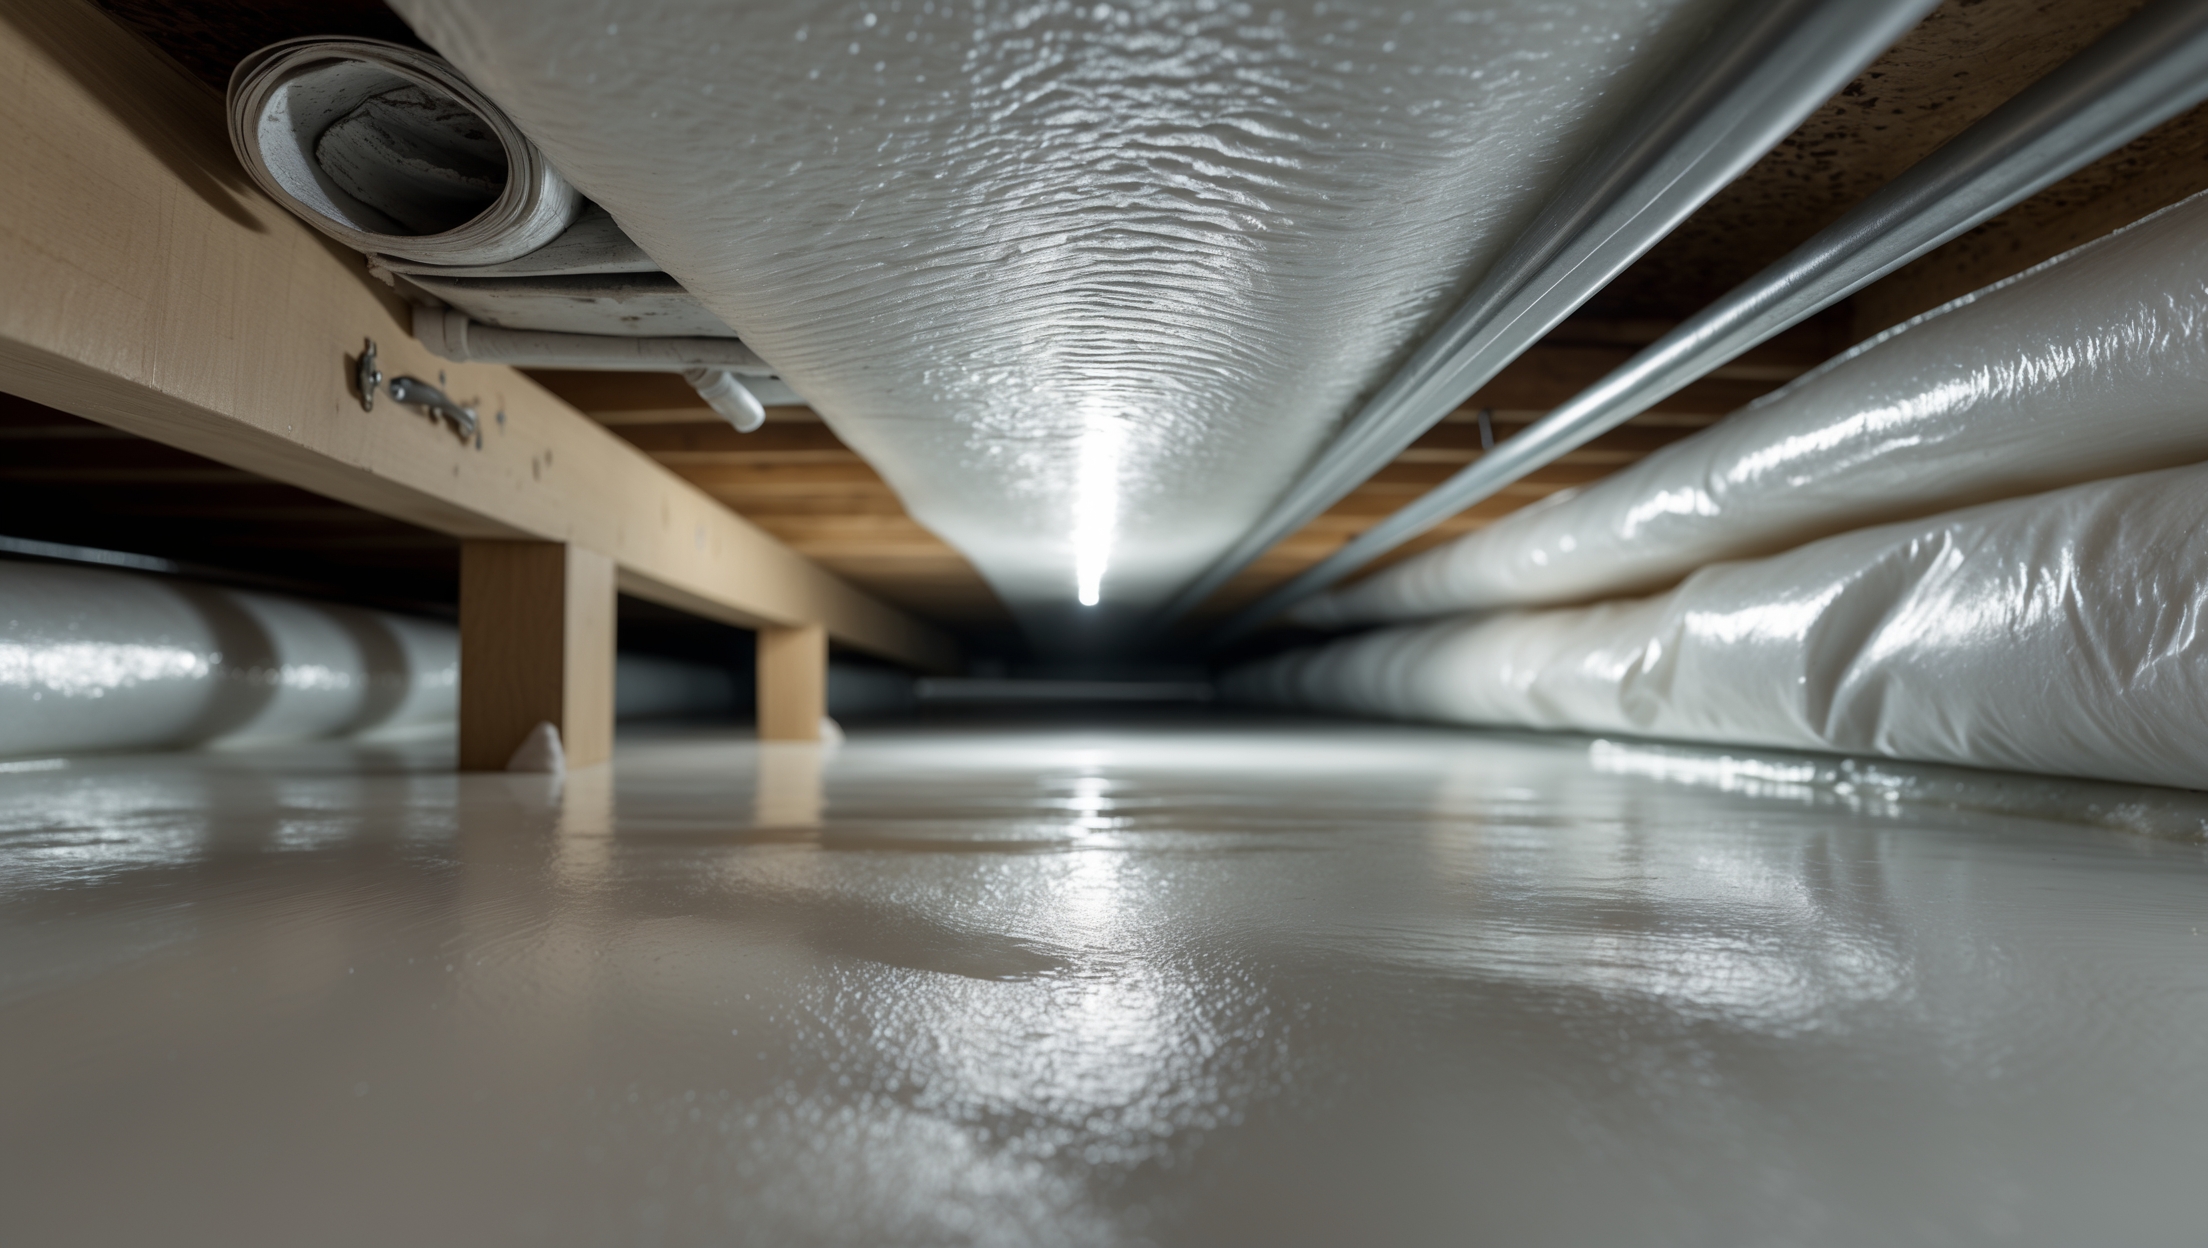
Crawl space encapsulation involves sealing the crawl space beneath your home with a heavy-duty vapor barrier, insulating the walls, and managing ventilation to prevent moisture intrusion. This process is designed to create a controlled environment under your house, protecting your home from excess humidity, mold growth, pest invasions, and structural decay. Encapsulation is especially beneficial in areas with high humidity, frequent rainfall, or known mold issues.
Common Myths About DIY Crawl Space Encapsulation
Myth 1: “Crawl Space Encapsulation Is Only for Old or Damaged Homes”
Many homeowners assume encapsulation is only necessary for houses with visible problems—like mold, musty odors, or sagging floors. In reality, encapsulation is a proactive measure that benefits both new and old homes. Even newly built structures can suffer from high moisture or pest infiltration if the crawl space is left unsealed. The earlier you address crawl space conditions, the more you protect your investment.
Myth 2: “Encapsulation Is Overkill—A Simple Vapor Barrier Is Enough”
While laying a vapor barrier on the ground can help, true encapsulation is a multi-step process that also involves sealing vents and insulating walls. Omitting these steps leaves your crawl space vulnerable to outside air and moisture—negating much of the benefit. A piecemeal approach often leads to recurring issues, especially in climates prone to humidity or flooding.
Myth 3: “DIY Crawl Space Encapsulation Is Too Complicated for Homeowners”
This myth keeps many capable DIYers from attempting the project. While encapsulation does require planning, attention to detail, and some physical labor, it’s well within reach for most homeowners with basic DIY skills. There’s no need for specialized tools or advanced construction knowledge—just patience, the right materials, and careful adherence to best practices.
Myth 4: “Encapsulation Traps Moisture and Causes Mold Growth”
The opposite is true—if done correctly. Encapsulation is specifically designed to keep moisture out. Problems only arise if you skip critical steps, such as sealing foundation vents, repairing leaks, or installing a dehumidifier where needed. Proper prep work and follow-through are key to ensuring encapsulation prevents, rather than contributes to, mold.
Myth 5: “Encapsulation Will Make My Home Too Airtight and Unsafe”
This myth confuses crawl space encapsulation with whole-house air sealing. While encapsulation does reduce airflow under your home, it doesn’t impact indoor air quality if you maintain proper ventilation and monitor humidity. In fact, encapsulation often improves indoor air quality by blocking out mold spores and allergens.
Myth 6: “Crawl Space Encapsulation Is Always Expensive and Has a Low ROI”
While professional encapsulation can cost several thousand dollars, a well-executed DIY project is considerably more affordable. More importantly, the long-term savings on energy bills, reduced maintenance, and increased home value offer a strong return on investment—far outweighing the upfront costs in most cases.
Cost Breakdown: What to Expect for DIY Encapsulation
One of the biggest deterrents for homeowners is perceived cost. Let’s break down what you’ll actually need to budget for a typical 1,000-square-foot crawl space:
- Vapor Barrier (12–20 mil thick): $0.40–$0.70 per sq. ft. ($400–$700)
- Seam Tape & Fasteners: $60–$120 total
- Spray Foam or Rigid Foam Board Insulation: $1–$2 per sq. ft. of wall ($120–$250 for average perimeter)
- Dehumidifier (if needed): $200–$450
- Crawl Space Door & Vent Covers: $100–$250
- Miscellaneous Tools/Supplies: $100–$200 (utility knife, caulk, PPE, etc.)
Total Estimated DIY Cost: $980–$1,970 (compare to $4,000–$8,000 for professional installation)
Keep in mind: Costs vary by region, crawl space size, material choices, and whether you need to address existing issues like standing water or pest infestations.
Long-Term Benefits of Crawl Space Encapsulation
Improved Indoor Air Quality
Up to 50% of the air circulating in your home can originate from the crawl space. By sealing out moisture, mold, and soil gases, encapsulation dramatically reduces airborne allergens and pollutants—especially important for allergy sufferers and families with young children.
Enhanced Energy Efficiency
Encapsulation creates a thermal barrier that helps maintain consistent indoor temperatures. This reduces strain on your HVAC system and can cut energy bills by 10–20% in many climates. Sealing up leaks also minimizes drafts and cold floors in winter.
Protection Against Structural Damage
Persistent moisture is the enemy of wood framing, subfloors, and even masonry. Encapsulation prevents rot, warping, and rust on metal components, extending the lifespan of everything from joists to ductwork.
Pest Deterrence
Rodents, insects, and other pests love dark, damp crawl spaces. Encapsulation removes the humidity and entry points that attract them, making your home less inviting to unwelcome guests.
Increased Home Value
Encapsulation is an attractive feature for buyers, signaling excellent maintenance and lower risk of future repairs. It can increase your home’s resale value and marketability, especially in regions with known moisture or pest problems.
Step-by-Step DIY Crawl Space Encapsulation Overview
While this isn’t a full installation guide, here’s a high-level overview of the DIY encapsulation process:
- Inspect and Prep: Remove debris, check for standing water (address drainage issues first), and repair any plumbing leaks or foundation cracks.
- Seal Gaps and Vents: Use foam or caulk to seal small gaps. Install vent covers and insulate any exposed pipes.
- Install Vapor Barrier: Lay heavy-duty polyethylene sheeting over the ground, overlapping seams by at least 12 inches. Run the barrier up walls and secure with tape and fasteners.
- Insulate Walls: Attach foam board or spray foam insulation to foundation walls (not ceiling joists in most climates).
- Seal Door and Access Points: Replace or insulate crawl space doors and ensure a tight fit to prevent drafts.
- Install Dehumidifier: If humidity remains high, add a crawl-space-rated dehumidifier and route the drainage outside.
- Monitor Conditions: Place a hygrometer to track moisture levels and inspect regularly for any signs of issues.
Potential Pitfalls and How to Avoid Them
- Skipping Drainage Solutions: Encapsulation won’t fix active water intrusion. Address drainage or install a sump pump if necessary.
- Inadequate Sealing: Overlooking small gaps, utility penetrations, or seams can undermine moisture control. Double-check every joint and edge.
- Poor Quality Materials: Thinner vapor barriers (under 12 mil) are prone to tearing and premature failure. Invest in thick, puncture-resistant materials.
- Ignoring Local Codes: Some municipalities have rules about crawl space ventilation or insulation. Always verify compliance before starting.
- Lack of Monitoring: Moisture can return if a pipe leaks or a barrier is punctured. Regularly check conditions and make repairs as needed.
Frequently Asked Questions
How long does DIY crawl space encapsulation take?
Most projects can be completed over 2–3 weekends, depending on crawl space size and existing conditions. Complex drainage issues or large areas may require more time.
Is a dehumidifier always necessary?
If your crawl space is prone to high humidity year-round, a dehumidifier is strongly recommended. In drier climates, encapsulation alone may suffice.
Can I encapsulate if my crawl space has a dirt floor?
Yes—encapsulation is especially important for dirt floors, which are major sources of ground moisture. Ensure the vapor barrier fully covers the soil and is tightly sealed to the walls.
Will I need a permit for crawl space encapsulation?
Regulations vary by locality. Some areas require permits for insulation or structural modifications. Check with your local building department before starting.
Conclusion
Crawl space encapsulation is a truly transformative home improvement—one that pays dividends in comfort, health, and property value for years to come. Debunking common myths is the first step toward understanding its true potential. Far from being an unnecessary luxury or an overly complex project, encapsulation is a practical, approachable, and cost-effective upgrade for most homes.
By separating fact from fiction, you can confidently assess whether DIY encapsulation is right for you. The process requires diligence and attention to detail, but the rewards are well worth the effort: cleaner indoor air, lower energy bills, and robust protection against moisture-related damage. With a clear-eyed view of the real costs and benefits—and a careful approach to preparation and installation—you can safeguard your home’s foundation and improve your quality of life for the long haul.
If you’re ready to take on this project, start by inspecting your crawl space and assembling the right materials. Remember to prioritize safety, consult local codes, and don’t hesitate to call in a professional for complex drainage or structural repairs. With the right information and a methodical approach, crawl space encapsulation can be one of the most impactful DIY improvements you’ll ever make.
You mention long-term benefits and potential cost savings, but how much should I reasonably expect to spend on materials for DIY crawl space encapsulation compared to hiring a pro?
For a typical DIY crawl space encapsulation, material costs generally range from $1,500 to $3,000, depending on the size and materials chosen. Hiring a professional can cost between $5,000 and $15,000. The DIY route saves significantly on labor, but be sure to factor in time and any tools you might need to purchase or rent.
The article mentions managing ventilation as part of encapsulation. Is it better to use a mechanical dehumidifier or just rely on passive vents, especially in climates with really high humidity like the Southeast?
In high-humidity climates like the Southeast, a mechanical dehumidifier is usually more effective than passive vents. Passive vents can let in more moist air, while a dehumidifier actively controls moisture levels and helps prevent mold and structural issues after encapsulation.
For homeowners attempting a DIY encapsulation, what are some of the most common mistakes that could compromise the effectiveness of the vapor barrier?
Some frequent mistakes include not sealing all seams and edges of the vapor barrier, skipping repairs of existing cracks or moisture issues before installation, using the wrong tape or adhesive, and failing to overlap barrier sections adequately. It’s also important to extend the barrier up the walls several inches and secure it tightly to prevent gaps.
You mention using a heavy-duty vapor barrier for encapsulation, but do you have any tips for choosing the right thickness or type of barrier for areas with especially high humidity like the Southeast?
For areas with high humidity like the Southeast, choose a vapor barrier that’s at least 12 to 20 mils thick and made of reinforced polyethylene. Thicker barriers offer better moisture resistance and durability, especially if you expect foot traffic or storage use in the crawl space.
Can you give a rough estimate of the long-term costs versus savings on energy bills for a typical sized home, especially for someone on a tight renovation budget?
For a typical home, DIY crawl space encapsulation can cost between $1,500 and $5,000 upfront. However, you could see annual energy savings of 10–20%, which often means $150–$300 per year. Over ten years, the savings can help offset or even surpass your initial investment, making it a budget-friendly improvement in the long run.
Can you give more details about what kind of insulation should be used on crawl space walls, and if there are specific materials that work best for DIY encapsulation?
For DIY crawl space wall insulation, rigid foam board (like extruded polystyrene or polyisocyanurate) is highly recommended because it resists moisture and insulates effectively. Avoid fiberglass batts, which can absorb water and lead to mold. Make sure to seal all seams with tape or spray foam for best results.
If a homeowner notices minor mold before starting encapsulation, is it safe to proceed with DIY methods, or should a professional address the mold first?
If you notice any mold, even minor, it’s best to have it professionally assessed and removed before starting encapsulation. DIY methods might not fully address hidden mold, which could cause health issues or future problems. Professionals can ensure all mold is safely remediated before you move forward.
You mention the real costs involved, but could you break down what materials or steps tend to be the most expensive in a typical DIY crawl space encapsulation project?
The most expensive parts of DIY crawl space encapsulation are usually the heavy-duty vapor barrier material, high-quality tape and sealants, and a dehumidifier if you add one. Labor is free if you do it yourself, but tools and insulation can also add to costs depending on your crawl space size.
I’m trying to figure out the actual costs involved for a small house. Can you give a rough estimate of DIY crawl space encapsulation materials versus hiring a professional?
For a small house, DIY crawl space encapsulation materials usually cost between $1,500 and $3,000, depending on quality and local prices. Hiring a professional can range from $5,000 to $10,000 or more, since labor and expertise are factored in. The main savings with DIY are labor costs, but ensure you’re comfortable handling the work.
The article mentions that encapsulation helps with home comfort and energy efficiency. How quickly can you notice a difference in utility bills or indoor air quality after finishing a DIY crawl space project?
You can often notice improvements in indoor air quality within days after completing encapsulation, as humidity and musty odors decrease. Changes in utility bills, like lower heating or cooling costs, may become noticeable within one or two billing cycles, depending on your home’s size and energy usage.
I’m curious how the long-term maintenance compares when you DIY encapsulate your crawl space versus hiring a professional. Are there specific issues that tend to come up more often with DIY jobs?
When you DIY encapsulate a crawl space, long-term maintenance can be trickier since improper sealing or material choice often leads to moisture issues, mold, or pest problems over time. Professionals typically use higher-quality materials and ensure thorough installation, which reduces the chances of such issues cropping up later on.
What kind of budget should I realistically expect for a DIY crawl space encapsulation, including tools and materials, and are there any hidden costs first-timers often overlook?
For a DIY crawl space encapsulation, expect to spend around $1,500 to $4,000, depending on your crawl space size and material choices. This includes vapor barrier, tape, sealant, dehumidifier, and tools like a utility knife. First-timers often overlook costs for protective gear, extra sealing supplies, disposal fees, and fixing minor water issues before encapsulation.
For newer homes that don’t show signs of moisture or pest issues, is there a recommended schedule for checking whether encapsulation might be needed later on, or is it truly beneficial as a preventative measure from the start?
For newer homes without current issues, it’s wise to check your crawl space at least once a year for any early signs of moisture or pests. Encapsulation can be a good preventative measure, but it’s not always essential right away—regular monitoring helps you decide if or when it becomes necessary.
You mention encapsulation being especially helpful in areas with high humidity. If my region only has mild humidity, is it still worthwhile to do a full encapsulation, or would basic vapor barriers do the job?
In regions with only mild humidity, a basic vapor barrier is often sufficient to control moisture. Full encapsulation offers added protection but may not be necessary unless you have specific concerns like persistent dampness, mold, or pest issues in your crawl space.
The article mentions long-term benefits like improved energy efficiency—how soon after encapsulating the crawl space would I notice a difference on my utility bills?
Most homeowners start noticing lower utility bills within the first one to three months after encapsulating their crawl space. The exact timing depends on factors like the size of your home, your insulation levels, and local climate, but improved energy efficiency often shows up relatively quickly.
Can you explain more about the type of vapor barrier needed for DIY crawl space encapsulation? Is there a specific thickness or material you recommend for humid climates?
For DIY crawl space encapsulation, a polyethylene vapor barrier is commonly used. In humid climates, it’s best to use a 12-mil or thicker barrier for durability and moisture protection. Reinforced polyethylene is especially recommended, as it resists tearing and provides a reliable seal against ground moisture.
I’m new to DIY projects and wondering how complicated the actual installation of the vapor barrier is during crawl space encapsulation. Are there certain tools or materials that are absolutely essential for beginners?
Installing a vapor barrier in your crawl space can be manageable for beginners, but it does require some patience. Essential tools and materials include heavy-duty plastic sheeting (at least 6 mil thick), a utility knife, double-sided tape or adhesive, a staple gun, and safety gear like gloves and a mask. Sealing the seams carefully is key to an effective installation.
The article talks about the costs involved in DIY encapsulation. Could you provide a ballpark budget or a breakdown of what the biggest expenses are, and where a homeowner might be able to save?
DIY crawl space encapsulation typically costs between $1,500 and $4,000, depending on size and materials. Major expenses include vapor barriers, sealant tape, dehumidifiers, and insulation. You can often save by doing the labor yourself and shopping around for vapor barrier materials, but avoid cutting corners on quality to ensure long-term effectiveness.
Can you give more details about the real costs involved with DIY versus hiring a professional? I’m trying to figure out if saving on labor is worth the potential risks or added hassle.
DIY crawl space encapsulation usually costs $500 to $2,000 for materials, while hiring a professional can range from $3,000 to $10,000 depending on your home’s size and needs. While you save on labor with DIY, you may face challenges like improper installation, missed issues, or lack of warranty, which could lead to higher costs long-term if problems arise.
If I’m not super handy, are there specific steps in the DIY crawl space encapsulation process that usually trip people up or require professional help, such as dealing with ventilation or installing the vapor barrier?
Yes, people often find installing the vapor barrier and managing ventilation or sealing vents challenging. Working around obstacles like pipes or wiring and ensuring an airtight seal can be tricky. If you’re not handy, you might want professional help with these steps to avoid moisture issues later.
I noticed you mention that encapsulation helps with energy efficiency. In your experience, have you seen a noticeable drop in utility bills after finishing a DIY crawl space encapsulation, and if so, how long did those savings take to materialize?
Yes, many homeowners notice lower utility bills after encapsulating their crawl spaces, especially during extreme temperatures. The savings usually become apparent within the first one to two billing cycles, as the improved insulation helps your HVAC system run more efficiently.
You talked about DIY encapsulation and breaking down the actual costs. Could you give an idea of the main expenses a small business or homeowner should budget for when planning to encapsulate a crawl space themselves?
When planning DIY crawl space encapsulation, budget for vapor barrier material (usually heavy-duty plastic sheeting), tape and sealants, insulation, a dehumidifier, and possibly a sump pump. For a typical small space, expect material costs to range from $1,500 to $4,000 depending on quality and size. Don’t forget safety gear and basic tools if you don’t already have them.
The article says encapsulation can help with energy efficiency and mold prevention. Is there a typical timeline for noticing those benefits after completing the project, and are there early warning signs if something in the encapsulation wasn’t done correctly?
You’ll often notice improved energy efficiency and humidity reduction within a few weeks after encapsulation. Mold prevention benefits can be seen over several months. Early warning signs of improper encapsulation include lingering musty odors, visible moisture or condensation, and increased utility bills. If you observe these, it’s a good idea to inspect the area for gaps, tears, or unsealed vents.
You talked about sealing the crawl space with a heavy-duty vapor barrier and managing ventilation—what are some common mistakes that beginners make in this process, and how can they be avoided?
A few common mistakes include using thin or low-quality vapor barriers, failing to seal seams and edges properly, overlooking pipe or wire penetrations, and blocking necessary vents in humid climates. To avoid these, choose a thick (at least 12-mil) barrier, tape all seams tightly, carefully seal around obstacles, and follow local codes for ventilation needs.
I saw the article mentions insulation for the crawl space walls when encapsulating. Is there a specific type of insulation that works best for DIY projects, or can I just use what’s available at my hardware store?
For DIY crawl space encapsulation, rigid foam board insulation is usually recommended because it’s moisture-resistant and easy to cut to size. Unlike fiberglass batts, foam boards won’t absorb water or promote mold. Check that the insulation you choose is rated for below-grade use and follow local building codes for the best results.
You mention that encapsulation helps with moisture and mold issues, but what about homes that already have some minor mold present? Is it okay to encapsulate before fully removing all traces of existing mold?
It’s important to remove all existing mold before encapsulating your crawl space. If you encapsulate over mold, it can continue to grow and potentially worsen air quality in your home. Make sure any mold is properly treated and cleaned up first for the best results.
If my home is in a region with frequent rainfall but no current signs of mold or sagging, is it better to encapsulate now as a preventive step, or wait until problems develop?
Encapsulating your crawl space now, even without current issues, can be a smart preventive step—especially in areas with frequent rain. This helps keep moisture out, reducing the risk of future mold or structural problems. Acting early can also save you from more costly repairs down the line.
You mention the importance of managing ventilation during encapsulation. Could you explain what kind of ventilation adjustments a DIYer needs to plan for, and how complicated that part of the process usually is?
When encapsulating a crawl space, you’ll usually need to block existing vents but install a dedicated air exchange system, like a dehumidifier or a small supply vent from your HVAC. For DIYers, sealing the vents is straightforward, but adding or modifying HVAC vents or running new electrical for a dehumidifier can be more complex and might require a professional.
You mention that encapsulation can benefit both new and old homes. Are there any warning signs in a newer home that would make encapsulation more urgent, or is it mostly a preventative step?
Encapsulation is usually a preventative step for newer homes, but signs like musty odors, visible moisture, condensation, or high indoor humidity can mean it’s urgent. Even new homes can develop crawl space issues if drainage or ventilation isn’t ideal, so it’s good to watch for these warning signs.
Can you elaborate on what kind of ventilation management is best for encapsulated crawl spaces in humid regions? I’ve heard conflicting advice about installing vents versus using dehumidifiers.
In humid regions, it’s generally best to seal crawl space vents and use a dehumidifier to control moisture levels. Open vents can let humid air in, causing condensation and mold. A quality dehumidifier helps maintain ideal humidity, protecting your home’s structure and air quality.
You mention avoiding pitfalls during DIY crawl space encapsulation—what are some common mistakes first-timers make, and how can I make sure I don’t miss any important steps during the process?
Common mistakes include failing to properly seal all vents and gaps, using the wrong vapor barrier thickness, and not addressing existing moisture or mold before encapsulation. To avoid missing steps, create a checklist covering cleaning, repairs, sealing, barrier installation, and dehumidification, and follow manufacturer recommendations throughout the process.
For someone with basic DIY skills, what are some common pitfalls to watch out for that might still lead to mold or musty odors even after encapsulation?
Some common pitfalls include not properly sealing all vents and gaps, using the wrong type of vapor barrier, or failing to address pre-existing moisture or leaks before encapsulation. Also, forgetting to install a dehumidifier can allow humidity to linger, leading to mold and musty odors even after encapsulation.
I’m interested in trying DIY encapsulation, but I’m worried about messing up ventilation and causing mold issues. Are there any beginner mistakes mentioned that I should watch out for?
Yes, the article highlights some beginner mistakes to avoid. A common one is sealing the crawl space too tightly without adding proper ventilation or a dehumidifier, which can trap moisture and cause mold. Make sure to control humidity and check for existing leaks or water problems before sealing everything up.
After sealing the crawl space and installing a vapor barrier as described, how do you monitor if you’ve actually achieved the controlled environment you want? Are there affordable ways to check for ongoing moisture or air quality issues?
To check your crawl space environment, you can use affordable digital hygrometers to monitor humidity and temperature levels. For moisture, place a few inexpensive wireless sensors in different spots. For air quality, there are budget air quality monitors available that track VOCs and mold risk. Regularly checking these readings helps you spot and address any issues early.
The article mentions encapsulation is especially helpful in areas with high humidity or mold issues. If my crawl space has never had visible moisture or mold, is it still worth the investment or can I skip it safely?
If your crawl space has stayed dry and free of mold, encapsulation may not be urgent. However, it can still help prevent future problems and improve energy efficiency. If your local climate is generally dry and you haven’t seen issues, you can likely skip it for now and monitor conditions periodically.
I live in a pretty humid area, so I’m interested in the long-term benefits you mentioned. Does encapsulating the crawl space really make a noticeable difference in energy bills, and if so, how soon after finishing the project would I typically see savings?
Encapsulating your crawl space in a humid area can noticeably lower your energy bills by reducing moisture and helping your HVAC system run more efficiently. Many homeowners start seeing savings within the first few months after the project is completed, though the exact timing can vary depending on your home’s size and insulation.
You mentioned encapsulation helps prevent pest invasions—does this mean you should address existing pest problems before starting, or can encapsulation alone handle minor infestations?
It’s best to address any existing pest problems before starting crawl space encapsulation. Encapsulation helps prevent future invasions, but it won’t eliminate pests that are already present. Handling current infestations first ensures the encapsulation is effective and long-lasting.
Could you expand on the real cost breakdown for a DIY approach? I’m trying to figure out if the upfront expense covers just materials or if there are hidden costs DIYers often overlook.
The upfront expense for DIY crawl space encapsulation mainly covers materials like vapor barriers, tape, insulation, and sealants. However, many DIYers underestimate additional costs such as tool rentals, disposal fees, protective gear, and potential repairs to joists or pipes discovered during the project. It’s important to budget extra for these hidden expenses.
I’m curious about the real costs mentioned—does your breakdown include potential hidden expenses like repairs to existing moisture damage before encapsulation, or is it just materials and labor?
The cost breakdown in the article mainly covers materials and labor for the encapsulation itself. It doesn’t include extra expenses like repairing existing moisture damage or structural issues, which can add to the total cost if problems are discovered before encapsulation begins.
You mentioned breaking down the real costs for DIY encapsulation. Could you give a ballpark figure for materials and time investment for an average-sized crawl space?
For an average-sized crawl space (around 1,500 square feet), material costs typically range from $1,500 to $3,000. This includes vapor barriers, tape, sealants, and insulation. As for time, expect to spend 2 to 4 full days on the project, depending on your experience and any prep work needed.
The article talks about managing ventilation as part of the process. Can you clarify what kind of ventilation adjustments are needed during DIY encapsulation, especially if my home is in a humid area?
During DIY crawl space encapsulation in a humid area, it’s important to seal exterior vents and gaps to keep moisture out. Instead of traditional ventilation, consider installing a dehumidifier inside the encapsulated space to control humidity levels. This helps maintain a dry environment and prevents mold growth.
Does encapsulation make sense if my crawl space seems dry right now, or is it mostly for homes with visible problems like musty smells or sagging floors?
Encapsulation can still be a smart investment even if your crawl space appears dry now. It helps prevent future moisture issues, improves energy efficiency, and can protect your home’s structure over time, not just fix existing problems like odors or sagging floors.
If my crawl space already has some minor mold, should I take care of that before starting encapsulation, and are there specific products you recommend for prepping the area?
It’s important to remove any mold before starting encapsulation to prevent future problems. Clean the area using a mold remover labeled for crawl spaces, such as Concrobium Mold Control or RMR-86. Always wear protective gear and let the area dry completely before sealing it.
How much of a difference does sealing and insulating the crawl space actually make on monthly energy bills? I’m trying to figure out if the upfront costs really pay off for a typical family home.
Sealing and insulating your crawl space can lower monthly energy bills by 10–20% for many homes, since it helps keep indoor temperatures stable. While upfront costs vary, most families see payback within a few years thanks to improved comfort and savings on heating and cooling.
When it comes to managing ventilation after encapsulation, are there specific steps DIYers should take to avoid accidentally creating new issues like stale air or trapped humidity?
After encapsulation, it’s important to ensure proper ventilation by installing a dehumidifier specifically designed for crawl spaces. Seal all vents and monitor humidity levels, aiming for 45-55%. Avoid using crawl space fans that draw in outside air, as this can reintroduce moisture. Regularly inspect for condensation or musty odors as signs to adjust your approach.
Could you clarify which parts of crawl space encapsulation are typically feasible for a cautious DIYer, and which steps might require a professional to avoid costly mistakes?
A cautious DIYer can often handle tasks like cleaning the crawl space, laying down a vapor barrier, and installing basic insulation. However, jobs such as sealing foundation vents, electrical or plumbing work, and addressing significant mold or structural issues are best left to professionals to ensure safety and avoid expensive errors.
You touched on both insulation and ventilation as key parts of crawl space encapsulation. How can a homeowner balance these to prevent moisture build-up but still maintain healthy airflow?
To balance insulation and ventilation, make sure to fully seal and insulate the crawl space, then use a mechanical ventilation system like a dehumidifier or a ventilation fan. This setup controls moisture while ensuring a steady flow of fresh air, reducing the risk of mold and maintaining healthy air quality indoors.
When you mention sealing the crawl space with a vapor barrier, how do I know what thickness or type of barrier I should use for a humid climate? Is there a standard recommendation for DIY projects?
For humid climates, a 12-20 mil thick polyethylene vapor barrier is generally recommended. This thickness offers strong moisture protection and durability for DIY projects. Choose a barrier labeled as ‘reinforced’ or ‘puncture-resistant’ for added reliability. Be sure it covers the ground and overlaps walls for the best results.
I’m considering a DIY encapsulation but am worried about the overall cost. Could you provide a ballpark estimate of what materials and tools would add up to for an average-sized crawl space?
For an average-sized crawl space (about 1,000 to 1,500 square feet), materials and tools for a DIY encapsulation typically range from $1,500 to $3,000. This covers vapor barrier, tape, sealants, insulation, dehumidifier, and basic tools. Costs can vary based on quality of materials and any additional repairs needed.
If my crawl space doesn’t have any obvious humidity or mold problems, is there still a big benefit to encapsulating it, or would basic insulation and ventilation be enough for a dry climate?
Even in a dry climate without visible humidity or mold issues, encapsulating your crawl space can still provide benefits like improved energy efficiency, better indoor air quality, and long-term protection against future moisture problems. Basic insulation and ventilation can help, but encapsulation offers a more comprehensive barrier if you want maximum peace of mind.
The article talks about the real costs of DIY crawl space encapsulation, but can you give a ballpark figure for the total materials needed for an average-sized home? I want to compare it to what pros charge in my area.
For an average-sized home, DIY crawl space encapsulation materials typically cost between $1,500 and $3,000. This covers vapor barriers, tape, sealants, insulation, and a dehumidifier if needed. Professional services usually run $5,000 to $15,000, depending on your region and the complexity of the job.
The article talks about avoiding pitfalls during installation. Could you share specific mistakes that new DIYers often make when trying to seal and insulate their crawl spaces?
Certainly! Common mistakes include not sealing all vents and gaps thoroughly, using the wrong type or thickness of vapor barrier, failing to address existing moisture or mold before encapsulation, and improper insulation placement. Skipping drainage solutions or not taping seams correctly can also cause issues down the line.
When considering the long-term benefits, how do the energy savings from crawl space encapsulation typically compare to the upfront DIY material costs?
Over time, the energy savings from crawl space encapsulation can offset or even surpass the initial costs of DIY materials. Many homeowners notice lower heating and cooling bills within the first year, with cumulative savings adding up over several years, making it a worthwhile investment in most cases.
The guide talks about avoiding pitfalls during encapsulation. What are some of the most common mistakes homeowners make when managing crawl space ventilation, and how can those be prevented early in the project?
A common mistake is leaving crawl space vents open after encapsulation, which lets in moisture and undermines the whole process. Another is failing to seal all air leaks and gaps. Prevent these by thoroughly sealing all vents and cracks with appropriate materials during encapsulation and ensuring mechanical ventilation is properly installed if needed.
How difficult is it for a beginner to install a vapor barrier and insulation in the crawl space without professional help? Are there any common mistakes first-timers should watch out for during encapsulation?
Installing a vapor barrier and insulation in your crawl space can be challenging for beginners, mainly due to tight spaces, moisture issues, and needing proper sealing. Common mistakes include not overlapping or sealing the barrier’s seams, leaving gaps around piers, and using incorrect insulation materials. Careful prep, measuring, and sealing are crucial for effective results.
You mention the benefits of encapsulation for both old and new homes. Is there a difference in the material or approach you would recommend for a newer home versus an older one with existing moisture issues?
For older homes with existing moisture issues, it’s important to address those problems first—such as repairing leaks or improving drainage—before encapsulation. Materials are generally similar for both new and old homes, but older homes may need thicker vapor barriers or additional sealing to address wear and tear. The main difference is the extra prep work often required in older homes.
Could you share more specifics about the typical costs involved for a DIY crawl space encapsulation, especially compared to hiring a professional? I’m trying to figure out if there are hidden expenses that might not be obvious to a first-timer.
DIY crawl space encapsulation usually costs between $1,500 and $4,000, depending on materials and the size of your space. Hiring a professional can range from $5,000 to $15,000. Hidden expenses for DIYers include tools, extra sealants, potential repairs, and disposal of old insulation. Make sure to budget for unforeseen issues you might discover once you start.
You mention energy efficiency as one of the long-term benefits. Do you have any estimates on how much a typical homeowner might save on utility bills after encapsulating a crawl space?
Homeowners can typically save between 10% to 20% on their heating and cooling bills after encapsulating a crawl space, depending on climate, the condition of the space beforehand, and overall home insulation. Actual savings vary, but many notice their HVAC systems run less often and indoor temperatures stay more consistent.
You mention encapsulation can improve energy efficiency and comfort, but do the upfront costs really pay off if my home isn’t showing obvious issues like moisture or odors yet?
Even without obvious issues, encapsulation can still reduce energy bills by helping your HVAC run more efficiently. Over time, these savings can offset the initial costs, especially in climates with temperature extremes. Plus, it acts as a preventative measure, potentially avoiding expensive repairs from hidden moisture problems down the road.
You mention crawl space encapsulation can help with humidity and mold, but is it still recommended if my region doesn’t get a lot of rain or moisture? I’m trying to decide if it’s worth the effort in a drier climate.
Even in drier climates, crawl space encapsulation can still offer benefits, such as improving indoor air quality and keeping out pests. However, if moisture and humidity are rarely issues in your area, the investment may not be as necessary. Assess your home’s specific needs before deciding.
What are some signs during the process that I might need to call in a professional instead of continuing the DIY approach, especially when dealing with mold or tricky ventilation issues?
If you spot extensive mold growth, strong musty odors, or suspect structural damage, it’s time to call a professional. Also, if you have trouble managing ventilation or notice persistent moisture despite your efforts, expert help is recommended to address underlying issues safely and thoroughly.