Introduction: Why Under-Cabinet Lighting Is a Game-Changer for Your Kitchen
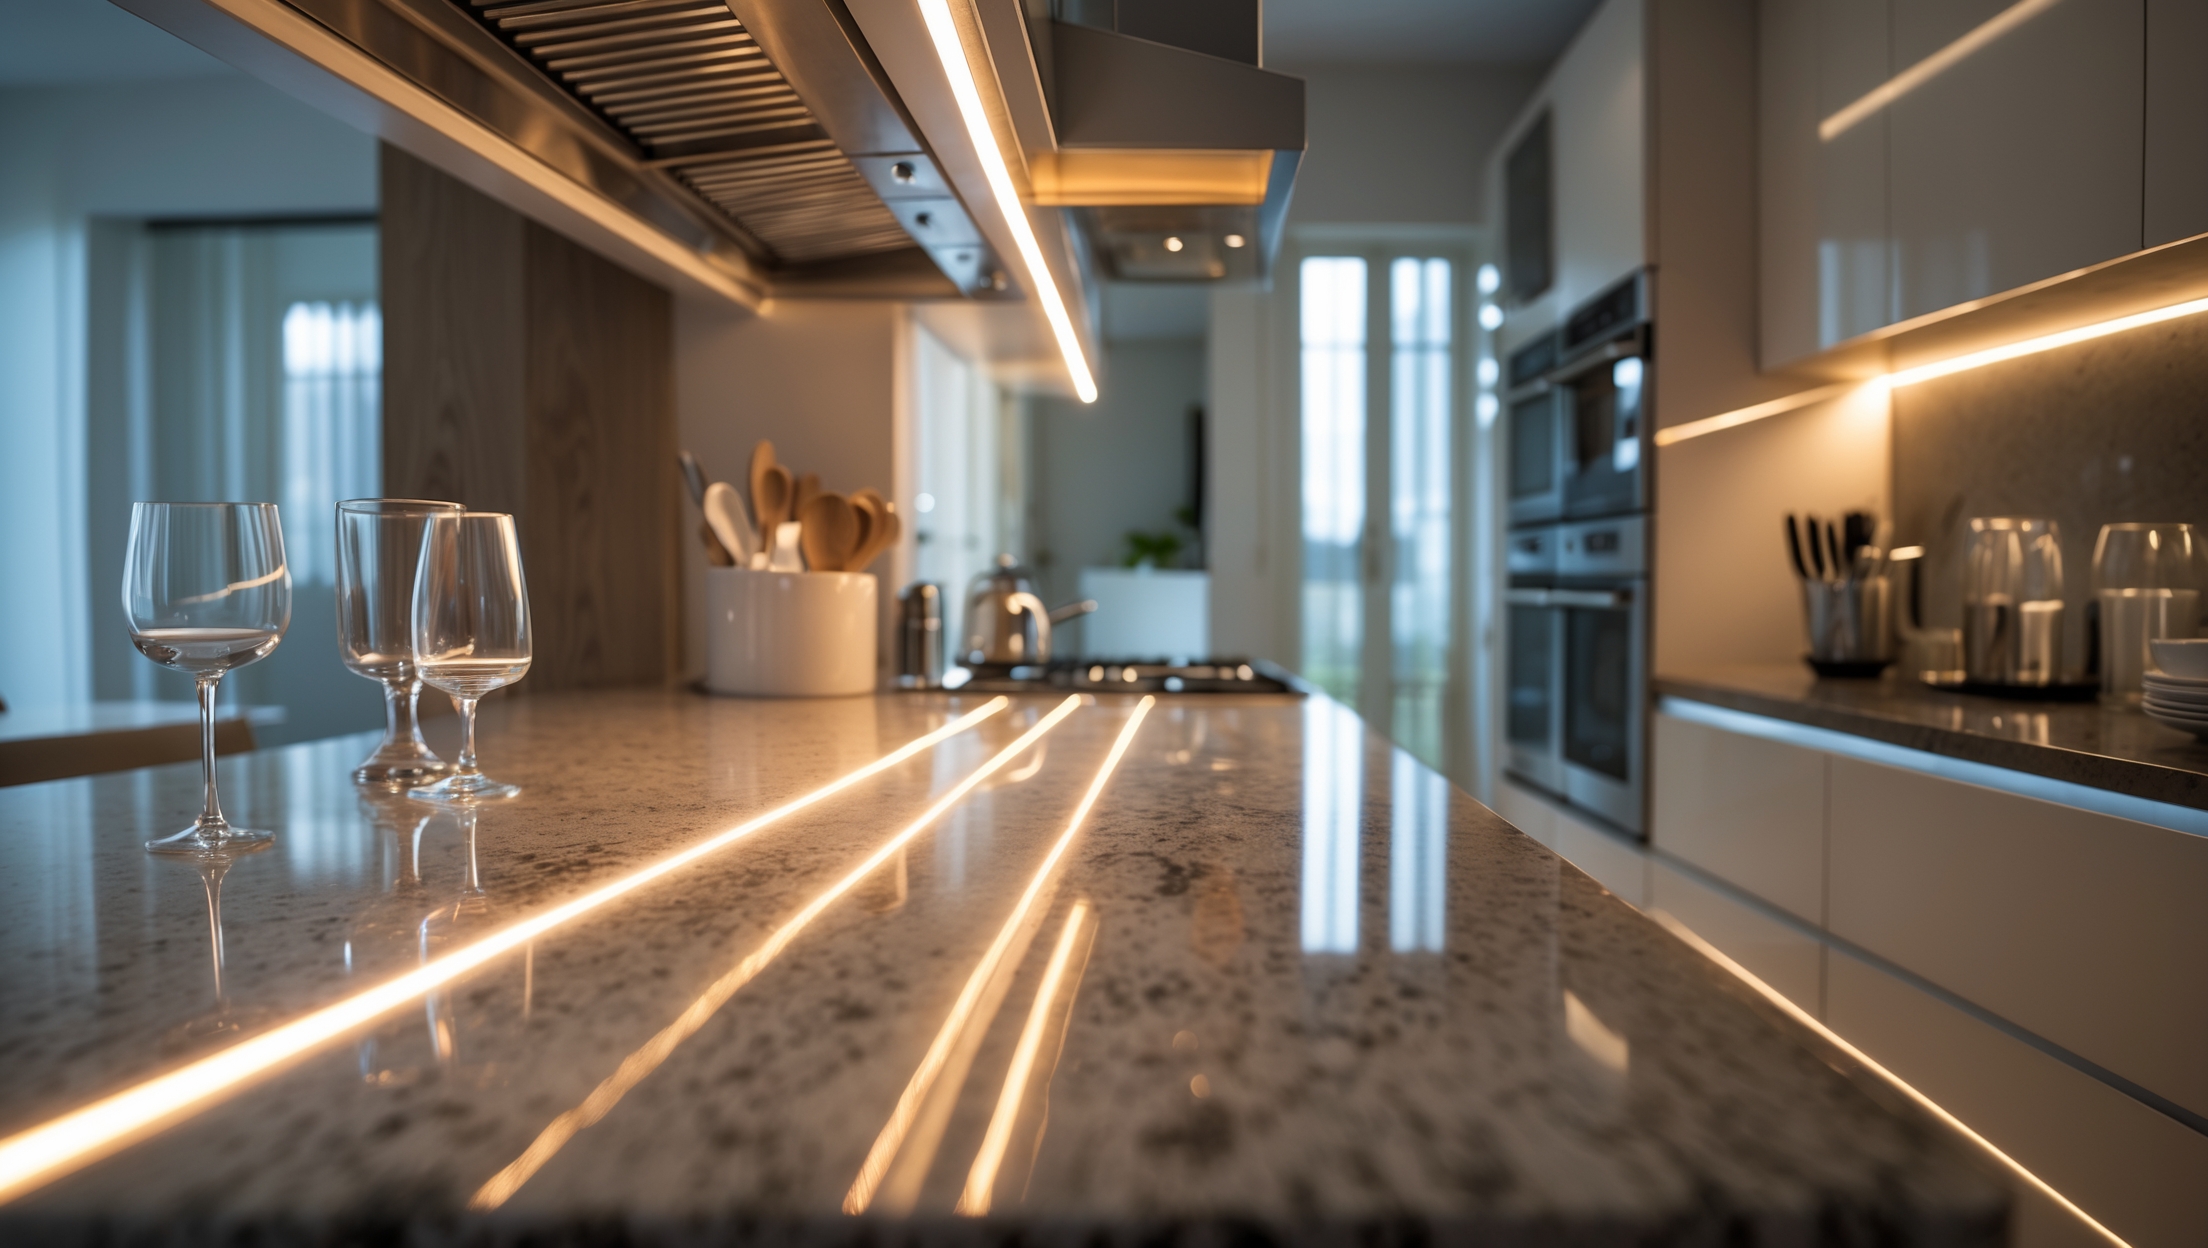
Under-cabinet lighting is one of the most effective and impactful upgrades you can make in your kitchen. Not only does it enhance the overall aesthetics by creating a warm, inviting glow, but it also improves the functionality of your workspace. Gone are the shadows and dim corners that make meal prep tedious or unsafe; instead, you’ll enjoy even, focused illumination that brings out the true beauty of your countertops and backsplash. Whether you’re slicing vegetables, brewing coffee, or simply showcasing your kitchen’s design, under-cabinet lighting delivers a professional, finished look that rivals high-end remodels—without the high-end price tag.
Despite its transformative potential, many homeowners are intimidated by the prospect of installing under-cabinet lighting themselves. Concerns about electrical work, compatibility, and choosing the right fixtures can hold you back from taking the plunge. The good news? With the right planning, tools, and step-by-step instructions, this is an achievable DIY project—even for enthusiastic beginners. In this comprehensive guide, we’ll walk you through every stage of the process, from selecting the best lighting type for your needs, to safe installation, wiring, and troubleshooting. By the end, you’ll be ready to transform your kitchen with confidence, efficiency, and a professional touch.
Choosing the Right Under-Cabinet Lighting: Types, Features, and Considerations
LED vs. Fluorescent vs. Xenon: Pros and Cons
- LED Strips and Bars: Highly energy-efficient, long-lasting (up to 50,000 hours), low heat output, and available in a variety of color temperatures. Dimmable varieties and adhesive-backed strips make installation easy.
- Fluorescent Fixtures: Good for even, diffused light and affordable upfront, but bulbs have shorter lifespans and may flicker. Installation is bulkier, and color rendering is typically lower than LED.
- Xenon Lights: Produce warm, natural light with excellent color rendering. However, they generate more heat and consume more energy compared to LEDs.
Lighting Formats: Strips, Pucks, and Bars
- LED Strips: Flexible, ideal for continuous light under long cabinets. Easily cut to size for custom applications.
- Puck Lights: Small, round fixtures that deliver focused spots of light. Best for highlighting specific areas, but can create uneven illumination if spaced too far apart.
- Light Bars: Rigid, linear fixtures that offer uniform brightness. Suitable for both modern and traditional kitchens.
Hardwired vs. Plug-In vs. Battery-Powered
- Hardwired: Connects directly to your home’s electrical system. Provides a seamless, built-in look and can be controlled via wall switches. Requires basic electrical work.
- Plug-In: Plugs into a standard wall outlet. Easiest to install with basic tools, but visible cords may detract from aesthetics.
- Battery-Powered: Cordless and easy to install, but limited by battery life and brightness. Best for renters or temporary solutions.
Planning Your Project: Measuring, Layout, and Supplies
Assessing Your Kitchen Layout
Start by examining your kitchen’s cabinet configuration. Note the spaces where under-cabinet lighting would be most beneficial—typically above work areas like countertops, sinks, and stovetops. Measure the length of each cabinet section to determine how many feet of lighting you’ll need. If your cabinets are interrupted by appliances or corners, plan for connecting cables or separate fixtures.
Choosing Color Temperature and Brightness
- Warm White (2700K–3000K): Creates a cozy, inviting feel—ideal for traditional kitchens.
- Neutral White (3500K–4000K): Balanced and versatile, complements most decors.
- Cool White (5000K+): Crisp, bright light best for task-heavy areas and modern kitchens.
For brightness, aim for 200–500 lumens per linear foot, depending on your needs and countertop reflectivity.
Shopping List: Tools and Materials
- LED strip or bar lighting kit (ensure compatibility with your chosen power supply)
- Power supply (driver or transformer as required)
- Measuring tape and pencil
- Drill and drill bits
- Screwdriver (manual or power)
- Wire strippers/cutters (for hardwired installations)
- Double-sided mounting tape or mounting clips
- Cable management accessories (wire raceways, adhesive clips, or channels)
- Voltage tester (for safety)
- Optional: Dimmer switch, connectors, extension cords
Preparation: Safety and Pre-Installation Steps
Turn Off Power
If you’re installing hardwired lighting, always shut off power to the relevant circuit at the breaker box. Use a voltage tester to confirm that wires are not live before proceeding.
Clear and Clean Work Area
Remove items from countertops and clear the area under cabinets. Wipe down cabinet undersides to ensure proper adhesion for tape or mounting hardware.
Mark Fixture Locations
- Use a pencil to mark where each light fixture, strip, or bar will go.
- Space puck lights evenly (typically 8–12 inches apart) for uniform illumination.
- For strip and bar lights, run the fixtures as close to the cabinet front as possible to minimize shadows.
Installation: Step-by-Step Guide
Step 1: Test-Fit the Lighting
Before permanent installation, loosely lay out the lights and connectors. Test all connections and power on to ensure everything works and reaches intended locations.
Step 2: Attach Fixtures Under Cabinets
- LED Strips: Remove adhesive backing and press firmly along the marked path. For extra security, use mounting clips at intervals, especially at ends and corners.
- Light Bars: Secure with screws or mounting brackets provided in the kit. Use a level to keep bars straight.
- Puck Lights: Screw or stick each puck in place as marked. Hide wires along cabinet edges with clips or channels.
Step 3: Connect and Conceal Wires
- Route connecting wires along the underside or back of cabinets using adhesive clips or cable channels.
- If crossing gaps (e.g., above a stove), use low-profile wire raceways to hide and protect the cables.
- For plug-in models, plan the shortest, least conspicuous path to the nearest outlet.
Step 4: Power Connection
- Plug-In: Plug the power supply into a nearby outlet. Use surge protectors or smart plugs for added safety and convenience.
- Hardwired:
- Connect the power supply to the house wiring inside a junction box.
- Match wire colors (black-hot, white-neutral, green-ground), secure with wire nuts, and tuck wires safely inside the box.
- Attach the box cover and restore power to the circuit.
- Battery-Powered: Insert fresh batteries and test functionality before finalizing placement.
Step 5: Install Optional Controls
- If your kit includes a dimmer or remote switch, install it according to manufacturer instructions.
- For hardwired setups, consider adding a wall-mounted dimmer for customized lighting levels.
Step 6: Final Testing
- Turn on all lights and check for even illumination, flickering, or dead spots.
- Adjust or reposition fixtures as needed for optimal coverage.
- Test dimmers, remotes, or smart controls to ensure proper operation.
Troubleshooting Common Issues
Lights Won’t Turn On
- Check all power connections and ensure the outlet or circuit is live.
- Inspect for loose connectors or reversed polarity in wiring.
- Test with a voltage tester; replace faulty power supplies if necessary.
Uneven Lighting or Brightness Drops
- Make sure strips or fixtures are not overloaded beyond the capacity of the power supply.
- For long runs, consider splitting into two circuits or upgrading the power supply.
- Check for damaged connectors or poorly attached strips.
Flickering Lights
- Double-check all connections, especially at joints and dimmer switches.
- Ensure your dimmer is compatible with LED technology.
- Replace any damaged or subpar-quality components.
Finishing Touches: Concealment and Cleanup
Hiding Cords and Wires
Use paintable wire channels to blend cords into the cabinet or wall color. Secure loose wires with adhesive clips, running them along natural cabinet lines for minimal visibility. For extra polish, caulk or touch up holes with matching paint or wood filler.
Cleaning the Workspace
Remove dust and debris from installation. Polish the newly illuminated countertops to enhance the visual impact of your upgrade.
Maintenance and Upgrades
Routine Cleaning
- Wipe fixtures with a damp, lint-free cloth. Avoid harsh chemicals that could damage LED coatings or wiring.
- Regularly check for dust buildup, especially around connectors and power supplies.
Replacing or Upgrading Components
- LEDs rarely fail, but if a strip or puck goes out, swap it for a compatible replacement.
- Consider upgrading to smart LED controllers for app-based dimming and scheduling.
- If you remodel your kitchen, many modular systems can be reconfigured or extended easily.
Frequently Asked Questions
- Can I install under-cabinet lighting without running new wiring? Yes—plug-in and battery-powered options make this project accessible without electrical work.
- Is under-cabinet lighting safe for renters? Removable adhesive strips and battery-powered fixtures are perfect for renters and won’t damage cabinets.
- How much does under-cabinet lighting cost? DIY kits range from $30 to $200 depending on size, features, and quality. Hardwired installations may require additional tools or professional help if you’re uncomfortable with wiring.
- Will LED lights discolor my cabinets? Modern LEDs emit minimal UV and heat, so discoloration is unlikely.
Conclusion: Enjoy Your Brighter, More Functional Kitchen
By following this step-by-step tutorial, you’ve not only enhanced your kitchen’s style but also increased its functionality—making meal prep safer, easier, and more enjoyable. Under-cabinet lighting is a high-impact, low-cost improvement that delivers immediate rewards every time you walk into your kitchen. Whether you chose sleek LED strips, classic pucks, or versatile bars, the right lighting can highlight your design choices, create a welcoming ambiance, and even boost your home’s value.
What’s more, mastering this project gives you the confidence to tackle other home improvements, knowing that careful planning and attention to detail make all the difference. Don’t forget to maintain your new lighting with gentle cleaning and occasional checks, and keep exploring smart upgrades—like app-based controls—that make life even more convenient. If you enjoyed this transformation, consider other DIY lighting projects throughout your home: under-cabinet lighting in bathrooms, accent lighting in bookshelves, or toe-kick illumination in base cabinets. Each project is a chance to personalize your space and enjoy the satisfaction of a job well done. Happy renovating!
Do you recommend hardwired or plug-in under-cabinet LED strips for someone with limited electrical experience? I’m concerned about safety and ease of installation, especially since you mention enthusiastic beginners can handle this project.
For beginners with limited electrical experience, plug-in under-cabinet LED strips are usually the safest and easiest choice. They don’t require wiring into your home’s electrical system—just mount the strips and plug them in. Hardwired options are best left to those comfortable with electrical work or professionals.
You mention that LEDs come in a variety of color temperatures. For kitchens with mostly warm wood finishes, is there a recommended shade to maintain a cozy look without sacrificing task visibility?
For kitchens with warm wood finishes, a color temperature around 2700K to 3000K is ideal. This range provides a cozy, inviting glow that complements the wood while still offering enough brightness for tasks. Avoid cooler temperatures, as they can make the space feel less warm and welcoming.