Introduction: Why Smart Home Security is a Game-Changer
As technology continues to transform the way we live, smart home security systems have emerged as a must-have for homeowners seeking peace of mind and enhanced property protection. Unlike traditional alarm systems, modern smart security solutions offer real-time alerts, remote access, integration with other smart devices, and customizable monitoring options. Whether you want to deter intruders, monitor package deliveries, or simply check in on your home while away, a well-installed smart security system delivers robust security and convenience. But with so many devices, brands, and technical nuances, the installation process can seem daunting—especially if you want to ensure optimal coverage, legal compliance, and long-term reliability. This comprehensive, step-by-step guide will walk you through everything you need to know to successfully install a smart home security system, from planning and budgeting to setup, troubleshooting, and ongoing maintenance. Let’s empower you to take control of your home’s safety, starting today.
Step 1: Define Your Security Needs and Budget
Assess Your Home’s Vulnerabilities
Every home is unique, and so are its security requirements. Start by evaluating your property’s layout and identifying potential entry points, such as front and back doors, ground-level windows, garages, and basement entrances. Consider the following factors:
- Neighborhood crime rates
- Frequency of deliveries or visitors
- Presence of valuables or sensitive areas (home office, safe, etc.)
- Children or elderly residents needing extra protection
Set a Realistic Budget
Smart security systems range from affordable DIY kits to comprehensive, professionally monitored setups. Define your budget by factoring in:
- Initial device and hardware costs
- Optional subscription or monitoring fees
- Accessory costs (mounting kits, batteries, memory cards)
- Potential installation tools (drill, screws, cable management)
Allocate extra funds for future upgrades or maintenance, ensuring your system can adapt to evolving technology and threats.
Step 2: Choose the Right Devices and System Type
Key Components of a Smart Home Security System
- Central Hub or Base Station: The brain of your system, connecting all sensors and devices.
- Door and Window Sensors: Detect unauthorized openings.
- Motion Detectors: Monitor movement inside your home.
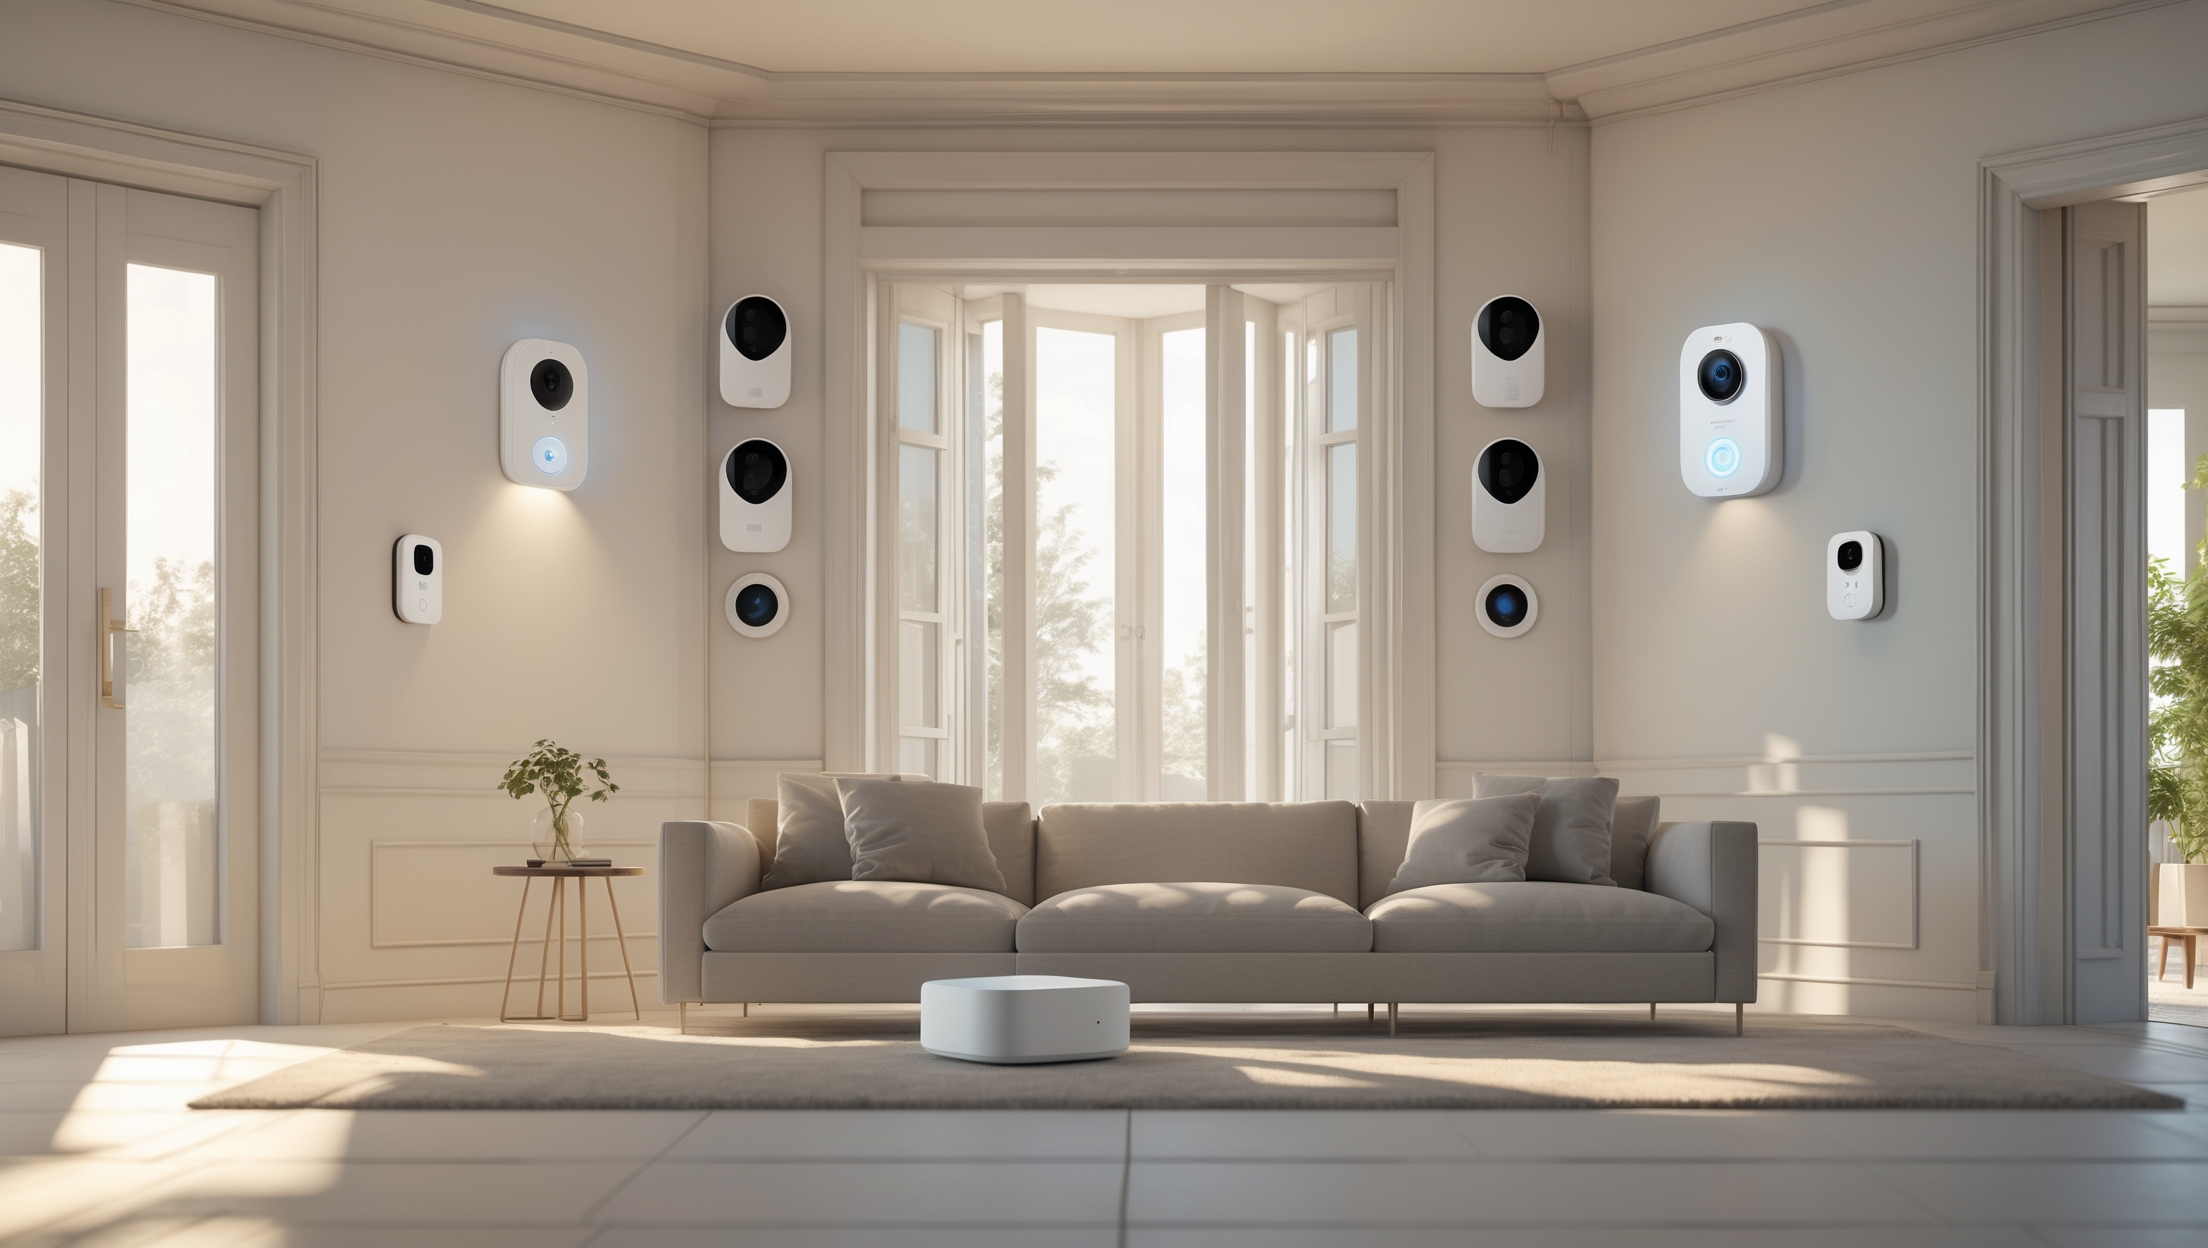
- Security Cameras: Provide real-time and recorded visual monitoring, often with night vision and two-way audio.
- Smart Locks: Grant or restrict access remotely.
- Siren/Alarm: Alerts you and scares off intruders.
- Environmental Sensors: Detect smoke, carbon monoxide, or leaks as part of a comprehensive solution.
Wired vs. Wireless Systems
Wireless systems are easier to install, more flexible, and generally sufficient for most homes. However, wired systems can offer greater reliability and are less susceptible to signal interference or hacking. Consider your home’s structure, internet reliability, and aesthetic preferences before choosing.
DIY vs. Professional Installation
Most modern systems are designed for DIY installation, saving you money and providing flexibility. However, if your home is large or requires complex wiring, professional installation might be warranted. Verify that your chosen system supports DIY if you plan on handling the setup yourself.
Step 3: Compliance, Permits, and Privacy Considerations
Local Regulations and Alarm Permits
Some municipalities require permits for alarm systems, especially if you plan to use professional monitoring that alerts emergency services. Check your city or county website for permit requirements, fees, and false alarm policies. Failing to comply can result in fines or service interruptions.
Data Privacy and Neighbor Consent
Cameras pointing at public spaces or neighboring properties may raise privacy concerns. To avoid legal issues, ensure all cameras are positioned to monitor your own property. Inform visitors and household members about active monitoring to maintain transparency and trust.
Step 4: Gather Tools and Prepare for Installation
Essential Tools and Supplies
- Drill and drill bits (for mounting devices)
- Screwdriver set (Phillips and flathead)
- Measuring tape and level
- Cable clips or adhesive strips for wire management
- Ladder (for mounting cameras or sensors at height)
- Smartphone or tablet (for app setup and testing)
- Extra batteries (if devices are battery-powered)
Pre-Installation Checklist
- Review manufacturer instructions thoroughly.
- Charge or insert fresh batteries into all devices.
- Download the security system’s companion app.
- Verify Wi-Fi coverage in all installation locations.
- Mark mounting locations with a pencil.
Step 5: Install the Central Hub and Connect Devices
Setting Up the Central Hub
Place the central hub in a central location, ideally near your router for strong connectivity. Plug it in and connect to your network as instructed by the manufacturer. Use your app to begin the setup process, naming your hub and creating your account.
Pairing Sensors and Devices
- Follow the in-app prompts to add door/window sensors, motion detectors, and cameras one at a time.
- Label each device (e.g., “Front Door Sensor,” “Living Room Camera”) for easy management.
- Test connectivity and ensure each device is recognized before mounting.
Camera Placement Tips
- Mount cameras 7–9 feet above ground for optimal coverage and to deter tampering.
- Aim cameras at entryways, driveways, and blind spots—avoid pointing directly at light sources to reduce glare.
- Test live feeds from your app before finalizing placement.
Step 6: Mount and Secure All Devices
Installing Sensors and Detectors
- Affix door and window sensors to clean, dry surfaces using screws or adhesive strips.
- Ensure sensors align properly—misalignment can cause false alarms or missed triggers.
- Place motion detectors in high-traffic areas, avoiding locations near heating vents or direct sunlight.
Camera and Siren Installation
- Use mounting brackets and weatherproof housings for outdoor cameras.
- Secure sirens in a location where they will be easily heard throughout your home.
- Check for secure, tamper-resistant mounting on all devices.
Smart Lock Setup
- Follow manufacturer instructions for removing your old lock and installing the smart lock hardware.
- Test locking and unlocking both manually and via the mobile app.
- Set up guest access codes and enable notifications for lock activity.
Step 7: Configure System Settings and Integrations
Customize Alert Preferences
- Set notification types (push, email, SMS) for different events (motion, door open, alarm trigger).
- Adjust sensitivity settings to minimize false alarms.
- Configure geofencing for automatic arming/disarming based on your location.
Integrate with Other Smart Devices
- Link your security system to smart lights, thermostats, or voice assistants (Amazon Alexa, Google Assistant).
- Set up routines (e.g., lights turn on when motion is detected at night).
- Enable cloud storage or local backup for camera footage.
Step 8: Test and Troubleshoot Your System
System Testing Checklist
- Trigger each sensor and verify real-time alerts on your devices.
- Test remote access and camera streaming from outside your home network.
- Simulate an intrusion to confirm alarm activation and notification speed.
Common Installation Issues
- Connectivity Problems: Move devices closer to the hub or use Wi-Fi extenders.
- False Alarms: Adjust sensor alignment and sensitivity.
- Camera Blind Spots: Reposition cameras for wider coverage, or add additional units where needed.
Consult your system’s troubleshooting guide or online support forums for model-specific solutions.
Step 9: Maintenance Best Practices
Routine Checks
- Test your system monthly to ensure all devices function correctly.
- Replace batteries in sensors and cameras as recommended.
- Update firmware in your hub and devices to patch security vulnerabilities.
- Review cloud storage or memory card capacity to prevent data loss.
Responding to Alerts
- Investigate every alert, even if you suspect a false trigger, to maintain system integrity.
- Update emergency contact information in your app regularly.
Upgrading and Expanding
- Add new sensors or cameras as your needs evolve.
- Stay informed about new features or integrations released by your system provider.
Step 10: Insurance and Documentation
Insurance Benefits
Many insurance companies offer discounts for homes equipped with monitored security systems. Contact your provider to inquire about potential savings and what documentation is required.
Documenting Your Setup
- Keep records of device serial numbers, purchase receipts, and installation locations.
- Store a backup of your system configuration and settings.
- Photograph your installed devices for insurance claims or troubleshooting.
Conclusion: Take Charge of Your Home’s Safety
Investing in a smart home security system is one of the most effective ways to safeguard your property, loved ones, and peace of mind. The installation process, while detailed, is entirely achievable with thoughtful planning, the right tools, and careful attention to each step. From assessing vulnerabilities and selecting the best devices to ensuring compliance, privacy, and ongoing maintenance, this guide empowers you to create a resilient, modern security setup tailored to your unique home. Remember, the effectiveness of your system is not just in the quality of the devices, but in how well you install, configure, and maintain them. As technology advances, periodically review your system’s performance and stay informed about new security features or integrations. By taking these proactive steps, you not only protect your investment but also contribute to a safer, smarter community. Whether you’re new to home improvement or a seasoned DIYer, your journey to a more secure home starts with informed action—so take the first step today, and enjoy the confidence that comes with comprehensive, connected protection.
I noticed you mentioned legal compliance as part of the installation process. Are there specific laws or regulations I should be aware of when setting up cameras or smart devices around my home, especially regarding privacy or recording in certain areas?
Great question! Yes, there are some legal considerations to keep in mind. Generally, it’s legal to install cameras on your own property, but you shouldn’t record audio without consent in many states. Also, avoid pointing cameras at neighbors’ homes or areas where people expect privacy, like bathrooms. It’s always good to check your local and state laws before installation.
Can you explain a bit more about what ongoing maintenance a smart home security system typically needs after installation?
After installation, a smart home security system usually needs regular software updates, battery checks for sensors and cameras, cleaning of camera lenses, and periodic testing to ensure all devices are working. You should also review alert settings and update passwords periodically to maintain security.
I’m interested in the part about legal compliance you mentioned. Are there specific laws or regulations I should be aware of when installing security cameras outside my home, especially regarding neighbors or public sidewalks?
Great question! Laws can vary by state and city, but in general, it’s legal to install cameras on your property. However, it’s important to avoid recording areas where neighbors expect privacy, like inside their homes or fenced yards. Filming public sidewalks is usually allowed, but always check your local ordinances to be sure. If in doubt, you might want to let neighbors know about your cameras for transparency.
You mentioned considering legal compliance as part of the installation process. Are there specific laws or regulations I should be aware of when setting up cameras or sensors, especially if I want to monitor areas like my front yard or shared entrances?
Great question! Laws on home security cameras vary by state and sometimes even by city. Generally, it’s legal to record video of public areas like your yard, but audio recording can be more restricted. Be cautious about aiming cameras at neighbors’ properties or shared spaces. To be safe, check your local regulations and consider letting visitors know about cameras with signs.
Can you share tips on how to balance cost and coverage when budgeting for a smart security system, especially if I have both front and back entrances to monitor at my shop?
To balance cost and coverage, prioritize key entry points like your front and back entrances with quality cameras or sensors. Start with essential devices and expand gradually. Consider security bundles or systems that allow you to add more components over time, and look for equipment with remote monitoring features to maximize coverage without overspending.
How can I make sure I’m meeting any legal compliance requirements mentioned in the article, like privacy laws or neighborhood rules, when placing security cameras inside or outside my home?
To stay compliant, check your local and state laws about recording video and audio, especially in shared or outdoor areas. Let neighbors know if cameras could capture their property, and avoid placing cameras where people expect privacy, like bathrooms. Also, check with your homeowners association for any specific neighborhood rules before installing your cameras.
When you mention assessing your home’s vulnerabilities, do you have any tips on how to check less obvious entry points, like basement windows or garage doors? I’m not sure what to look for as a first-timer.
For less obvious entry points like basement windows, check for secure locks, intact glass, and whether they’re obscured from view (which can attract intruders). For garage doors, ensure the automatic opener works only with your remotes and that side doors are solid with deadbolts. Look for signs of wear, gaps, or hiding spots nearby.
If my neighborhood’s crime rates are fairly low, do you think it’s worth investing in a full monitoring subscription, or would basic real-time alerts be enough for most scenarios?
If your neighborhood has low crime rates, basic real-time alerts may be sufficient for your needs. This lets you stay informed without the ongoing cost of a full monitoring subscription. However, a subscription can provide extra peace of mind if you travel often or want professional emergency response.
When assessing my home’s vulnerabilities, how do I figure out the best placement for cameras and sensors, especially if I have more windows on one side of the house? Are there guidelines for optimal coverage?
Focus on placing cameras near main entry points, such as front and back doors, and areas with many windows. For the side with more windows, consider adding extra sensors or a camera aimed to cover that area. Ensure cameras have a clear, unobstructed view, and avoid blind spots. Walk around your home and look for spots someone could enter unseen to guide your placement.
When you mention legal compliance in the installation process, what specific regulations or rules should I be aware of before setting up cameras around my home?
Before installing cameras, check your local and state laws about recording video and audio, particularly regarding privacy. Avoid filming areas beyond your property, like public sidewalks or neighbors’ yards, and inform visitors if cameras record audio. Some places also require clear signage indicating surveillance.
How long should I expect the installation process to take for a typical single-family home, including setup and troubleshooting, if I’m doing it myself as a busy parent?
For a typical single-family home, you can expect the installation process—including setup and basic troubleshooting—to take around 4 to 6 hours. If you’re managing interruptions as a busy parent, consider spreading the work over a weekend or splitting it into shorter sessions.
You mentioned initial device costs and optional monitoring fees. Is professional monitoring really necessary for a first-time DIY install, or can most of the features work just fine without a subscription?
You can use most core features of a DIY smart home security system, like motion detection, alerts, and remote control, without a subscription. Professional monitoring is optional—it adds 24/7 emergency response but isn’t essential for everyone, especially if you’re comfortable handling alerts yourself.
If I decide to try a DIY kit first, would it be easy to upgrade later to a professionally monitored system, or would I have to replace most of the equipment?
Many DIY smart home security kits are designed to be upgradable, so you can often switch to professional monitoring later without replacing most equipment. However, it’s important to check if your chosen system is compatible with professional monitoring services before buying, as some brands or models may have limitations.
After assessing security needs and budgeting, what are the most common mistakes people make during the setup phase that could affect long-term reliability or coverage of the system?
Some common mistakes include placing sensors or cameras in locations with obstructions, not covering all entry points, skipping regular system updates, and failing to test all components after installation. It’s also important not to overlook setting strong passwords and configuring backup power to ensure reliability.
The guide mentions budgeting for monitoring fees and accessories, but how much should I expect to pay monthly if I want professional monitoring versus just using the system myself?
If you choose professional monitoring, you can typically expect to pay between $15 and $40 per month, depending on the provider and features. If you use the system yourself without professional monitoring, there’s usually no monthly fee—just the one-time cost of equipment and any optional accessories.
You mention factoring in accessory costs like mounting kits and batteries—do you have any tips on estimating these expenses accurately so they don’t surprise me during installation?
To estimate accessory costs, list each device you plan to install and check the manufacturer’s website for recommended accessories. Add up prices for items like mounting kits, extra cables, and backup batteries. Don’t forget to include spare batteries if your devices aren’t hardwired, and always round up for shipping or small extras.
The guide mentions accounting for ongoing monitoring fees and accessory costs. Can you give a ballpark estimate for what a typical smart home security setup actually costs per month, including hidden expenses like batteries and cloud storage?
A typical smart home security system often costs between $20 and $40 per month for professional monitoring. Additional expenses like cloud storage can range from $3 to $10 monthly. Batteries and accessory replacements may add about $5 to $10 every few months, depending on your devices.
How do I decide between doing a DIY install versus hiring a professional, especially when it comes to making sure my system remains reliable over time?
Consider your comfort with tools and tech—DIY can save money and offer flexibility, but may require ongoing troubleshooting. Hiring a professional usually means expert setup, optimal placement, and support to keep your system reliable long-term. If you want hands-off maintenance and guaranteed reliability, a professional install is often best.
If my neighborhood crime rates are low but I get a lot of package deliveries, should I focus my budget more on cameras or door sensors?
If you receive frequent package deliveries, investing more in cameras—especially a doorbell or porch camera—can help you monitor packages and deter theft. Door sensors are useful for detecting unauthorized entry, but cameras will give you real-time visuals and evidence if a package goes missing.
If I want to avoid monthly subscription fees, are there effective smart security setups that still offer reliable real-time alerts and remote access?
Yes, there are smart security systems that do not require monthly fees and still provide real-time alerts and remote access. Look for devices that offer local storage and free app notifications. Some brands allow you to monitor your home yourself without a paid plan, while still using your phone for live views and alerts.
I noticed you mention factoring in monitoring fees and accessory costs when setting a budget. Are there any hidden expenses or recurring charges that first-time buyers tend to overlook with smart security systems?
Yes, besides monitoring fees and accessory costs, some users overlook charges like cloud storage for video recordings, app subscription fees, and potential installation costs if you hire a pro. Also, check if system upgrades or battery replacements are needed over time, as these can add to your total expenses.
Do you have any recommendations for smart security systems that are reliable but still affordable for someone with a limited budget, as mentioned in the budgeting section?
For reliable yet budget-friendly smart security systems, consider options like Wyze, SimpliSafe, or Ring. They offer affordable starter kits with essential features such as motion sensors and mobile alerts. You can expand the system as your budget allows, and installation is typically DIY, helping you save on setup costs.
I have kids and elderly parents living at home—could you explain what extra features I should look for to keep them safer with a smart security setup?
For families with kids and elderly parents, consider features like video doorbells, motion sensors, and panic buttons. Look for systems with user-friendly mobile alerts, two-way communication, and smart locks so you can monitor entrances and respond quickly if needed. Fall detection and integration with medical alert devices are also helpful for elderly family members.
In the budgeting section, how accurate are the cost estimates for DIY setups versus professionally monitored systems? Are there any unexpected expenses that tend to come up during installation or maintenance?
The cost estimates in the budgeting section are general averages based on current market prices, but actual expenses can vary. Unexpected costs sometimes include extra sensors, tools, or upgraded wiring for DIY setups, while professional systems may have hidden fees such as activation charges or long-term contracts. Maintenance expenses, like battery replacements or software updates, can also add up over time.
If someone lives in an apartment instead of a house, would the steps for assessing vulnerabilities and choosing devices be much different?
The basic steps are similar, but in an apartment, you might focus more on entry doors, windows, and possibly a balcony. Also, opt for wireless devices that don’t require drilling or permanent installation, since landlords may have restrictions.
I run a small retail shop from my home and have frequent deliveries. Which smart security features are most effective for monitoring packages and entrances without breaking the bank?
For effective, budget-friendly monitoring, consider a video doorbell to watch package deliveries and smart motion sensors at entrances. Indoor cameras near entry points can provide extra peace of mind. Look for systems with mobile alerts so you’re instantly notified of activity, allowing quick action if needed.
For someone who is new to this, how can I tell if I actually need a professionally monitored system or if a basic DIY kit is enough for a typical suburban home?
Consider your security concerns and lifestyle. If you want quick emergency response and constant monitoring, a professional system is best. If you’re comfortable managing alerts yourself and just want basic entry or motion sensors, a DIY kit should be enough for most suburban homes.
How long does the installation process typically take for a first-timer handling it solo? I want to make sure I can fit it in over a single weekend without running into too many unexpected delays.
For most first-timers, installing a smart home security system solo usually takes about 4 to 8 hours, depending on how many sensors and cameras you have. Setting up basic systems can be done in a single day, so you should be able to finish comfortably over a weekend.
When assessing my home’s vulnerabilities as mentioned, how do I balance between covering every possible entry point and sticking to a medium-sized budget?
Focus on securing the main entry points first, like front and back doors and easily accessible windows. Assess which areas are most vulnerable or hidden from view. Prioritize these spots for high-quality sensors or cameras, and consider using basic alarms or decals on less critical areas to stay within your budget.
As a small business owner, how do the recommended smart security systems differ when securing a commercial office compared to a typical home? Are there extra steps needed for business compliance?
Smart security systems for commercial offices often include features like multiple user access levels, integration with existing business networks, and advanced monitoring capabilities that homes may not require. For business compliance, you might need to follow extra steps such as data privacy policies, regular system audits, and possibly obtaining certifications depending on your industry.
If my home has several entry points and odd angles, do most DIY kits include enough sensors and mounting accessories, or will I need to buy a lot of add-ons to ensure full coverage?
Most DIY kits come with a standard set of sensors and mounting accessories, usually enough for basic coverage of key doors and windows. For homes with multiple entry points or unusual layouts, you may need to purchase extra sensors or mounts to cover every area thoroughly. Check the kit details to see exactly what’s included before buying.
When deciding between a DIY kit and a professionally monitored system, are there specific scenarios where one is clearly better than the other, especially in a suburban home with frequent package deliveries?
If your suburban home has frequent package deliveries, a professionally monitored system is often better for quick response to potential theft or break-ins. DIY kits are more budget-friendly and flexible but may not offer instant support in emergencies. For added peace of mind with lots of deliveries, professional monitoring is usually the safer choice.
When evaluating security needs, how should I prioritize between covering every entry point with sensors versus investing in just a few cameras in high-traffic areas? Is there a recommended balance for standard homes?
For most standard homes, aim to place sensors on main entry points like front and back doors and easily accessible windows. Cameras in high-traffic or vulnerable areas, such as entryways and driveways, add extra security. A balanced approach combines basic coverage of entries with cameras for monitoring key spots, maximizing protection without going overboard.
For those of us on a tight budget, are there any tips for prioritizing which smart security devices to install first to provide decent coverage without overspending?
To maximize security on a budget, start with core devices like a video doorbell or basic security cameras at main entry points. Motion sensors for doors and windows are also cost-effective. You can add more devices later as needed, but focusing on entry monitoring first gives the best initial coverage.
When budgeting, how can I estimate the ongoing subscription or monitoring fees if I haven’t decided which brand or system to go with yet?
You can estimate ongoing subscription or monitoring fees by researching several popular brands and checking their current pricing. Most systems charge between $10 and $40 per month, depending on features and level of monitoring. Using an average or the higher end of this range in your budget should help you plan realistically.
If I want to integrate my new smart security system with other smart devices already in my home, are there compatibility issues I should watch out for during the planning stage?
Yes, compatibility is important to consider. Check if your security system supports common smart home platforms like Alexa, Google Home, or Apple HomeKit. Also, confirm that your other devices use the same wireless protocols (such as Zigbee, Z-Wave, or Wi-Fi) for smooth integration.
I have kids who sometimes come home before I do. Are there certain smart security systems that are easier for children to operate or that let me monitor when they get home?
Yes, some smart home security systems are designed with user-friendly features for families. Look for systems that offer key fobs, PIN codes, or mobile app notifications when someone arrives. Many also allow you to assign unique codes to each child, so you’ll know exactly when they get home.
When figuring out the best camera placement, do you recommend focusing more on entry points like doors and windows, or should I also consider less obvious spots like side yards and garages for optimal coverage?
It’s best to prioritize entry points like doors and accessible windows, as these are common targets. However, including less obvious spots such as side yards and garages can improve your coverage and security, especially if those areas are secluded or provide alternate access to your home.
When thinking about budgeting, do you recommend spending more upfront on certain devices like doorbell cameras, or spreading the funds evenly across all entry points and accessories?
It’s usually wise to invest more upfront in high-traffic or vulnerable areas, like a quality doorbell camera for your main entrance. You can then allocate remaining funds to other entry points and add accessories as your budget allows, gradually expanding your system.
You mention both DIY kits and professionally monitored setups. How hard is it to switch from a DIY system to a professional monitoring service later on if my needs change?
Switching from a DIY system to professional monitoring is usually straightforward, especially if you choose a brand that offers both options. Often, you just need to sign up for a monitoring plan and update your system settings. Some companies might require you to add or upgrade hardware, but it’s generally an easy transition.
You mention both DIY kits and professionally monitored setups. Is it difficult to switch from a DIY system to professional monitoring later if I change my mind?
Switching from a DIY kit to professional monitoring is usually straightforward. Most major DIY systems offer optional professional monitoring plans you can activate through their app or website, often without needing new hardware. Just check that your specific system supports this option before buying.
You mention budgeting for both device costs and potential subscription fees—how do I find out in advance which brands require subscriptions for essential features like real-time alerts?
To find out if a brand requires a subscription for features like real-time alerts, check the product’s official website or user manual, and look for sections about features or plans. You can also read customer reviews or FAQs, which often mention any required subscriptions for essential services.
If my budget is pretty tight, which parts of a smart security system should I prioritize first to get decent coverage according to this guide?
To get decent coverage on a tight budget, focus on installing smart door and window sensors at entry points, and a video doorbell or one indoor camera near your main entrance. These give you essential alerts and visibility without needing the full system upfront.
If my property has areas like a garage and a home office that need extra protection, how do I determine the optimal placement and number of devices for comprehensive coverage without overspending?
Start by mapping out all entry points and vulnerable areas, like doors, windows, and secluded spots in your garage and home office. Prioritize placing sensors and cameras at these locations. Consider multi-purpose devices, such as motion detectors that cover wide areas, to reduce the total number needed. Most systems let you add devices over time, so you can start with essentials and expand as needed.
Could you clarify what legal compliance steps I should consider during installation, particularly regarding cameras that might capture footage beyond my property?
When installing cameras, ensure they only capture your property to respect neighbors’ privacy. Inform visitors about surveillance with clear signage. Check local laws regarding recording audio, as consent may be required. It’s wise to avoid pointing cameras at public spaces or neighboring properties to remain compliant.
The article mentions budgeting for optional subscription or monitoring fees—how much should I expect these to add to my monthly costs on average?
Optional subscription or monitoring fees typically range from $10 to $40 per month, depending on the brand and level of service. Basic plans are usually at the lower end, while professional monitoring or extra features can cost more. Be sure to check the specifics for your chosen system.